We’d been scouring the internet for forests for sale, applying our standard criteria for new purchases:
Priced under $100,000
Situated 1 hour from an international airport
Situated 1 hour from an international port
Depressed economy with a likelihood of recovery within a decade
We had found two areas of the world that seemed to comply, eastern Canada and southern Tasmania. There were some nice sea- and lake-front properties up near Halifax, where we reasoned that the economy, which has been in a bad way since the crash in fish stocks some decades ago, might recover if global warming caused the North West Passage to open up and container ships started coming ‘over the top’.
On the other hand, we don’t like Canada’s tax laws, but are already subject to Australia’s, so we had a closer look at Tasmania.
Down in the far south of the island state, much of the land facing the d’Entrecasteaux Channel has been (at least theoretically) subdivided into rural plots. Over the last hundred years there have been several attempts to build new bush towns down there, and the councils hold maps with named roads and numbered plots, but development never kicked off and there is no sign of this on the ground. Mainly it’s all unmarked post-logging new-growth forest. However, the plots exist as legal entities and are all owned by somebody, typically by a local resident who bought them up as an investment. Now those residents (or their descendants) are passing away and willing their land to their children. However, Tasmania has moved on and those children don’t want to live on the land, they want to make their fortunes in the big cities on the mainland. Many of these plots are now up for sale, as those children try to cash up and move on.
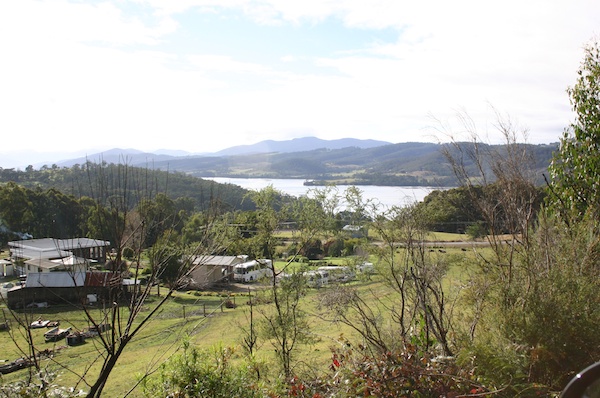
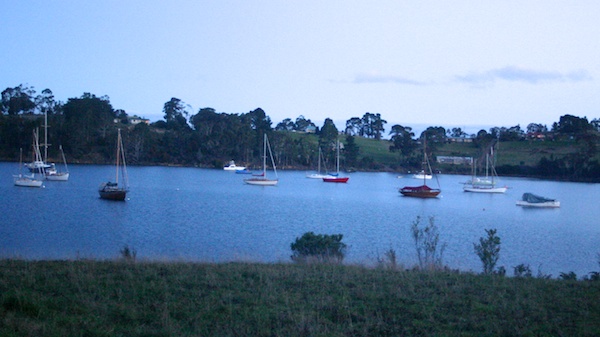
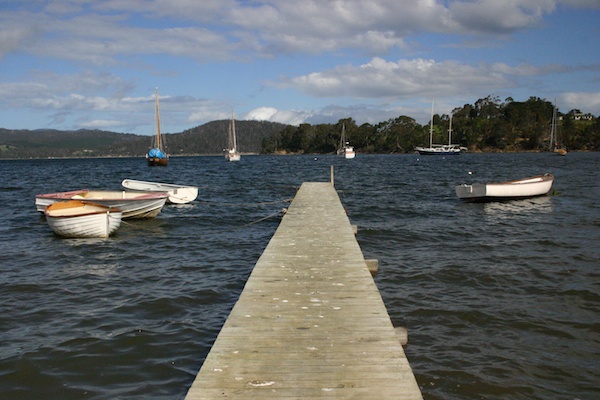
The d’Entrecasteaux Channel near Hastings
Having drawn up a short-list of some half-dozen candidates, we flew to Hobart, hired a car, and spent an enjoyable rainy weekend stomping around in the bush with an obliging agent from Tasmanian Private Realty.
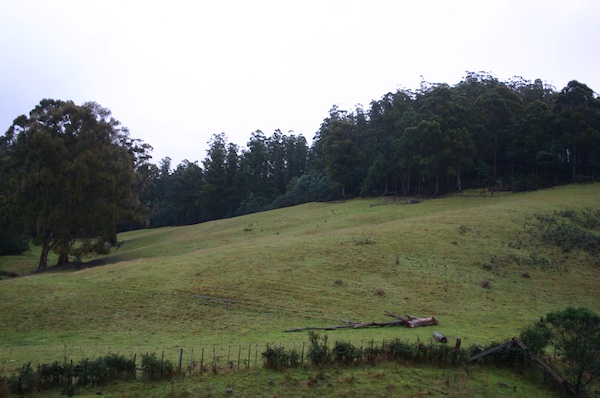
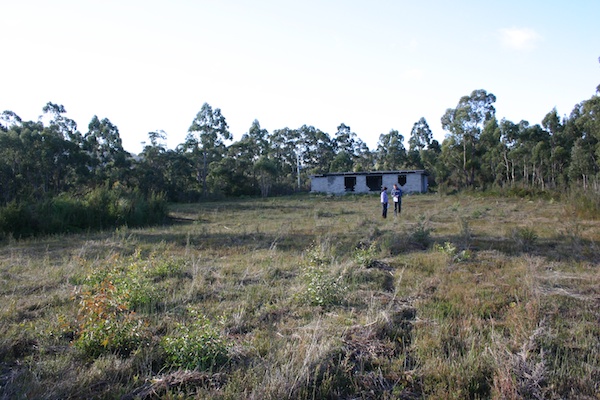
This forest in Cradoc also had pasture land, but we’d need to build a long access road over swamp landNice view from a forest above Franklin, but a little too close to our neighbours, and the trees were a bit scrubbyThis property near Hastings was mainly cleared with a half-finished building in it
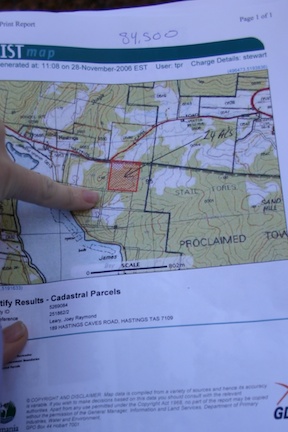
Planned division above Hastings
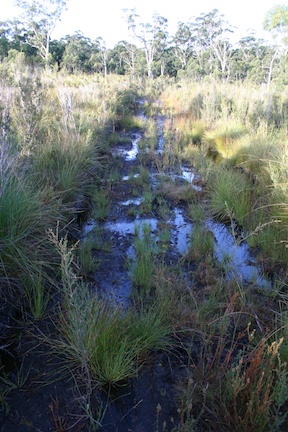
It’s at the top of a hill and peat bog
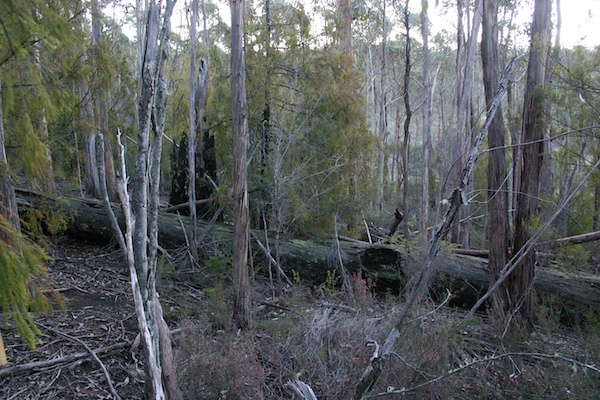
This property in Surges Bay had been logged too recently and hadn’t recovered yet
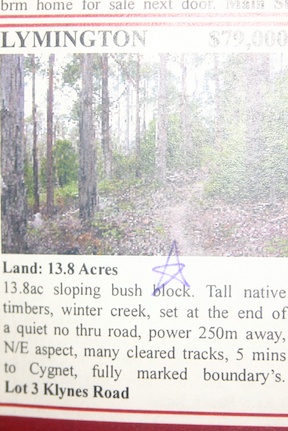
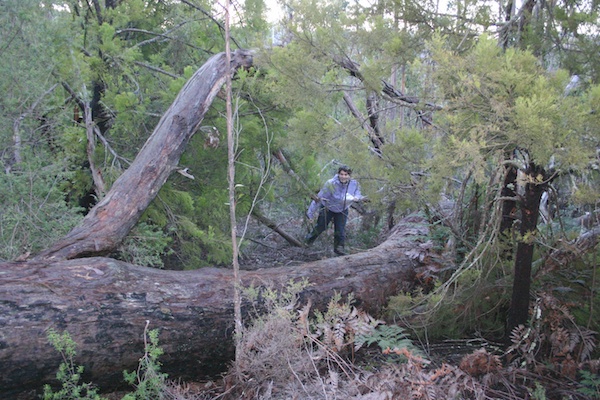
At the end of a long but very interesting day, we arrived in Lymington where there were three connected plots for sale. It was almost dark as we clambered around in the damp undergrowth, but we liked what we saw and decided to return again next morning.
Wrapping up a good day’s hunting
Tomorrow: a likely-looking one at Lymington
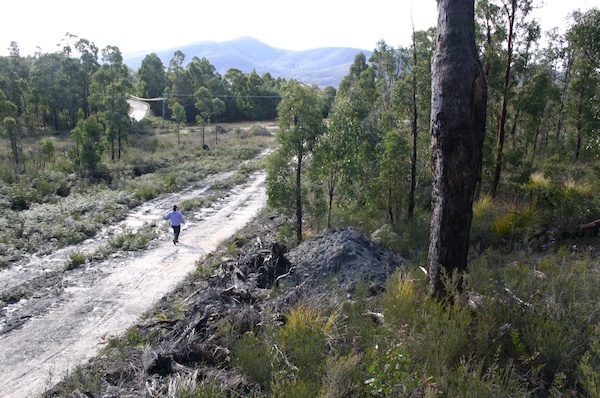
We were up bright and early and, after breakfast in the pleasant local town of Cygnet, drove out to Lymington. There was an old logging track that led past Lots 1 and 2, which then petered out before reaching Lot 3. All were for sale. Lot 1 was on the flat with some pasture, Lot 2 sat at the bottom of the hill, and Lot 3 ran up the hill to the top. As was usual with these kinds of plot, there were no fences or border markings of any kind.
From the logging road, Lot 2 is on the left and Lot 3 can be seen in the distance ahead
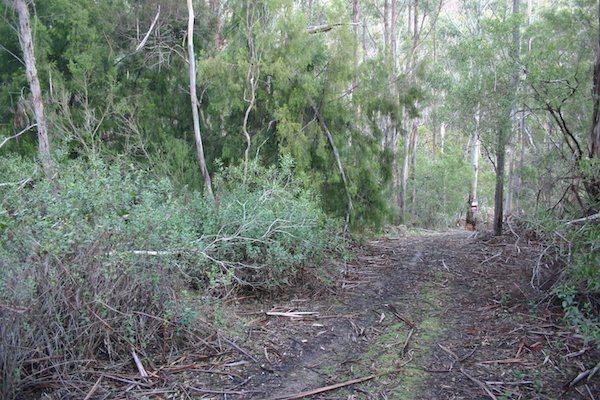
We were drawn to Lot 3. It has the advantage of sitting at the top of the hill at the end of a blind road, so it would be very private. The border with Lot 2 is marked by a winter creek. The other three sides of the square border forestry land, and when I rang the council to see if they had any plans for it, they told me that there it was such a thin inaccessible band that it would never be worth anybody’s while to log there again.
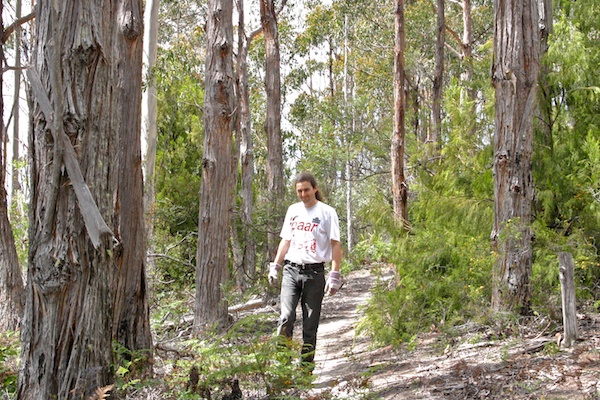
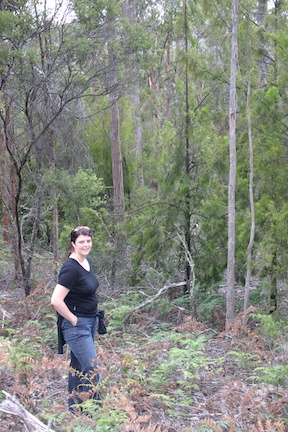
It looks like this property was logged about 30 years agoBronwyn has a good look around in the undergrowth
There is a good covering of different trees of different sizes, and the undergrowth is thin enough to allow access to the whole property. The rural zoning means that we can build a house or not, as we feel fit. As a bonus, Copper Alley Bay at the bottom of the hill has moorings for deep-keel yachts, and – as residents – we would be able to put in our own mooring for a minimal fee. The nearest town, Cygnet, has shops and pubs and a hardware store, as well as some nice little restaurants.
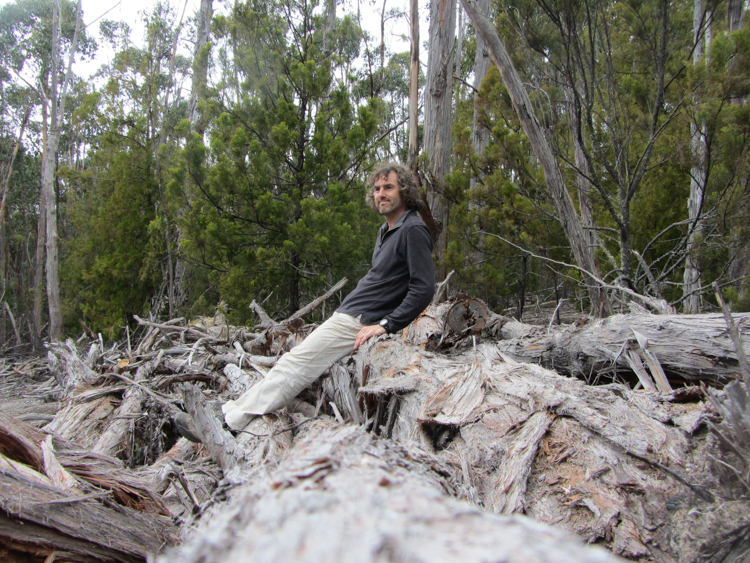
Relaxing here in a clearing, sipping world-class local wine as the sun sets over the blue sea below, I find it hard to believe our luck. We have just bought the forest that stretches for acres all around, but if we need some milk in the morning, we can drive down to the local town in fifteen minutes or, if the mood takes us, we can be at the international airport within the hour.
Indulging in a little light gardening
Our little piece of paradise is in Tasmania, a state that remains largely neglected by tourists and by mainland Australians alike, and yet the lush 68,000 square kilometre island contains some of the most productive land in the southern hemisphere. While the rest of Australia suffers under fifty years of drought, Tasmania not only supplies much of the country’s soft fruit, but also supports a burgeoning and very successful boutique wine industry.
The state largely escaped the Australian property boom and subsequent crash of 2002, and, compared to the rest of the country, land in Tasmania remains cheap and undeveloped. It is true that in recent years, the part of the island closest to the cosmopolitan buzz of mainland Melbourne has undergone something of a metamorphosis, with affluent mainlanders buying up waterside frontage, or giving up their office jobs to start boutique vineyard farm-stays. Later entrepreneurs have since spread out along the coast, with locals scrambling to subdivide and to sell them their previously worthless land.
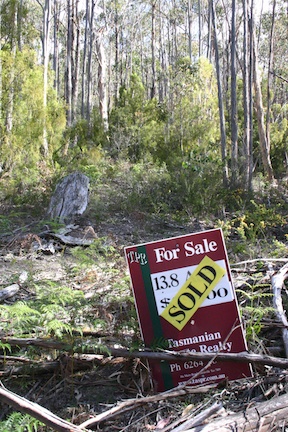
It is away from these northern areas that today’s bargains are to be found. A year ago, there was still land available on the hills above the capital city of Hobart. Today you should point your car southward, and in only half an hour you will find yourself in the Huon Valley wine region, currently densely thicketed with ‘For Sale’ signs. The larger tracts have been given over to viticulture, but what remains are little pockets of bush, perhaps hard-won fifty years ago, but now often willed to disinterested children who really just want to sell up, split the money, and get back to the city.
Logging is a part of life here, and apart from some rather spectacular National Reserves, there is little standing timber over fifty years old. A typical ‘bush lot’ comprises up to twenty acres of young gum trees for up to $100,000, a price that could also get you a mere handful of acres of cleared building land with water views. Having done most of our research on Tasmanian Private Realty‘s excellent website, we only needed a single weekend to view our shortlist before settling on fourteen acres sloping gently down towards the sea.
Sold to the happy couple
Mistress of all she surveys
Cygnet is the closest town. It is typical of the area in that it comprises a simple line of a few homes, some local businesses, and three pubs. When we spoke to the new owners of the Top Pub where we were staying, we found that they were renovating the upstairs into a boutique hotel. The nearby Red Velvet Lounge restaurant offered a gourmet menu featuring locally farmed salmon and organic produce, and there was talk of a new deep-water marina close by. These are not the hallmarks of your average bush town, and so it seemed to us that now was the time to buy.
We intend to build a small home in a clearing, but could equally well put up a series of guest lodges. That’s all in the future, though. For the moment, we are content to sit and sip our wine and enjoy the views.
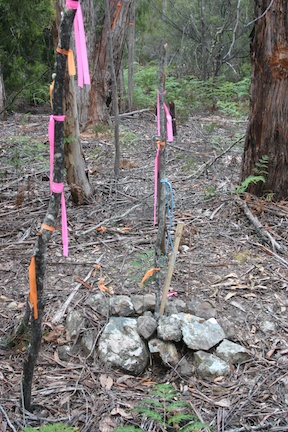
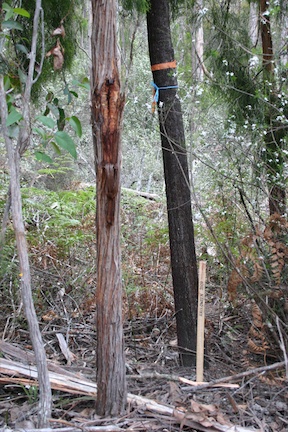
We’re about to head off on a sailing adventure, so we popped down to our Tasmanian property to ensure that we’d still be able to locate the boundaries on our return. We’ve replaced our original surveyor’s marks with fresh tape and put in some boundary stakes.
It’s important to know your boundaries
Following the edges
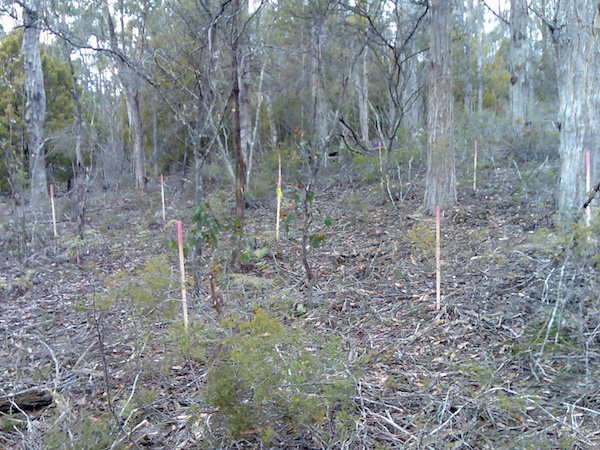
We also decided on the location of our house, which we intend to be built on a high deck to provide views out over the tree tops. We’re currently considering a round yurt design, so we’ve staked out a ring.
Staking out the foundations.
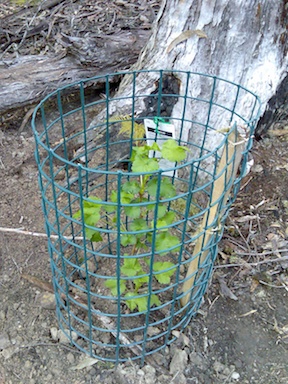
While buying stakes and marking tape at the local garden centre, we decided that we might as well do some gardening as well, so we planted some soft fruit.
Raspberry canes
Nut tree with truffles (maybe)
Really, though, the whole idea is to camp out here in complete seclusion, and enjoy the forest.
Now that we had purchased our forest in Tasmania, we had a great camping destination (albeit one where all our gear needed to be packed in over the creek on foot), but where should we build our house?
Our steeply sloping 2008 camp site. Note the staked retaining wall/ foot rest to stop us from rolling down the hill.
With 14 acres of dry sclerophyll forest to choose from, we spent several visits stomping about, clambering over fallen trees and poking at the ground, we slowly formed a more detailed mental picture of the terrain. The high Southern slopes are steep and rocky, and the low Northern slopes are steep and boggy. To the East, the land falls away steeply to one side. To the West lies the official route of Klynes Road, although in reality there is little more than a rough logging track which terminates at the creek crossing on our border. Still, it is the closest thing that we have to a demarcated border with the farm on that side, so we didn’t want to build in sight of it in case something changes there in the future.
In the end, we decided to put the house on a shelf of less steeply sloping land, more or less in the middle of the forest. After a lot of scrambling around and climbing trees, we ascertained that a raised deck would give us fine views across the d’Entrecasteaux estuary, over the tops of our lower forest. The higher wooded slopes to the South would protect us from storms rolling in from the Southern Ocean. Bravely, we hammered some stakes into the ground.
How about right here? The site in 2008.
It was still only coloured sticks in a forest, with no access except on foot by crossing the creek at the bottom of the property. However, a neighbour who had built a house further down Klynes Road had access to a bulldozer, so we commissioned him to run a causeway over the creek, push through an access track, and clear the brush from the building site.
2007
2012
The house is gonna be here! The brush cleared in 2012.
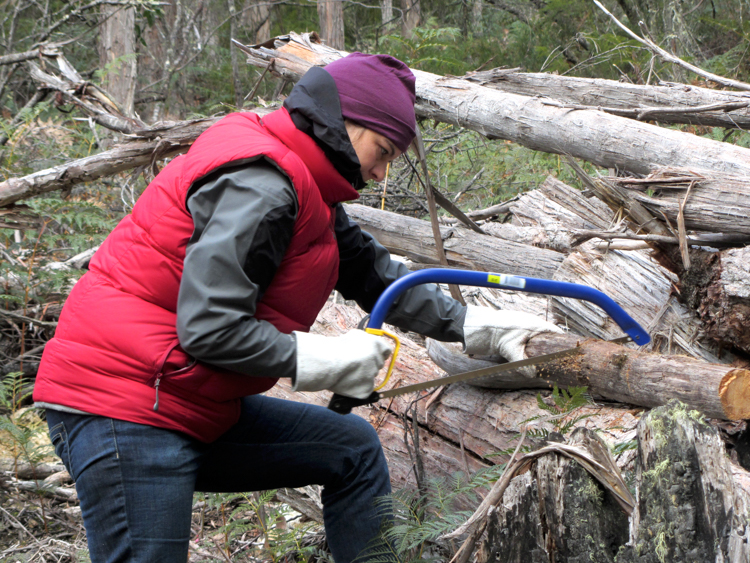
We’d asked him to leave the larger trees for the moment, but to clear anything that had fallen down. This had the unexpected benefit of providing us with chest-high stacks of drying fire wood which will probably last us for years.
Perched atop just one of our little piles of firewood.
We have no immediate plans to start the house build; all that is far in the future. But now that we can get a four-wheel drive in to our cleared building site, we have a perfect camp retreat at the bottom of the world.
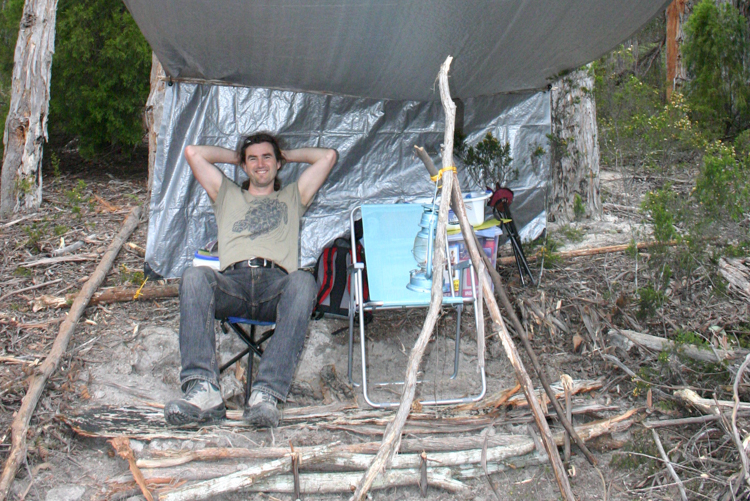
Home away from home. Our considerably more comfortable camp site in 2012.Making good use of the wood pile.
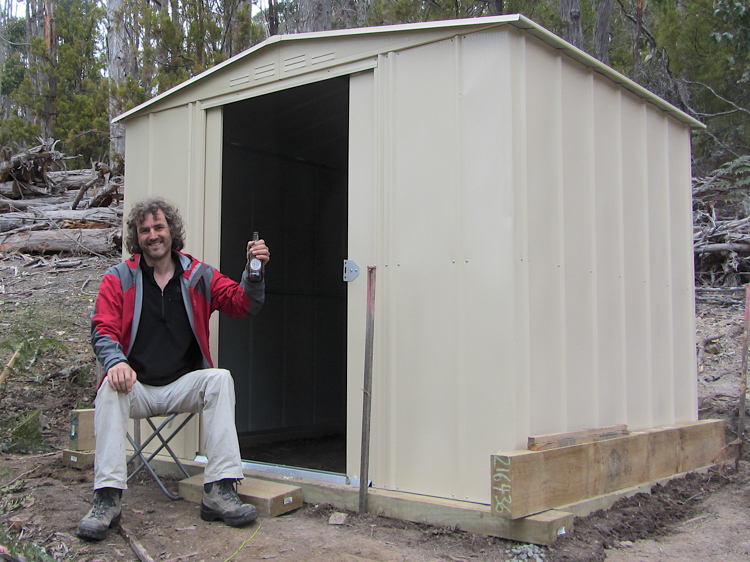
For several years, all of our camping gear had been stored under a bush, wrapped in a tarpaulin. On every visit, we found more holes in our tarp, and sometimes nibble-marks on the tools themselves. We decided to construct a more permanent shelter for our gear, and to this end bought a prefabricated garden shed and some railway sleepers.
Digging the foundations for the shed. It’s nice firm clay down there.A man and his shed.
We had chosen a build site in the middle of our forest, and had at least made a start on putting in an access road and clearing some space. But what next? What kind of house did we want to live in, and who could we get to build it? Would it make sense to do it myself as an Owner Builder?
We knew that whatever we built, it would be off the grid and self-sufficient. Even though such structures are increasingly common in Tasmania, it seemed to us that it would be sufficiently non-standard that we wouldn’t find something off the shelf, and perhaps we would be best off managing the project ourselves. To this end, I began investigating the requirements to attain my “Owner Builder” qualifications, which would give me the legal ability to build my own house in Tasmania.
It turned out that there were two components to this; the “White Card” which is an industry standard health-and-safety qualification that is essential for working on any building site in Australia, and the “Owner Builder Certificate”, which is a specific course to prepare you for the job in hand.
White Card
An Australian White Card is a pre-requisite for any construction activity, and the terms and conditions vary between Australian States. Whichever card you get, though, it is valid in all other Australian States… and some States don’t allow online training… and you don’t need to reside in a State to apply for their card… and the Western Australia card is available online and differs from some others in that it does not have an expiry date. I couldn’t see any reason why I shouldn’t get the open-ended WA card, so I registered with EOT online training and got one.
The course was inexpensive and interesting, with a face-to-face component which involved videoing yourself giving answers to some of the longer questions which are reviewed by the trainers. There was also a slightly bizarre requirement to film yourself correctly wearing your Personal Protection Equipment, so I took the opportunity to kit my daughter out as well.
Bunnings also sell PPE for small people.
Owner-Builder
The Owner-Builder qualification is a bit more involved, but is also available inexpensively online. I took my course with ABE, and began a fascinating journey into the intricacies of controlling a building project. One theme that continued throughout the various modules was to think carefully about whether you were up for it; are you capable of managing your time, managing people, managing a budget? Is your family prepared to support you throughout the inevitable stress? Are you really prepared to give up so much of your time?
It really is a very good course, and at the end I felt a little nervous but at least mentally prepared for the challenges to come.
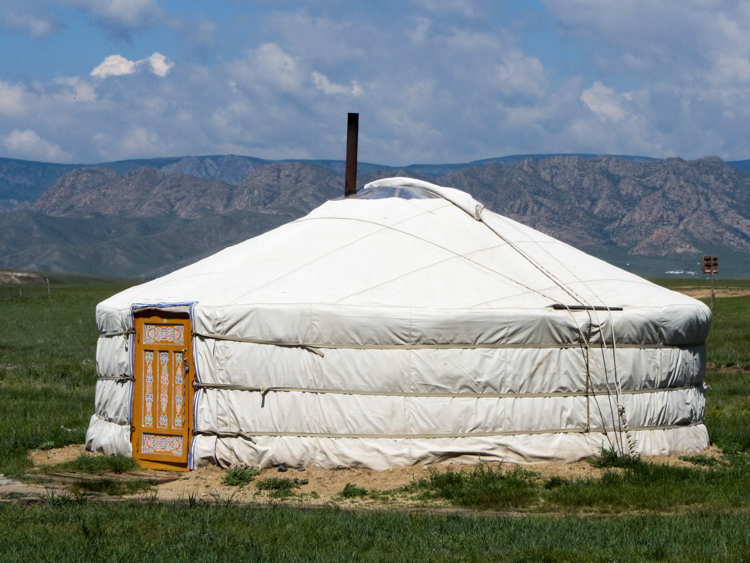
We had long been interested in the idea of building a yurt or round house in the woods, even travelling to Mongolia to stay in an original felt-walled ger.
Our ger on the Mongolian steppe.
These gers are designed to be stripped down, packed up and moved at regular intervals, stemming from the traditional nomadic lifestyle on the Steppes. With the breakdown of the USSR and their enforced “westernisation” of Mongolians, there is a resurgence in their use, particularly noticeable today in construction sites as the workers move from site to site.
Gers in use by construction workers in Ulaanbaatar.
There is quite a movement around the world to take the same easy-to-erect construction concept but with the view to building a more permanent structure. Some companies used modern fabrics, others made the walls from wood. In all cases, the result is a polygonal structure with a large open space inside.
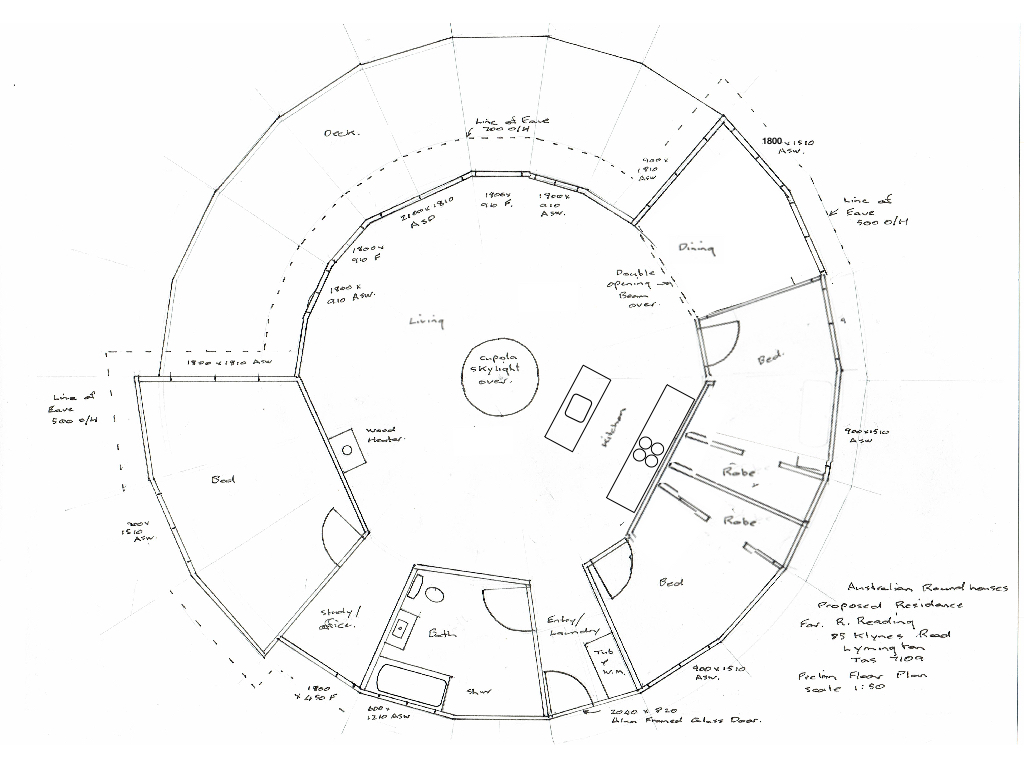
Australian Roundhouses
We looked at a few different companies, several in the US where this sort of thing has been going on for some years, but eventually settled on Australian Roundhouses (formerly Goulburn Yurtworks) just outside of Canberra.
A design from Australian Roundhouses.
The team were enthusiastic about prefabricating the structural elements in New South Wales and driving them to Tasmania on a low-loader to erect them for us. We had an entertaining time discussing various options and layouts; the polygonal plan provides a fantastic airy openness inside, but does present problems when most of our modern furniture is designed to fit inside a square box. Still, everything seemed to be going pretty well with an 8-metre central round house surrounded by a ring of “annexes” to give extra space. The central roof cupola would provide natural light, and the full-height windows and raised exterior deck would give us unrivalled views across the d’Entrecasteaux Channel.
We edged ever closer to an agreement, and the builders got ever more excited about their upcoming Tasmanian “holiday”. Then we realised that we might have a problem with the 49 foundation posts on which the structure would stand. They would add appreciably to the weight of the trailer which needed to cross to Tasmania on the ferry, so I agreed to look into sourcing them locally. Since the site is sloping, with a drop of a few inches to the South and about 3 metres to the North, a half to a third of the posts would need to be longer than the standard length in which such poles usually come. The longer ones, up to perhaps 4 or 5 metres, would all be “special order” and priced accordingly…
And then we started factoring in all the extras that we would need once the main structure had been constructed. Dry-walling, plumbing, electrical, waste, all would have to be added after the builders had gone home. Even the rough estimates started to blow our budget. We needed to reconsider.
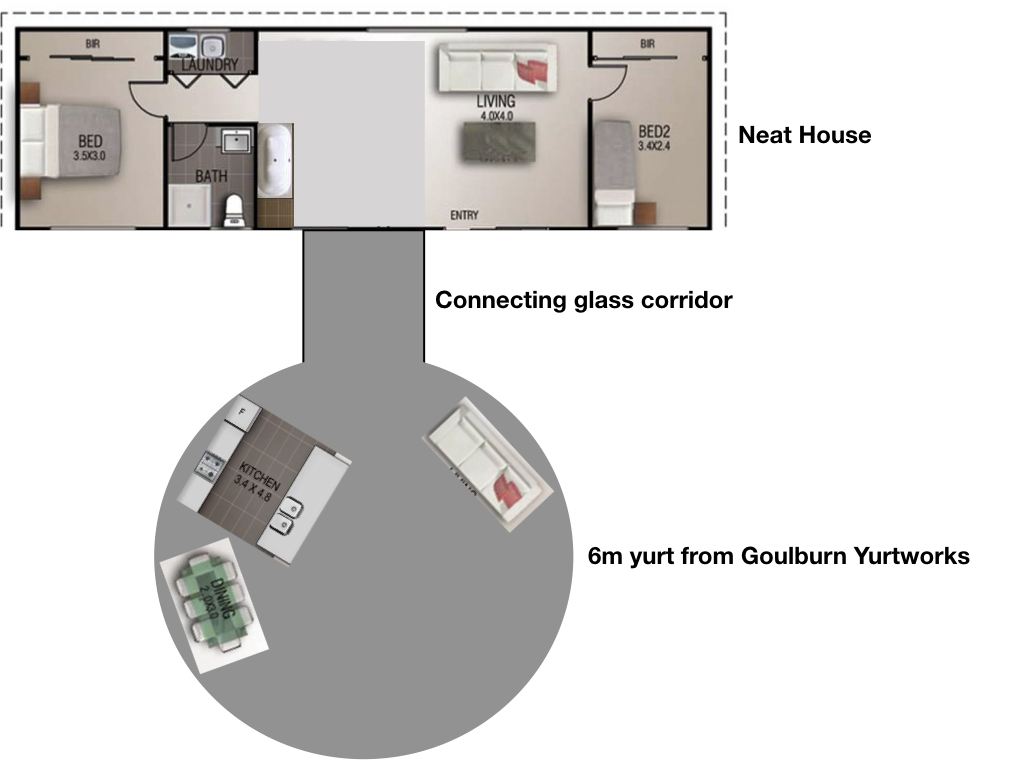
Neat House
Perhaps we could get away with a smaller round house for our living area, and combine it with a more traditional structure for the services? We looked into a company called Neat House who prefabricate buildings in Tasmania using local materials.
This would use fewer long foundation posts underneath the yurt, but now we would be dealing with house components from two separate suppliers, plus additional labour to glass-in the connecting corridor between them. It was all starting to get a bit complicated, so we went back to the drawing board.
After considering some lovely (but ultimately impractical and over-expensive) round house options, we have realised that we need to pay less attention to the fluffy design tasks, and more attention to supply chain logistics and to the post-lock-up finishing and decorating. To this end, we decided to investigate a prefabricated house.
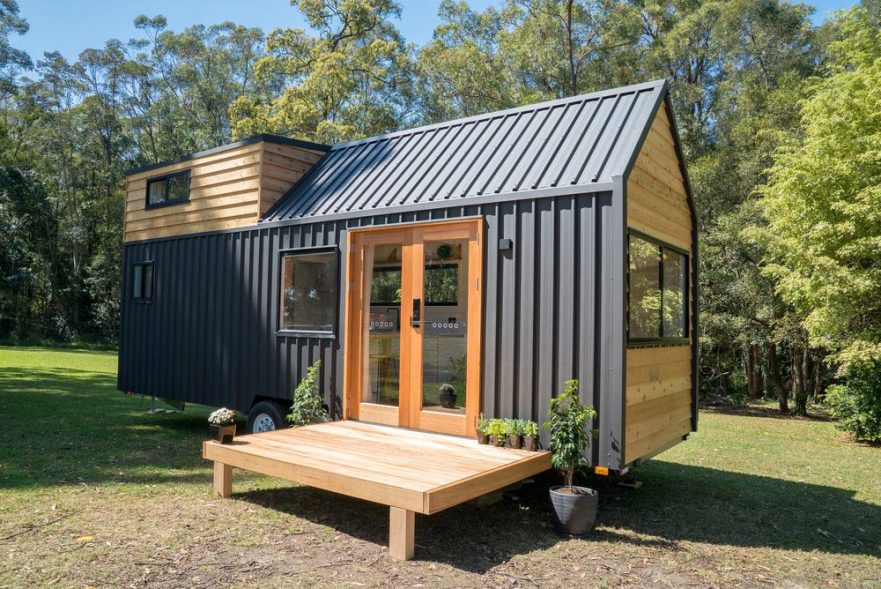
We started out looking at “tiny houses”, which are a bit of a fad at the moment. Technically a caravan in that they possess a wheeled chassis and are thus immune to building regulations, they are not meant to be towed around on a regular basis and are commonly installed as a granny flat in a suburban garden. A tiny house can be a marvel of interior design, and we found that we were familiar with many of the principles because it is similar to that found in yachts, where space is also at a premium.
A typical Tiny House, the Hauslein Sojourner
Although tiny houses are very interesting, and a good way to create some extra living space in a confined area, they are relatively expensive per square metre because of the necessity to cram everything into a small footprint, and anyway we have plenty of space to spread out and no need to unnecessarily limit ourselves.
There are other styles of prefabricated house, that can give you a larger footprint. Around Australia, there are a number of businesses which will build a house for you in their factory, all the way to completely decorated with all utilities and appliances installed. The house is then cut into pre-defined segments and delivered to the site on a low-loader for re-assembly. The advantage is that the builder has complete control over all aspects of the build using their own staff, and can thus deliver significant economies of scale as well as an agreed price and timeline.
We chose to move forward with TasBuilt Homes after visiting their rather amazing factory in Launceston.
Tasbuilt Homes factory, containing a house in progress.
The way it works is that you take one of their standard designs, and then move around the internal walls and fittings until you have the result that you want. The guys at TasBuilt were very friendly and obliging, and we had an excellent set of discussions with them, specifying all the finishes and adding a North-facing deck. Since the price was all-in, there were going to be no surprises, and we were pretty happy with the plan.
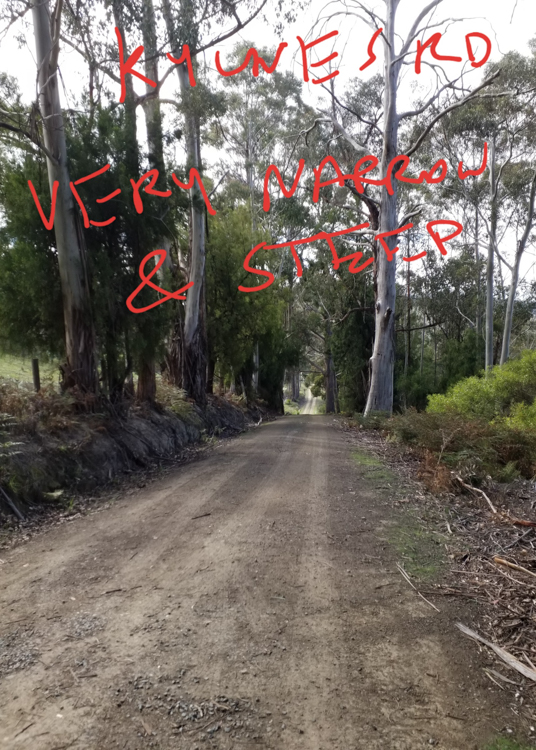
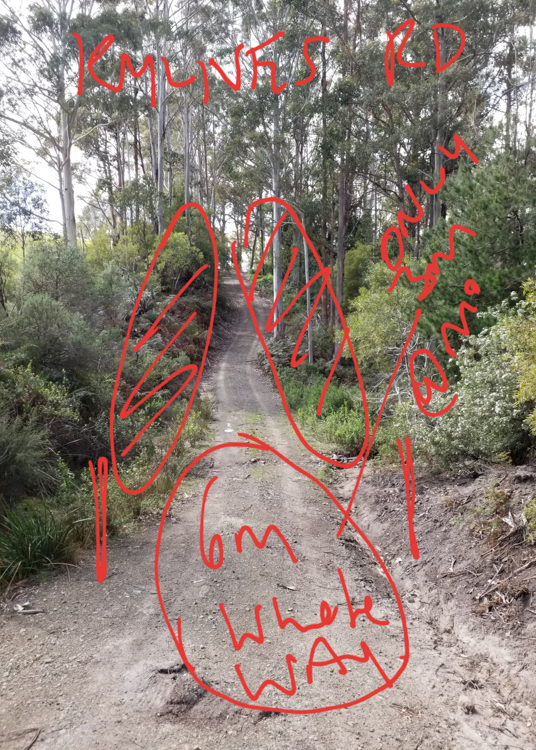
All was going swimmingly well, until TasBuilt sent their surveyor down to look at our access road, which was then under construction. They approved of the road that we were building across our property, but were less happy about access down Klynes Road itself. TasBuilt’s surveyor judged that it was too narrow and too steep to negotiate with a 6 metre wide trailer.
Klynes Road survey notes
Although this is officially a council road, we are not averse to running a bulldozer down it or cutting back some trees if we need to, because we are the last property on the road and it doesn’t go anywhere else. However, there were places where we would have had to double the width, which would entail substantial earthworks and the loss of some beautiful well-established trees, so we regretfully decided to return once again to the drawing board.
Back in 2012, we asked Matthew, a friend and neighbour who had access to useful machinery, if he would help us with bulldozing a road into our property. We asked him to make it as subtle as possible, just a winding bush-track through the forest to give us initial access, without materially changing the look and feel of the site. Matthew made us just what we wanted, a dirt track just perfect for humping camping gear in and out of the forest.
The entrance to the track from Klynes Road into the property, freshly built in 2012.
I had an idea in the back of my mind that some day we’d need to widen it to give access to construction machinery and to serve as our official Rural Fire Service access road, but for now this would do us just fine.
Since the “official” council road, Klynes Road, was merely a dotted line on a map rather than an actual graded thoroughfare, we also got Matthew to clear a line along its path up as far as our track entrance, adding a turning circle for delivery trucks, for when the time finally came to build something. Nobody else uses that end of Klynes Road, as it doesn’t go anywhere, so we felt that nobody would mind.
Then we went travelling abroad for a number of years, and returned with a small child. This re-focussed our minds on the building project, which had heretofore been a nebulous plan that we would think about somewhere in the future.
The first step was to evaluate what had happened to our property in the intervening six years. Was the access track still open? Was the cleared building site still accessible? We hopped on a flight to Hobart and rented a small car with a child seat.
We had no idea what we might find, or even if we’d be able to find the track. Nature can reclaim a lot of land in six years! This video records our arrival.
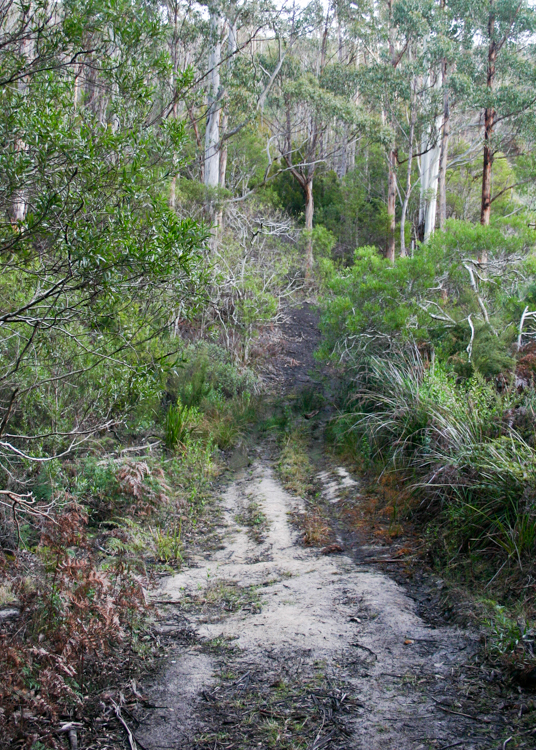
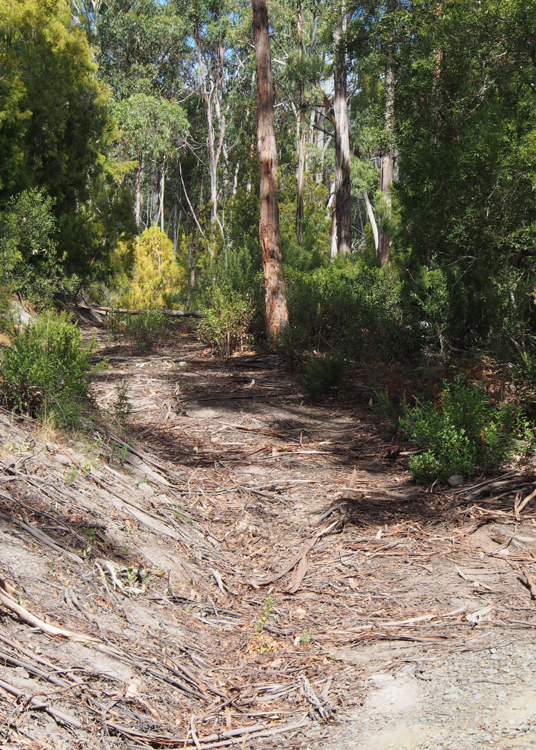
Track entrance in 2018
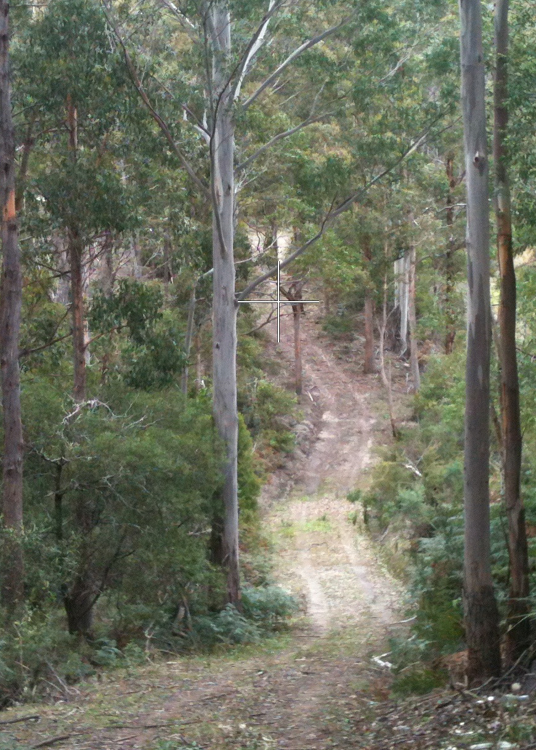
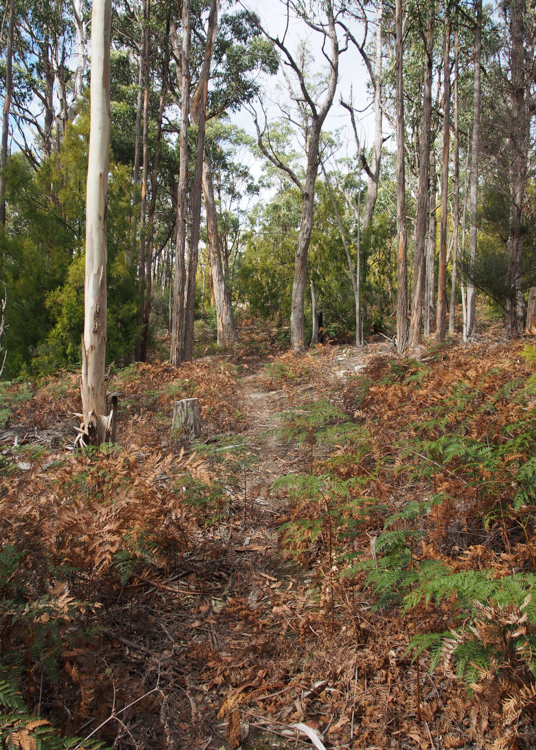
Top of the track, near the cleared site, in 2018
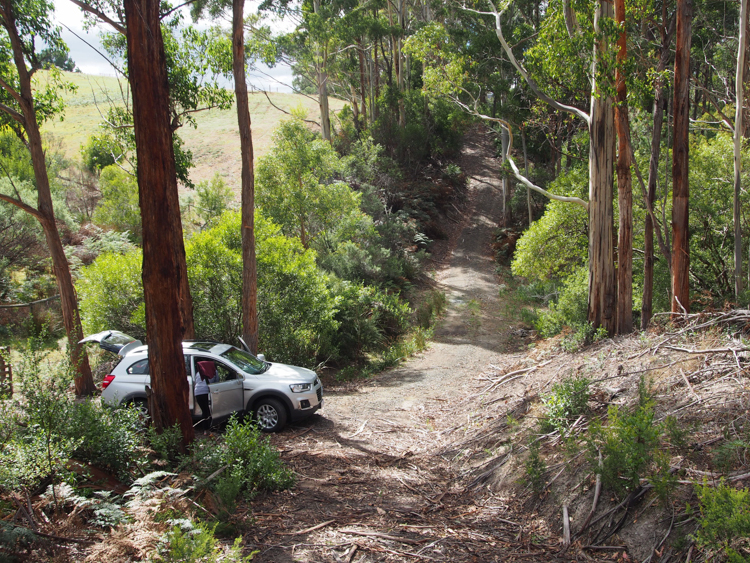
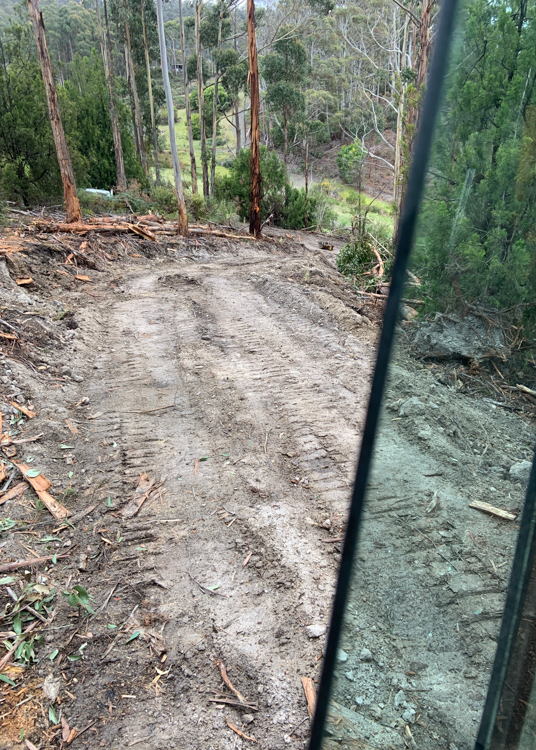
The track was still there, overgrown with ferns in places, and obstructed by fallen branches and the occasional tree. We cleared it all away, but found that the compacted mud of the track bed had eroded in places to reveal a lumpy surface of loose sand, projecting tree roots and slippery stumps, and there was no chance of getting our two-wheel-drive rental vehicle up there. We did come across a flat hard-standing that had been built by a gate to our nearest neighbours’ property (the farm on the other side of Klynes Road), a gate which hadn’t even been there six years ago. Now that we’d extended Klynes Road as far as our boundary, there was no reason why our neighbours shouldn’t make use of it, and they clearly had. It made a useful place to park the car, while we unloaded.
This is as far as we can get in this vehicle! Looking down Klynes Road from the track entrance.
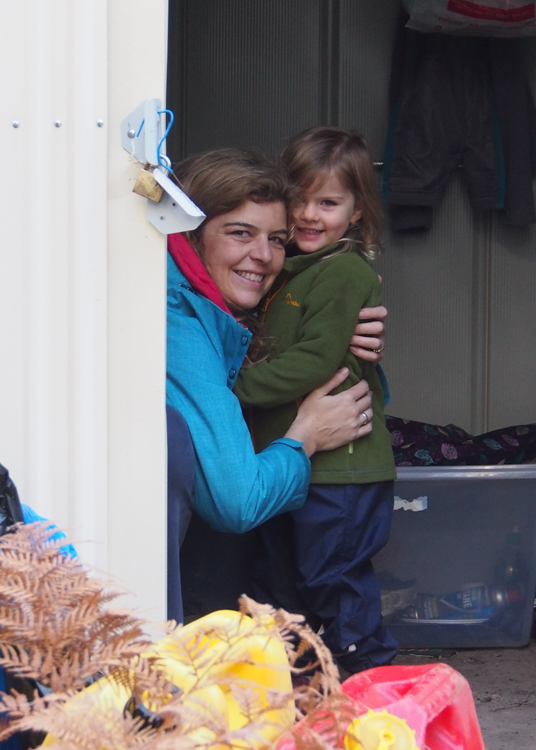
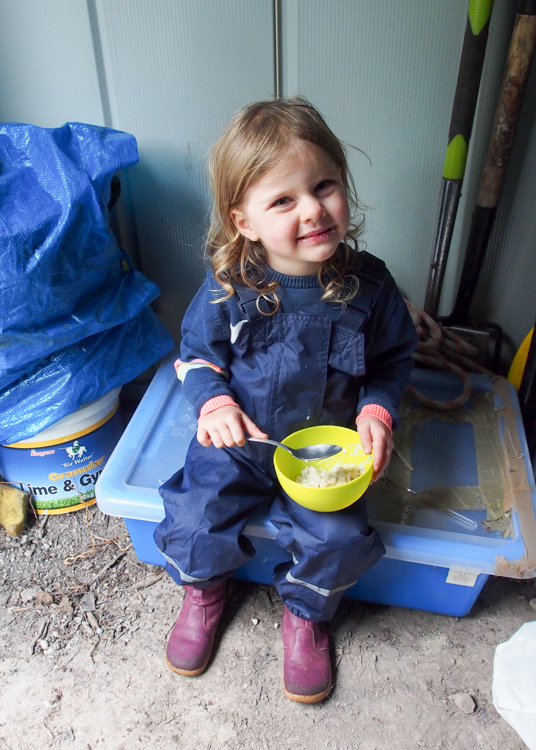
Our storage shed, now six years old, was still standing on firm foundations, with all of our camping gear refreshingly un-nibbled by the local wildlife. After moving out the bulkiest items, we used the shed as a rain shelter for cooking and eating. Berrima, age 3, instantly fell in love with the forest, and with the whole idea of bush camping.
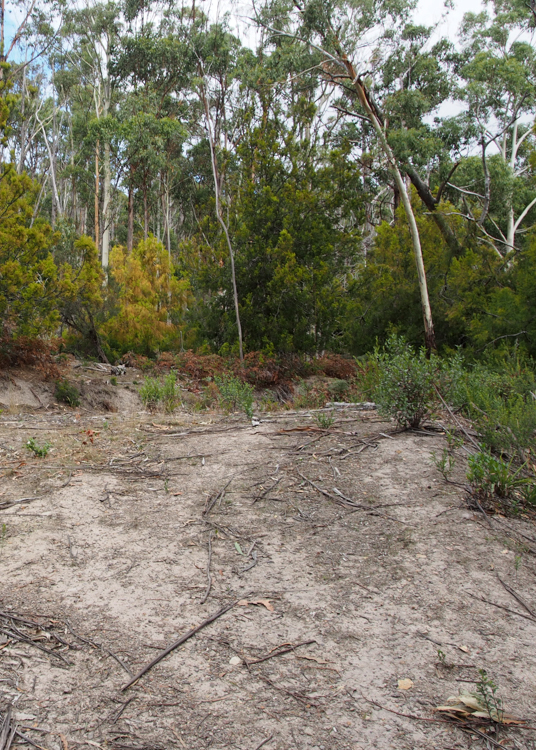
I had been worried that we would need to have the building site itself cleared again, but in fact it looked much the same as we’d left it six years earlier. I had deliberately left the tall trees standing while clearing away the scrub and litter, and I guess that’s the advantage of dry sclerophyll forest; all of nature’s action is far up in the tree canopy, and nothing much happens on the ground. There was just some Common Heath, a pretty but slightly prickly flowering native, and some bracken under the sheltering native cherry trees.
The house site, looking North, 2018.
Having established that everything was fine with our forest, we went back to work. A year went by, while we worked on contracts far away in Queensland and in the Australian Capital Territory. In the evenings, though, we planned and plotted ways to fund and build our final home.
Doing our research and due diligence, I became aware that the Rural Fire Service regulations had changed. When we’d put in our original access track, the requirement had been a maximum slope of 1 in 4; now the legislation had been upgraded to no steeper than 1 in 5.5 and at least 4 metres wide. Before we would be permitted to live in any planned house, we needed to build a new road.
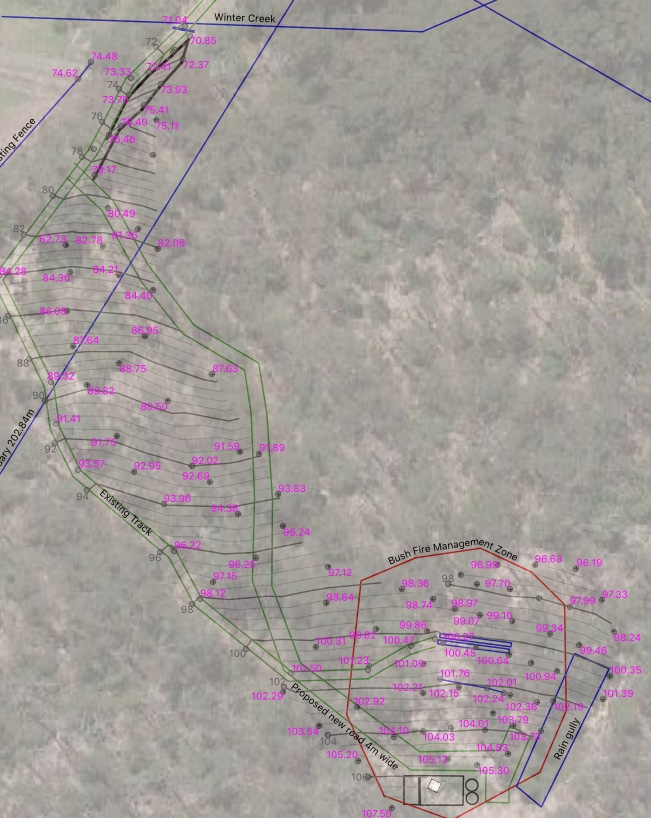
I commissioned a surveyor to provide us with a contour survey of the site and track. This confirmed that not only the track but also the final rise of Klynes Road was too steep, and the surveyor went back to research the slopes further downhill. Once this was done, I plugged his figures into a GIS program, and then spent several months trying to combine the often contradictory information from this and our previous surveys, mud-map sketches, and paper documentation, to form a coherent picture of our site.
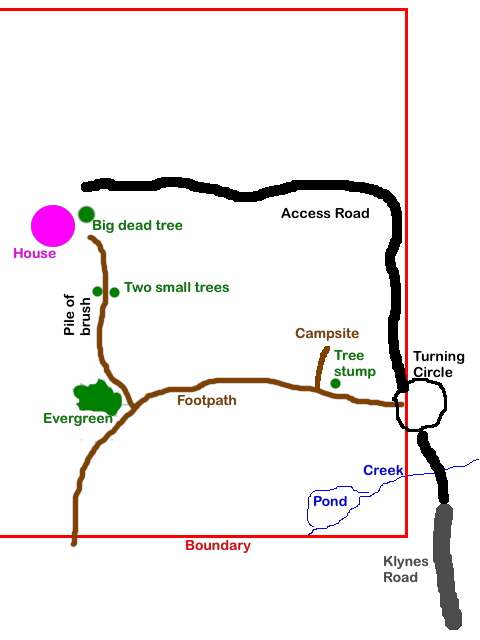
2010 mud map
2019 site plan
Poring over the numbers, I mapped out a potential contour route for an access road that would meet fire regulations, would be strong and wide enough to take heavy construction vehicles, and yet wouldn’t spoil the feeling of arriving at a remote bush block. In the 2019 site plan to the right above, you can see the wide green road skirting the Easterly limit of the contour lines.
The map is, of course, not the territory. For all I knew, there might be stands of important trees that I would not want to see felled, or other surprises that could only be determined on the ground. Since I was still working far away in Canberra, I also needed to find somebody with the necessary equipment and experience to get the job done in my absence. I boarded a flight to Hobart.
As luck would have it, it was pouring with rain that weekend, although this had brought the Common Heath into bloom across the entire 14 acres, which was quite beautiful.
Flowers of the Common Heath, pretty much the only plant that has reclaimed the cleared land.
I had intended to camp on the land, but instead elected to stay in a local B&B that had the advantage of heating and the internet. My rental car, a tiny hatchback, was obviously never going to make it up our track, but I figured that I would load it up with surveying equipment, stop short on the final drop of Klynes Road down to our creek, and hump in my gear on foot. I was quite surprised to discover that our neighbours had, in the act of putting in a boundary fence, extended Klynes Road right past our property and up over the next hill.
Our Klynes road terminus, 2018
Klynes road goes ever on… 2019
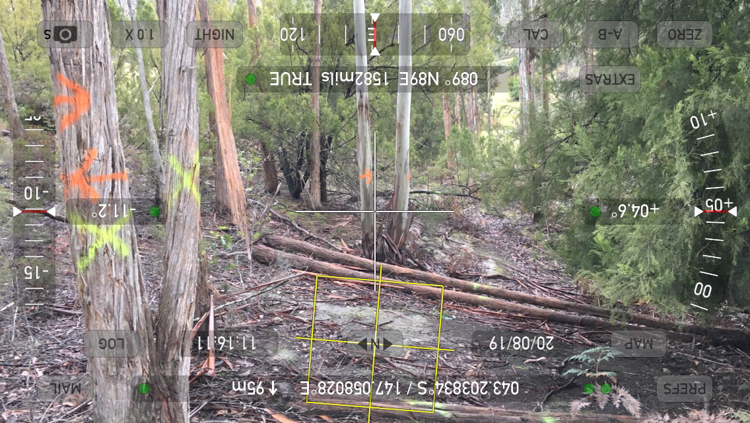
I had a rare old time stomping around in the mud, translating my mapped intentions onto the ground, and finding that yes indeed there was a slightly better route through the timber, one which avoided felling some of the older trees. I spray-painted and marked the route, while wondering who I was going to find to do the actual work.
Let’s put a road through here…
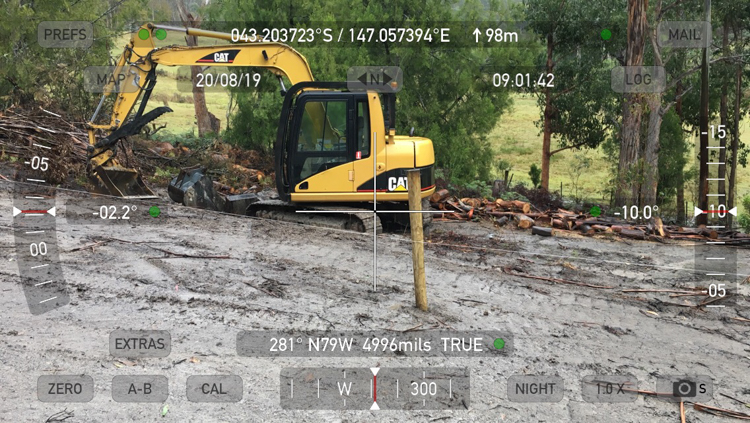
Back-tracking to our border with Klynes Road to check my figures against my boundary markers, I came across a large yellow digger parked on the fence-line of the farm on the other side.
Aha! I thought, and rang the neighbour whose fence this was, and before very long was in contact with the Dan, the Cat’s owner, who agreed that it made perfect sense for him to work on my project once he’d finished the fence-line, since his machinery was already on site.
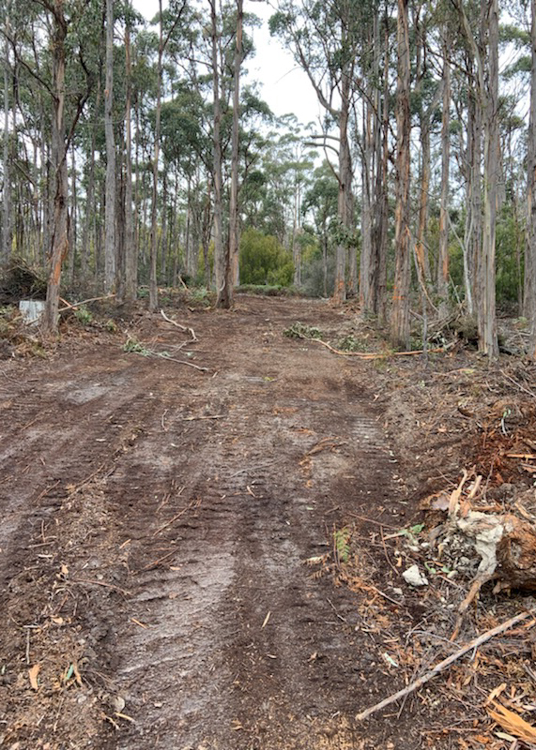
Soon enough, the road-building project was under way. Perhaps ironically, the very first thing that Dan did was to widen and re-open the old track, so that he could get his digger up to the site. Now we are the proud owners of not one, but two roads.
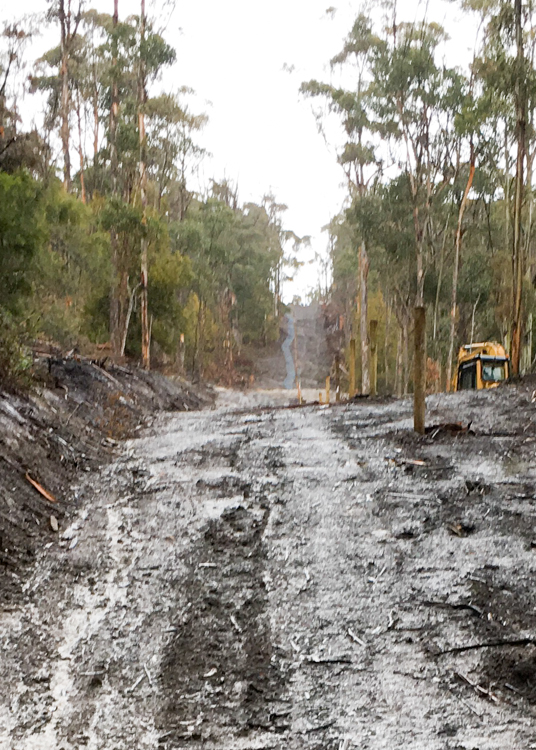
Initial clearance of the bottom of the new road
Clearing the way for the top of the new road
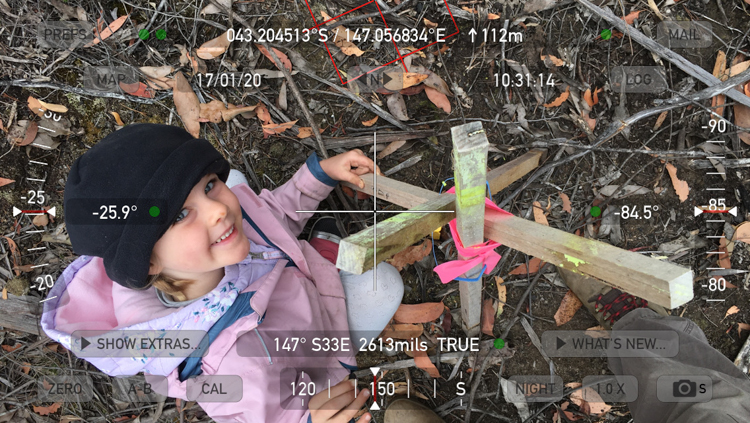
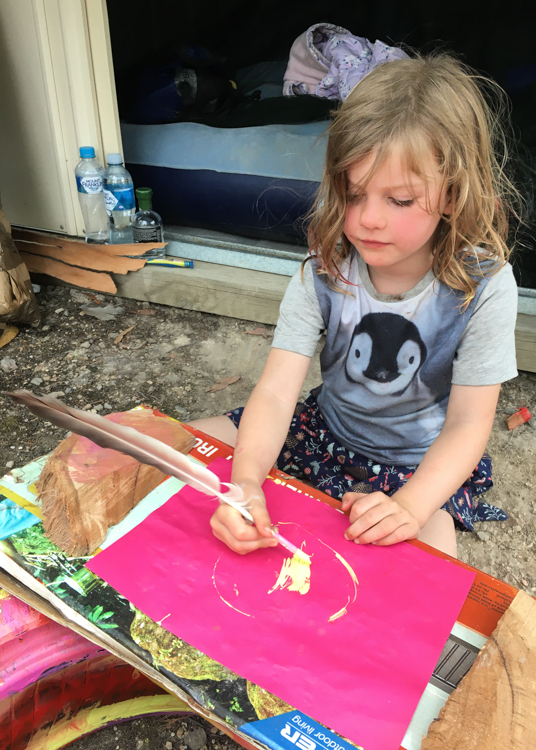
Things quietened down a bit until after Christmas, when Berrima and I arrived at the end of a road trip to escape the 2019 bush fires. We had a good laugh “going on an expedition” (looking for and re-marking our boundary markers), setting up a tyre swing, and doing some bush artwork.
An Expedition to the South West Pole.
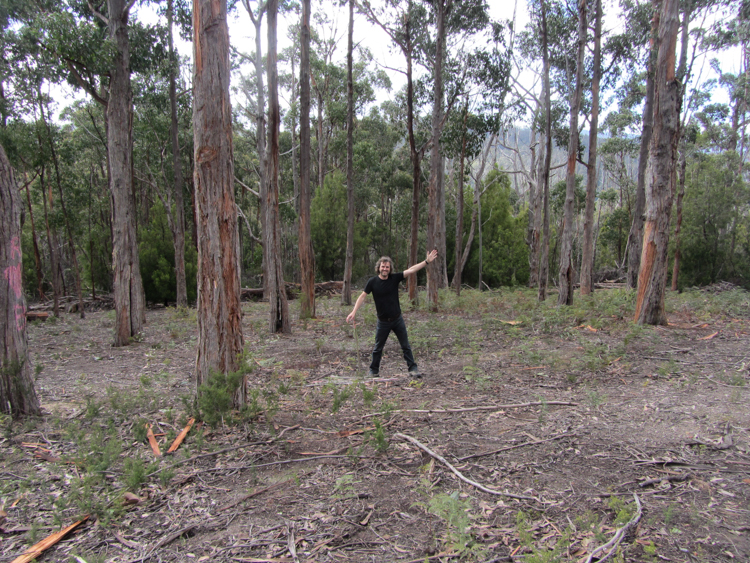
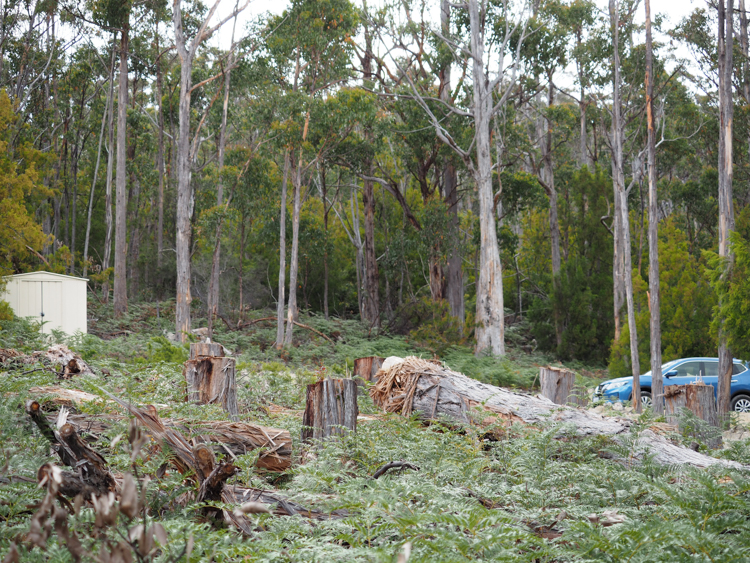
I also took the opportunity to finally clear the trees from the building site.
The building site, looking North, early 2020.
With actual physical labour and a changing skyline, it finally felt that I was achieving something. The site became brighter and sunnier, and the final shape of the view over the d’Entrecasteaux became more obvious. As well as Dan the digger, David the builder and Rodney the quarryman also visited, and we were able to point at things and make real decisions; it felt like we were making actual progress.
There is a bend at the bottom of the new road that is slightly too steep to drive up if the mud is wet. Even the Land Cruiser couldn’t get up in the rain.
The Cruiser goes up.. and then slides back down.
…but our resident artist made us a house number
Between Dan and Rodney and I, we formulated a plan. Dan would do some more levelling to straighten out the bend as much as possible, and then Rodney would drop a 1.5 tonnes of 60-100mm aggregate next to the creek. Dan would level it, and then Rodney would drop a second load. Once this had been bedded in up to the top of the bend, Rodney reckoned that the gravel trucks could negotiate the bend by themselves, and lay the rest of the 13 tonne loads themselves using the tipper and dragged chains.
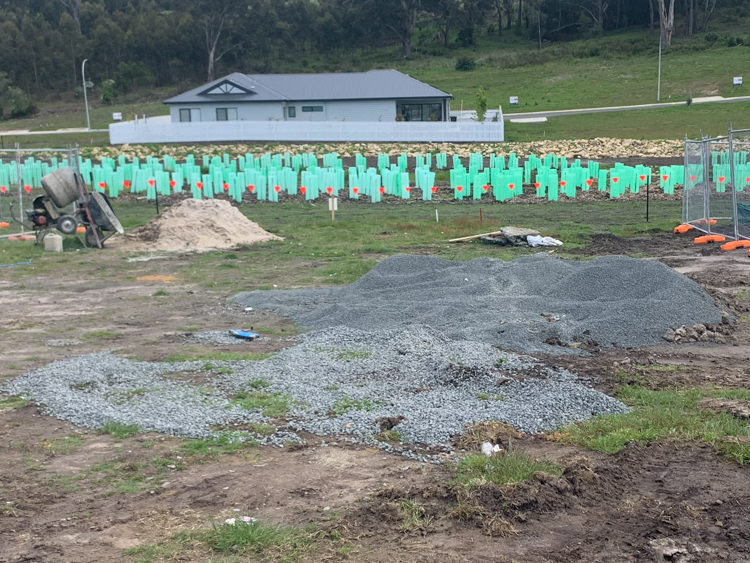
Today, the first load went down, and the creek crossing looks marvellous.
The first load of aggregate at the creek crossing, looking North down Klynes Road.
Having exhausted the possibilities of round houses and prefabricated houses, it was back to the drawing board once again. We had been trying to make the project easier for ourselves by getting major parts prefabricated and delivered, because we were working interstate and would not have daily oversight of the construction. One obvious solution was to move to Tasmania and personally supervise the build, but we had temporarily lucrative work in faraway Canberra which we still needed if we were to complete the project. Perhaps it was time to stop trying to make things easy, and get somebody to build a bespoke house for us on site?
We initially approached Davies Construction, who were happy to build something that resembled our previous designs, and provided some reasonable-looking cost estimates. We were feeling quietly confident when they backed out at the last minute, saying that they had just completed a build across the river in Franklin, and found that the travel distance of their sub-contractors was too onerous. I suspect that in reality our project was too small to be of interest to them.
Then we started discussions with the amazing David Kapel, a build manager in Launceston. David was excited by our project from the beginning, and took all of my carefully assembled quotes and estimates and agreed that he could meet almost all of them himself. He would handle our entire build, including all sub-contractors, from breaking the ground to the final finish, including electrical and plumbing work, for a reasonable price.
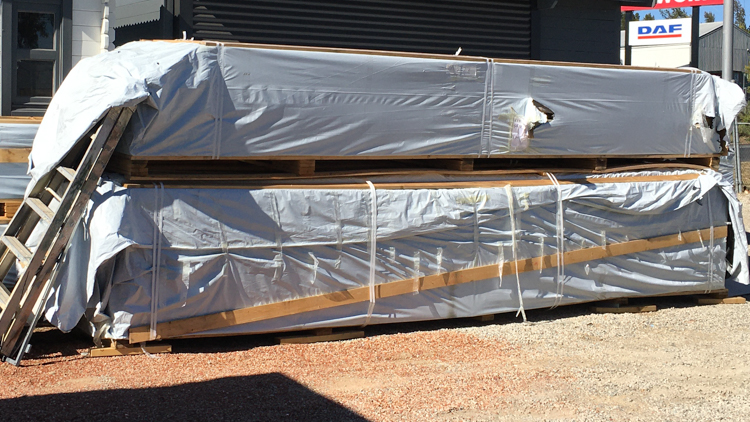
The way that he was able to achieve this was because the main structure of the house would be made from baulks of cedar, imported already cut and shaped to the owner’s specification by the Scandinavian company YZY Kit Homes. YZY had an agent close to our house in Canberra, who was happy to show us around some demonstration houses.
YZY Kit Home “Madeira”.
Being made of thick timber, these houses are sturdy with excellent thermal insulation, and the parts are easily transported. We were shown a house like the one above, broken down into components and ready to be packed into a standard shipping container which would easily fit down our road.
YZY Kit Home structural members ready for transportation.
Nothing was too much trouble for David, and he even agreed to a fixed-price contract because he was interested in having a show home in the south of Tasmania. We met him on site and discussed access, and we discussed turning circles and trees that needed to be removed, and the levelling of a space on which a 40-foot shipping container could safely be offloaded using a side-crane.
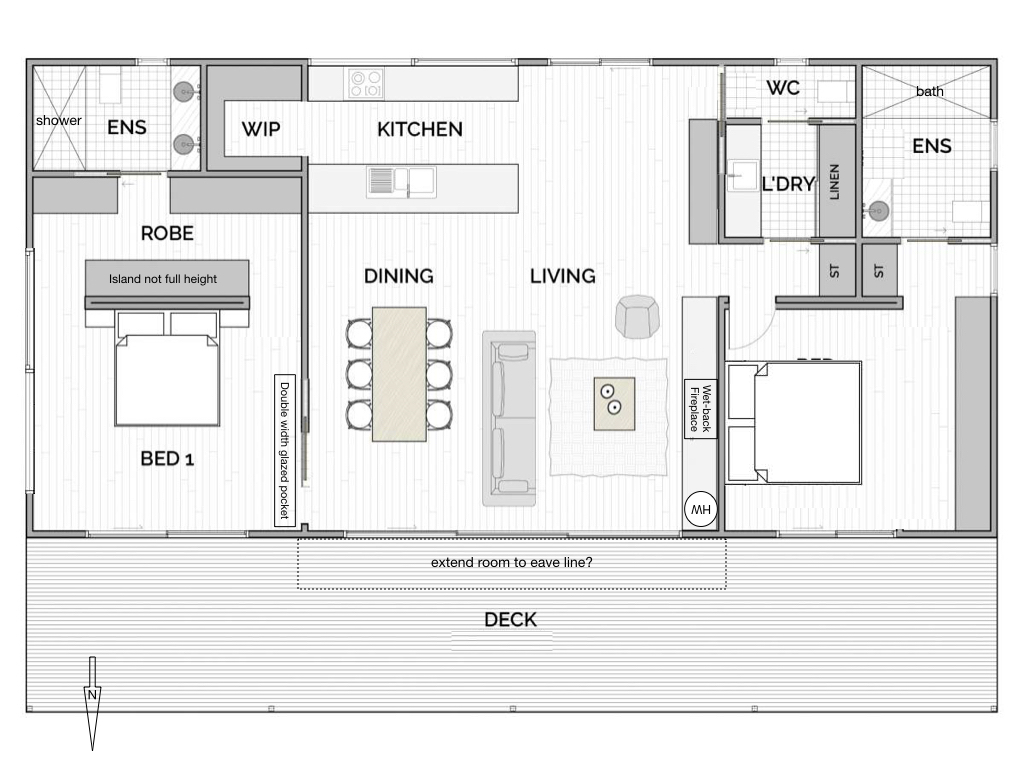
Over the months, we worked out interior decoration, decking materials, and different methods of achieving (and in fact exceeding) our required Bush Fire Rating.
Based on the YZY Madeira, our final plan.
We moved forward with grading our access road, and I got busy with the chainsaw to clear the building site. We put our property in Montevideo up for sale to free up some cash, and got down to the final fiddling details of the placement of light switches and power sockets. We were onto a winner.
Then disaster struck. Due to a family emergency, David had to pull out of the project and shut down his construction company. We were devastated.
YZY were still happy to supply the kit, but did not have any other licensed builders in Tasmania. Still in shock, shattered and not a little depressed, we drew a line under the whole idea of house-building, and went to look at yachts instead.
It took a little while to work it out of our system, and we looked at a lot of yachts. In the end, though, we couldn’t really find what we wanted for the amount of spare cash in our pockets, so we returned home to sulk.
Then we heard once more from David; his son, whom we had already met, was interested in taking up the reins of the family business. We slowly restarted our negotiations, and were just in the process of pricing up a second design option, when COVID-19 became a worldwide pandemic. Transport prices from Scandinavia went through the roof, as all the world’s empty shipping containers ended up rusting in China awaiting cargoes that never arrived. The Australian dollar went into free fall, and the supply chains of imported building materials broke down. Tasmania closed its borders to non-essential visitors.
We hope and trust that we will all get through this, but until the crisis is over, that’s the end of our story.
Our off-grid house-build in Tasmania has come to a complete standstill, following the builder’s surprise cancellation of the project, and the closure of State borders during the covid-19 pandemic. Dan’s digger – which has been chugging away all this time, clearing and levelling the site – burnt out a track motor, and importing spare parts has become problematic. We can’t get to the site to complete the clearance ourselves or to oversee any decisions due to quarantine regulations, and anyway the importation of building materials for the house, not to mention electronics for the solar array, has become all but impossible.
Our daughter starts school in Tasmania in 2021, and the contract in our current AirBnB in Canberra expires before Christmas 2020. We really need to sort out a Plan B.
We did some Zoom tours of houses for sale down in Kingston, which is on the outskirts of Hobart and close to the school, but noticed when the property agent panned around the neighbourhood that there were still some empty plots available. That got us thinking.
We had already formed a good working relationship with TasBuilt Homes, who had designed us a nice house which they were going to build in their factory and then bring in pieces to assemble on the land. Unfortunately, their surveyor decided that the approach road was too steep for their low-loaders to negotiate, and we moved on to other plans.
What if we bought a simple urban plot with access to town electricity and gas, and got TasBuilt Homes to put their house there instead? That would tide us over for a few years and enable us to get settled in Tasmania before once more addressing the off-grid build.
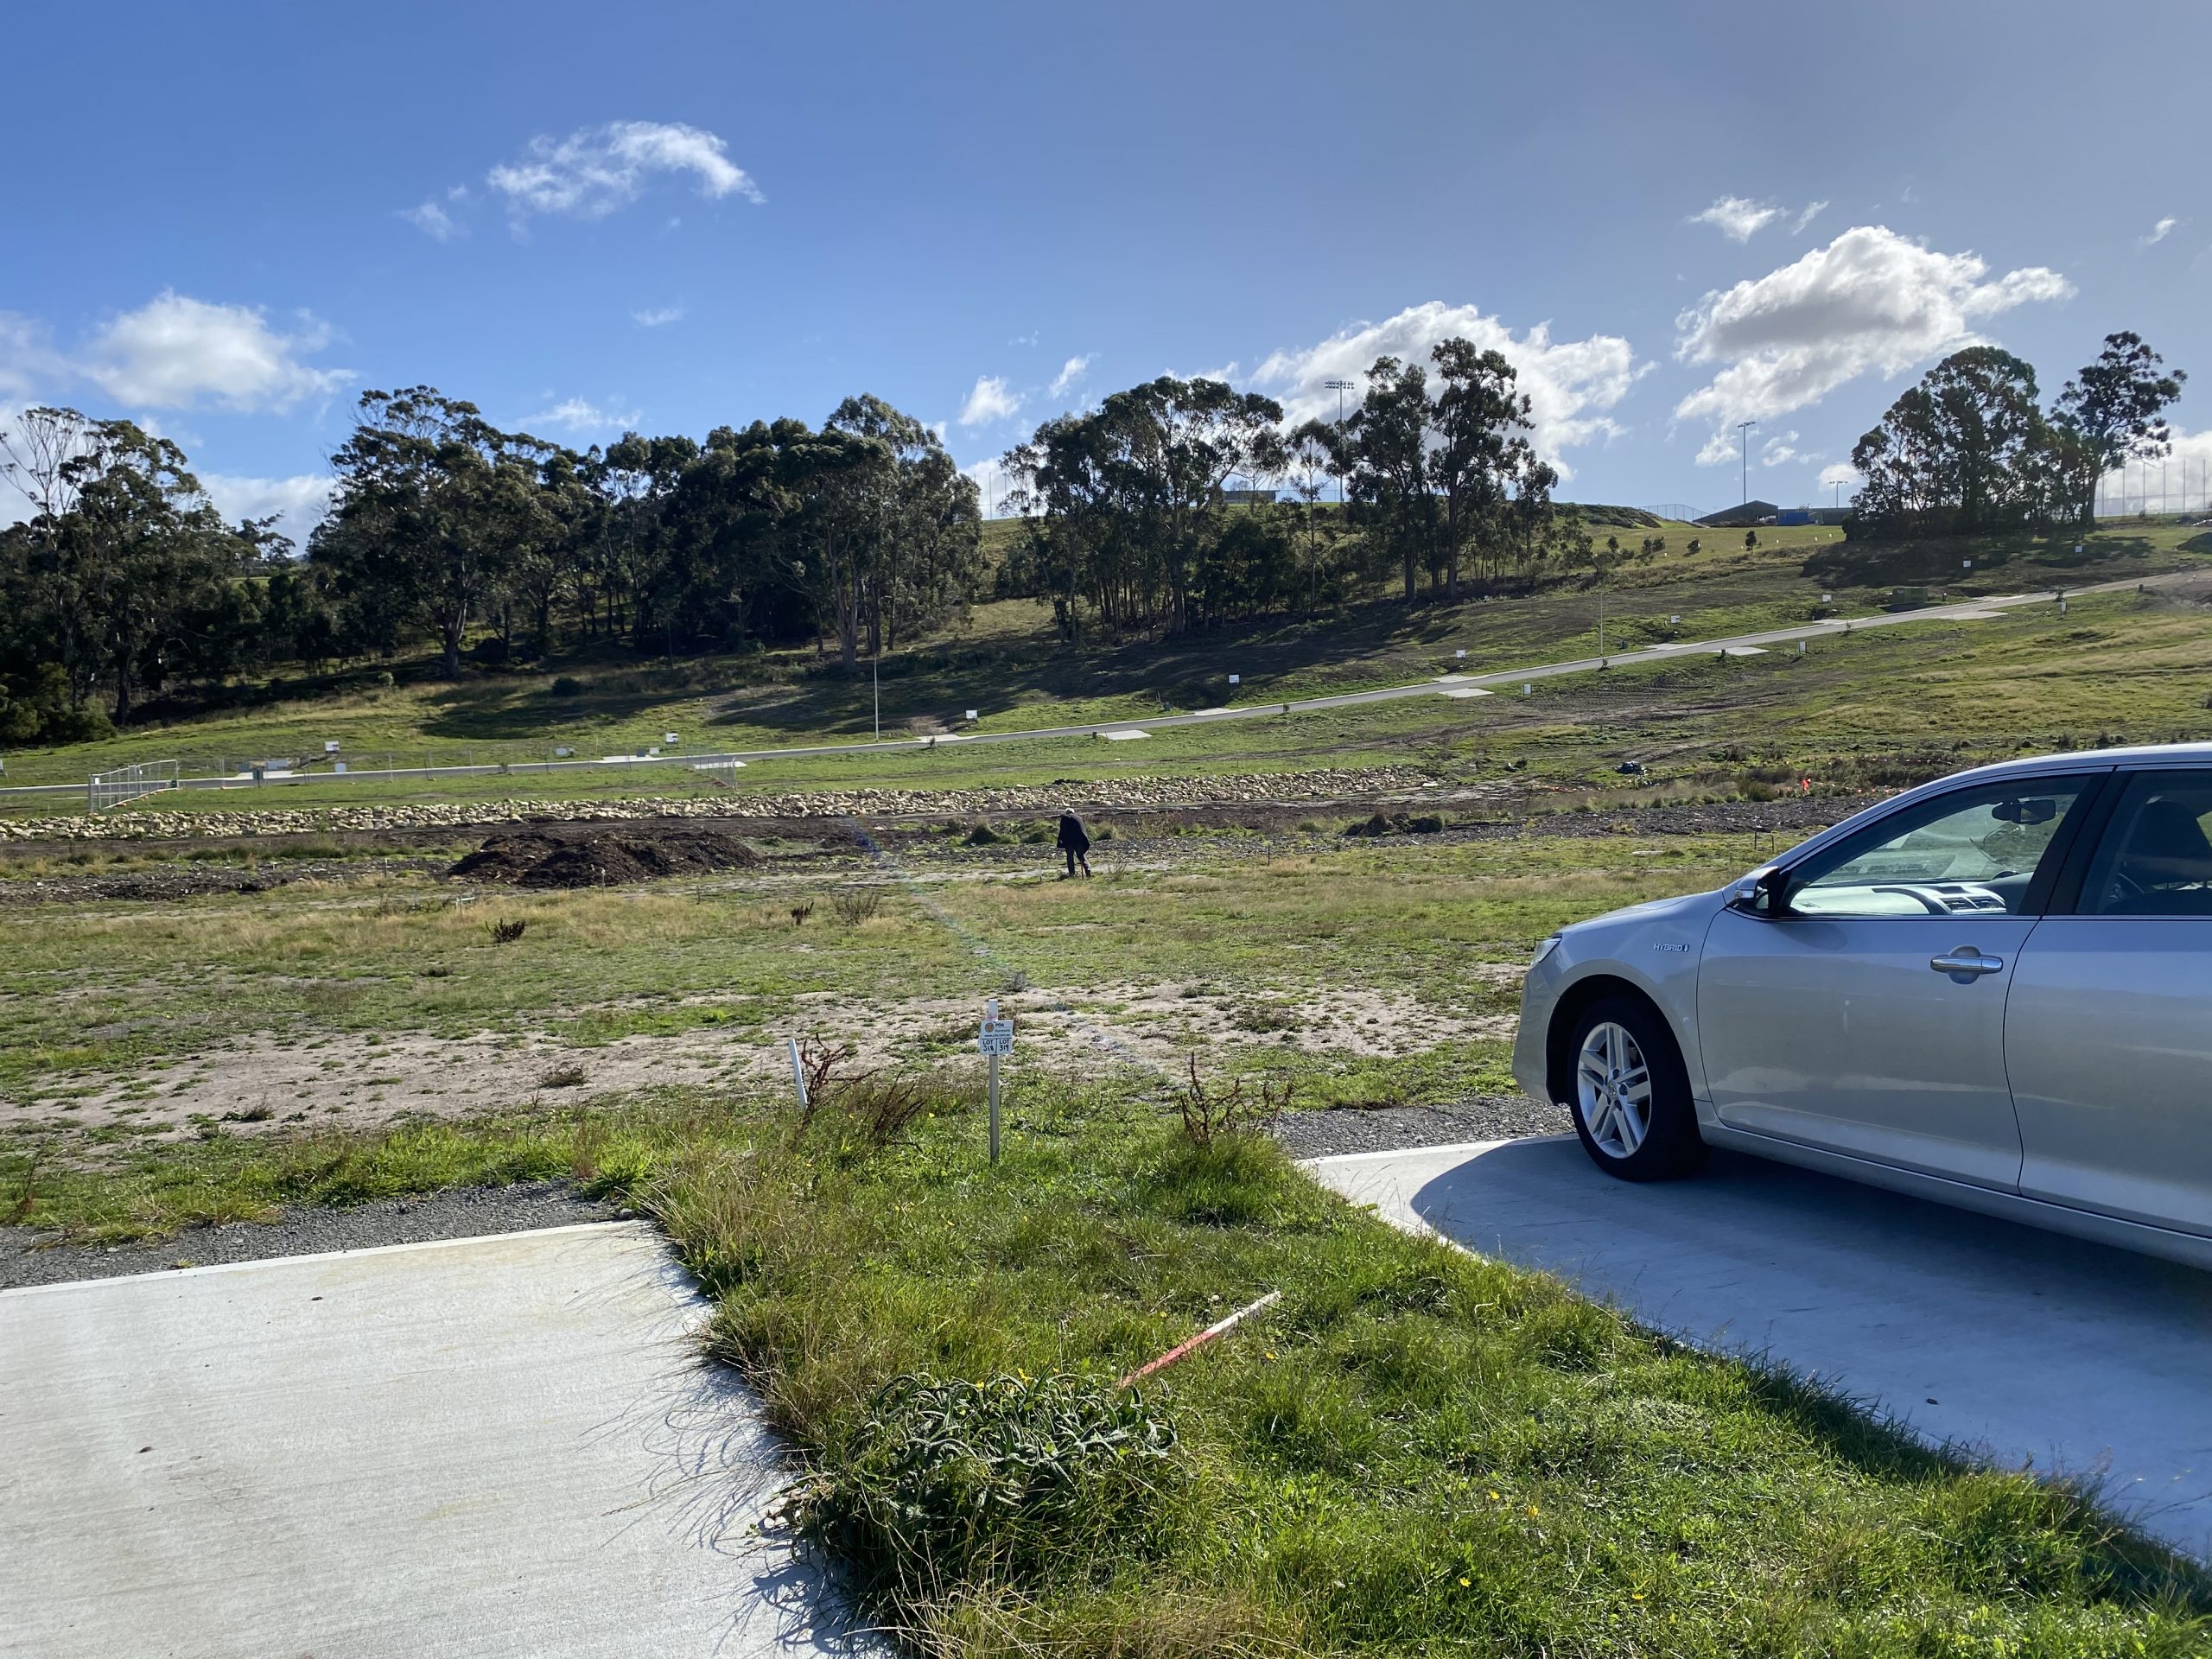
And so it came to pass that, three days ago, we became the proud owners of Lot 319 on the Spring Farm Road project in Kingston, Tasmania.
Can you see what it is, yet?
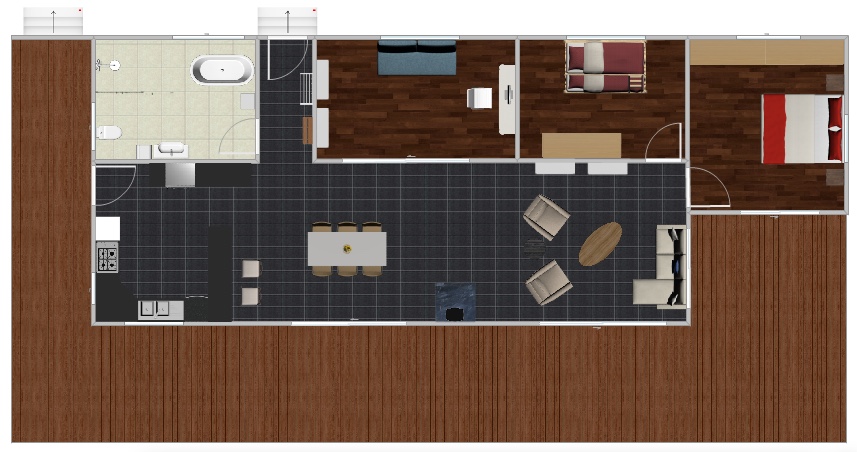
While the conveyancing was going through, we spent several weeks drafting the design of the house that we’ll put on it. This weekend, we’re signing a contract with TasBuilt Homes to start working on the full design.
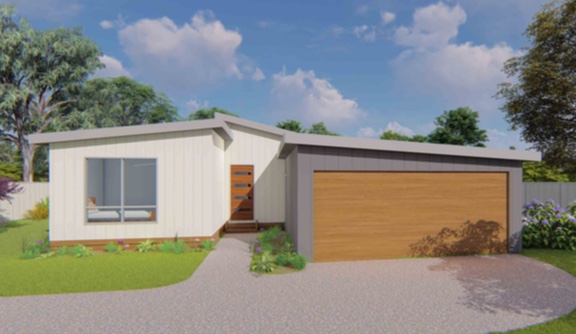
An artist’s impression. The colours are wrong, but the shape is right.
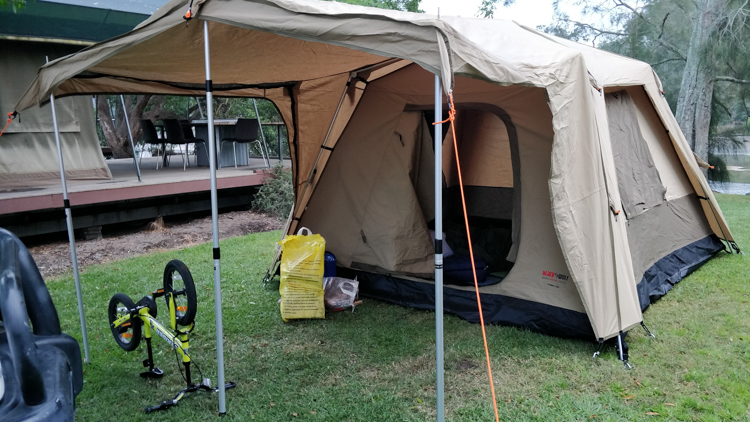
It probably won’t be finished in time for Christmas, but we do still own our wonderful forest, inside which is an area that has now been at least partially levelled. To that end, we have purchased a new tent in which we can live (and, if necessary, quarantine) until the Kingston build is complete.
We’ve been forced by the pandemic to put our plans for the forest on the back-burner, and instead to build a completely different house on a completely different plot. We now find ourselves under pressure to get the house finished so that we have somewhere to quarantine when/if we are allowed to relocate to Tasmania at the end of the year. At the time of writing, it isn’t clear how we’ll transit intervening Victoria, which is in a declared State of Disaster…
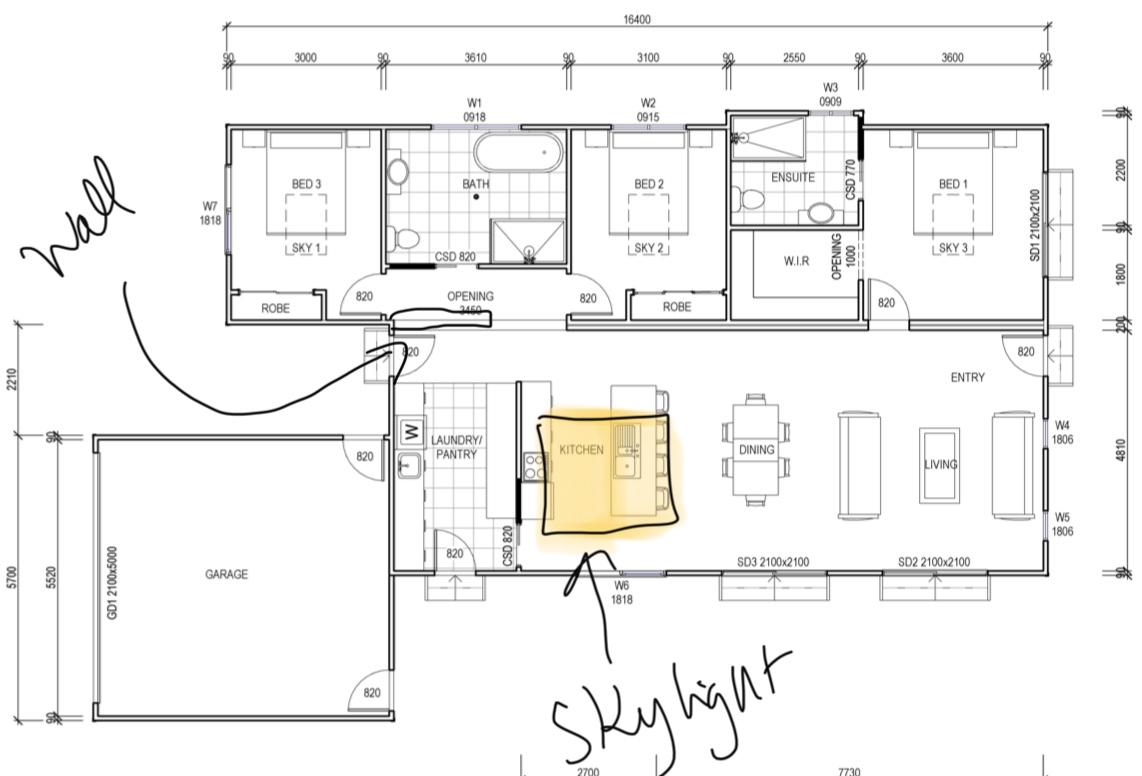
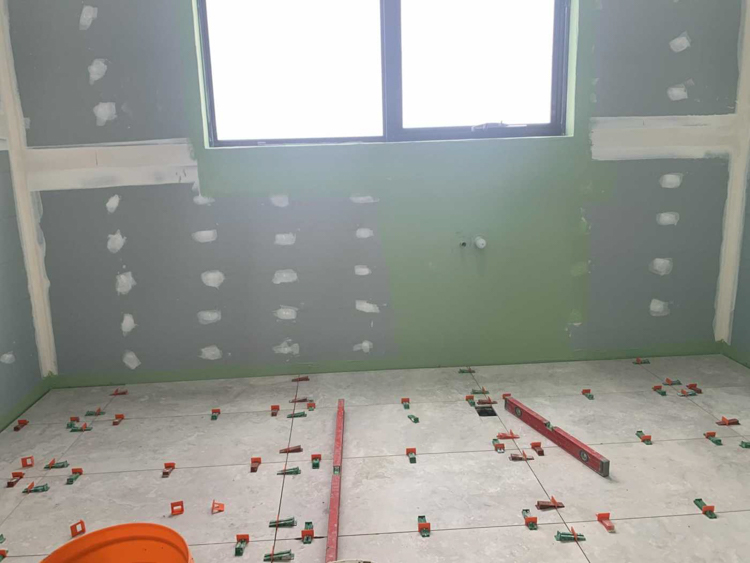
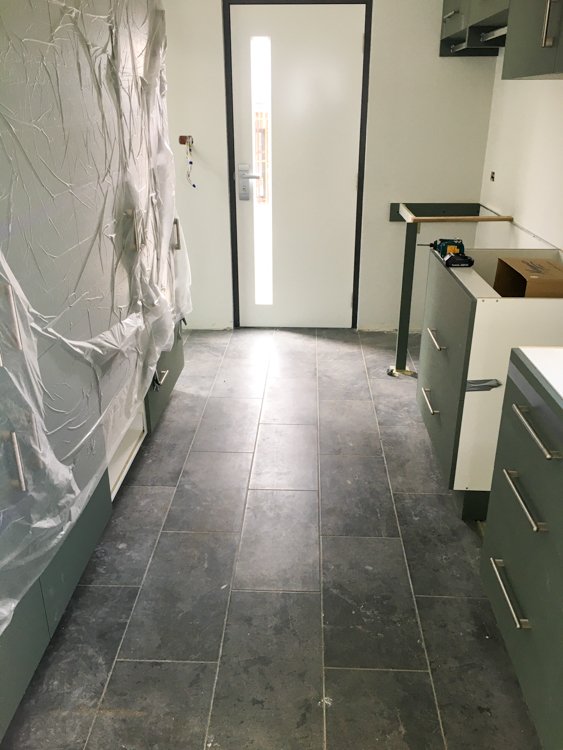
Putting those worries aside, we do need to crack on with our design. There is a tight deadline if we are to submit the plans in time for the builders to start ordering windows and other materiel, in time to get the prefabricated sections delivered to the site by the end of September. To this end, we have been having daily discussions with the builder and with various suppliers (fireplace, flooring, decking, solar heating) to try to get everybody on the same page before we submit the plans to Council.
Since everything is connected to everything else, we also needed to decide on the flooring and the tiles and various finishes up front, so that we have a good understanding of how they all work together; it would be disappointing, for instance, to find on the day that the top of the floor tiles (7mm thick) don’t line up with the top of the wooden flooring (14mm + underlay) and indeed the hearth of the fireplace. This entailed numerous trips to the tile shop, bathroom shop, kitchen shop…
Site Surveys
We had engaged a geotechnical engineer (Ian Newell at EAW Geo Services) to perform a soil survey even before our plot purchase was confirmed. We didn’t want any surprises about our foundation requirements, and thankfully we were graded H1 with stiff clay, which won’t give us any problems with a pier foundation.
Even though this is an urban block and not a bush block, we were also required by Tasmanian regulations to determine our Bush Fire Attack Level. We engaged another surveyor (Rebecca Green and Associates) who determined that we were “low risk”, something that we already knew but which needed to be backed up by a certificate as part of our planning application.
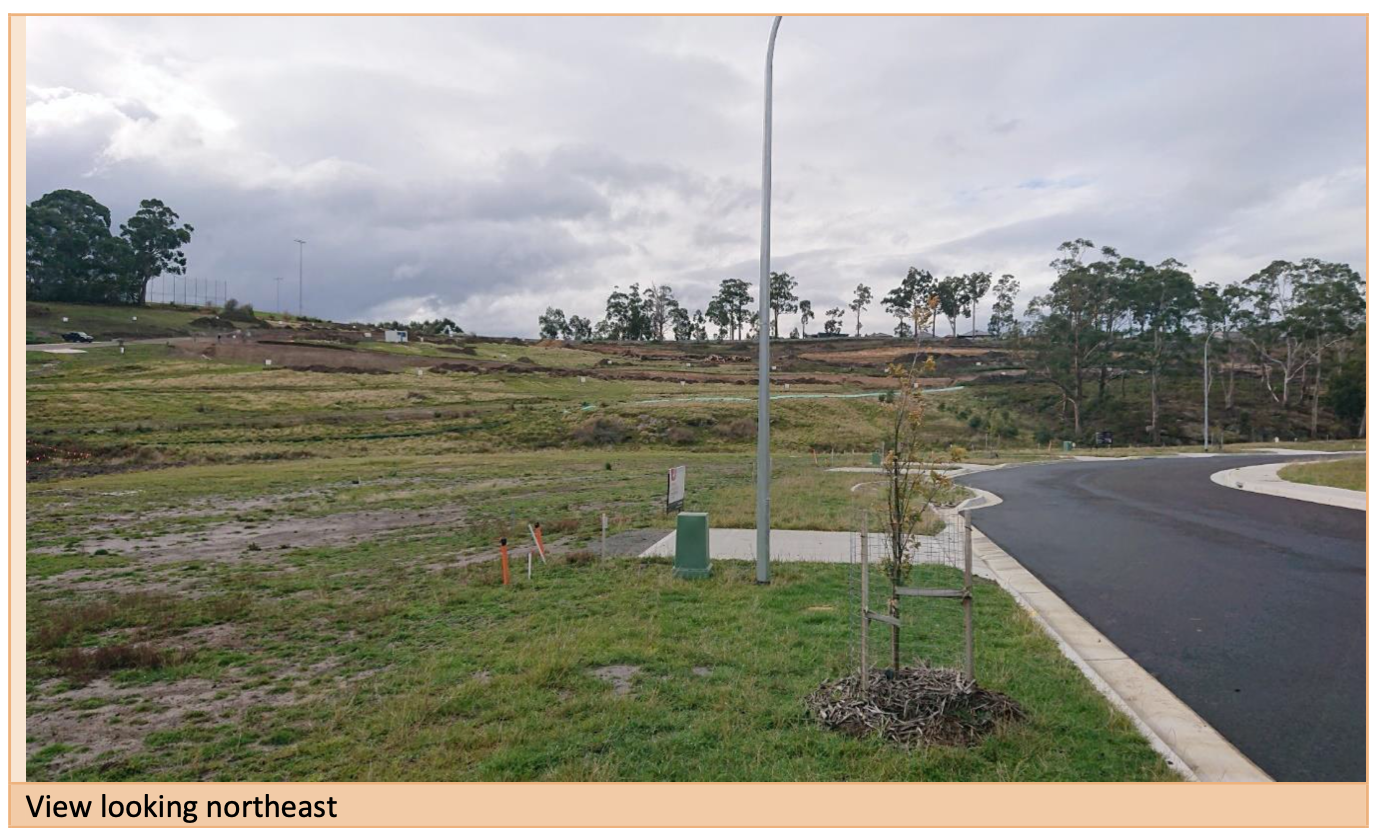
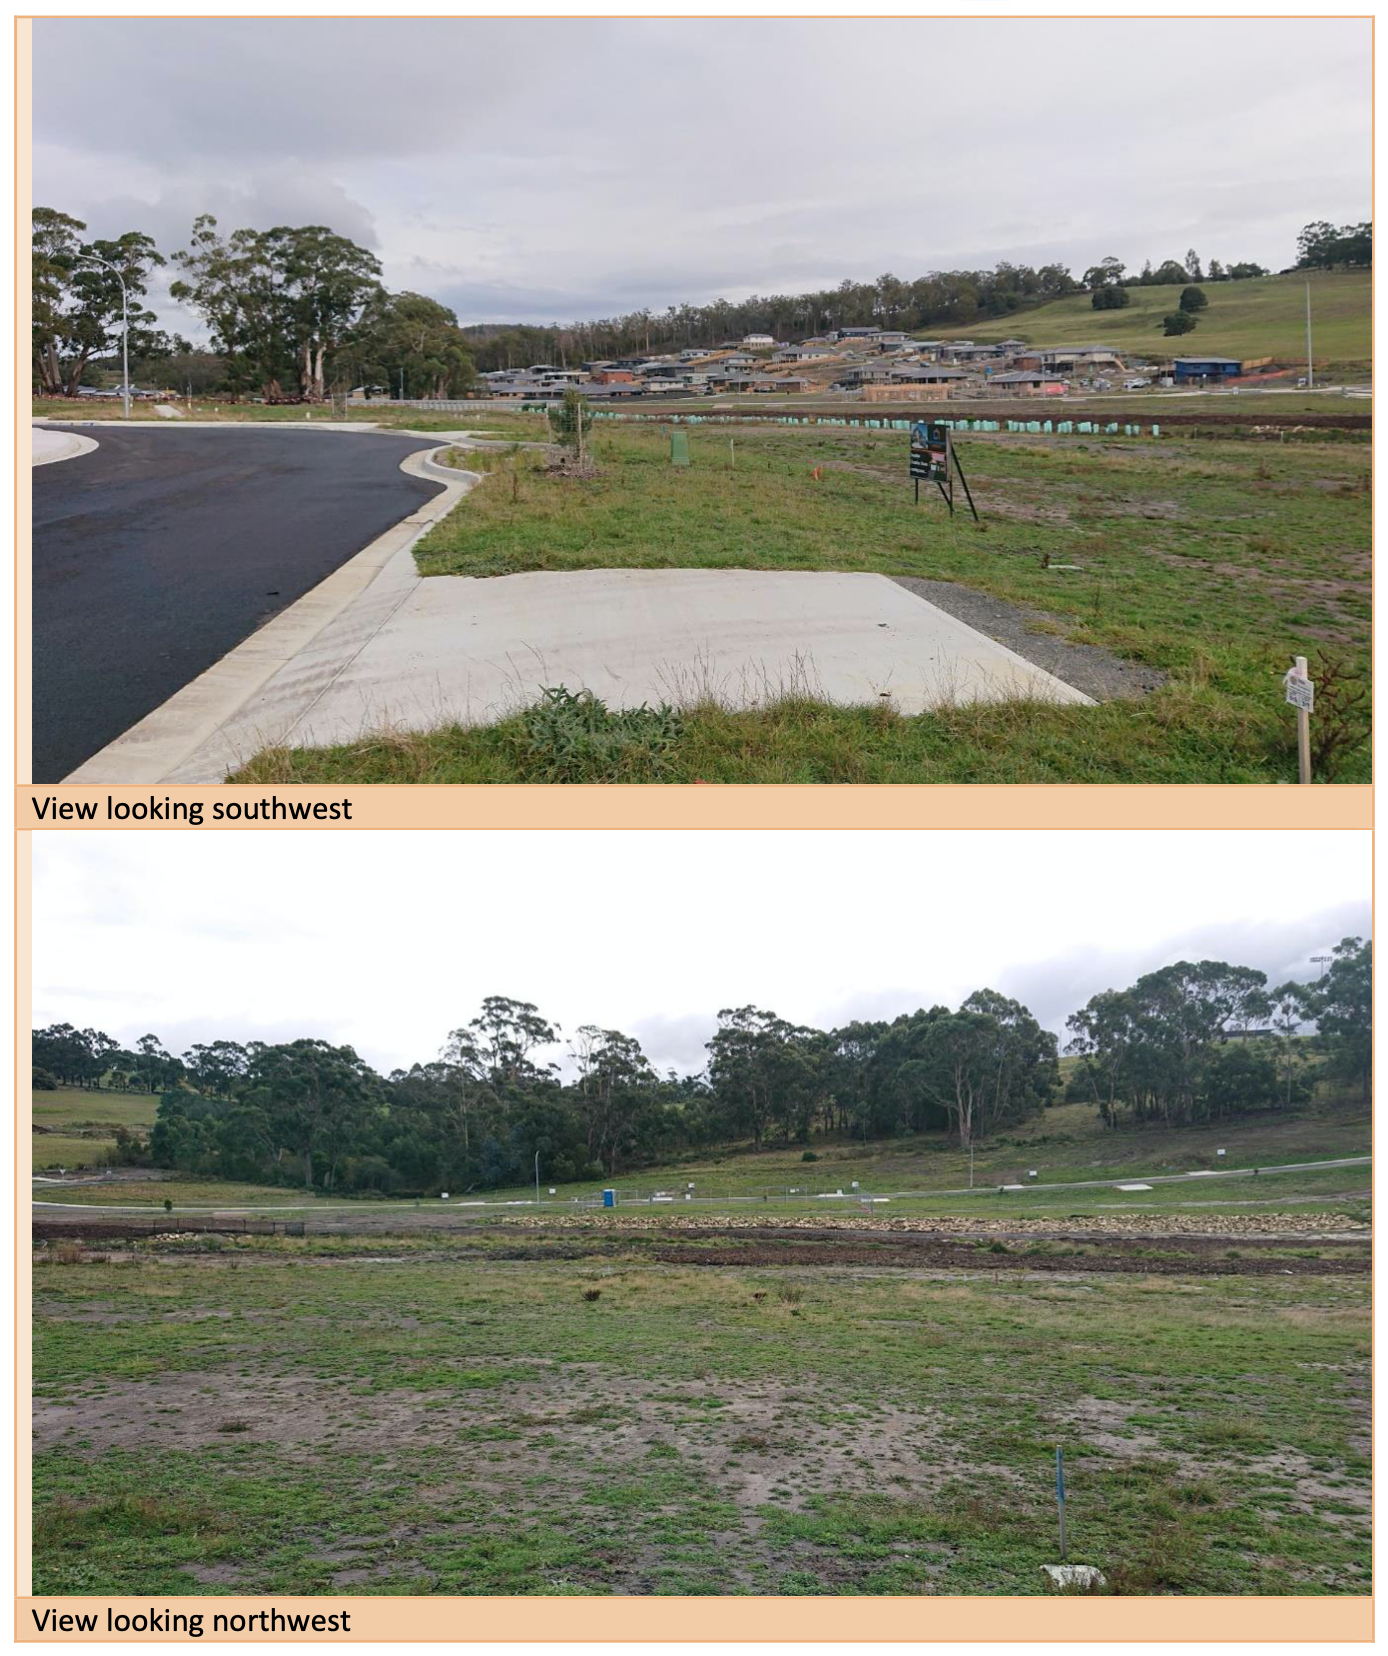
Bear in mind that, because of the current ban on interstate travel, we have never actually seen the block that we bought on the internet. One good thing about the Bush Fire Rating is that the surveyor must provide photographs of the surrounding vegetation in their report. Now we have access to current photographs! This gave us our first good view of the neighbouring blocks. We are a little surprised to find that nobody else had started building yet. Are we going to be the first?
The bottom view is our block.
Up on stilts
The plans were converging on a solution that fulfilled our requirements, but which didn’t blow our budget too badly. We were aware from Google Earth that there was a slight slope to the land, but since our house would be built on posts rather than on concrete foundations, we weren’t too bothered about it. Our previous plans for the property in Lymington had to deal with a much steeper slope, where we anticipated a deck standing over 3m above the terrain. For the Kingston house, we figured that there would be a drop of less than a metre from the lounge sliding doors to the garden, but we’d sort out some kind of step or low platform after the house was built. The engineers had made a similar assumption, roughing-in a few wooden steps on the design to make the doors accessible, but otherwise leaving them alone. When the rest of the design was largely complete, TasBuilt Homes sent a surveyor with a Dumpy to get accurate readings, and confirmed a fall of about a metre across the whole 30m length of the site.
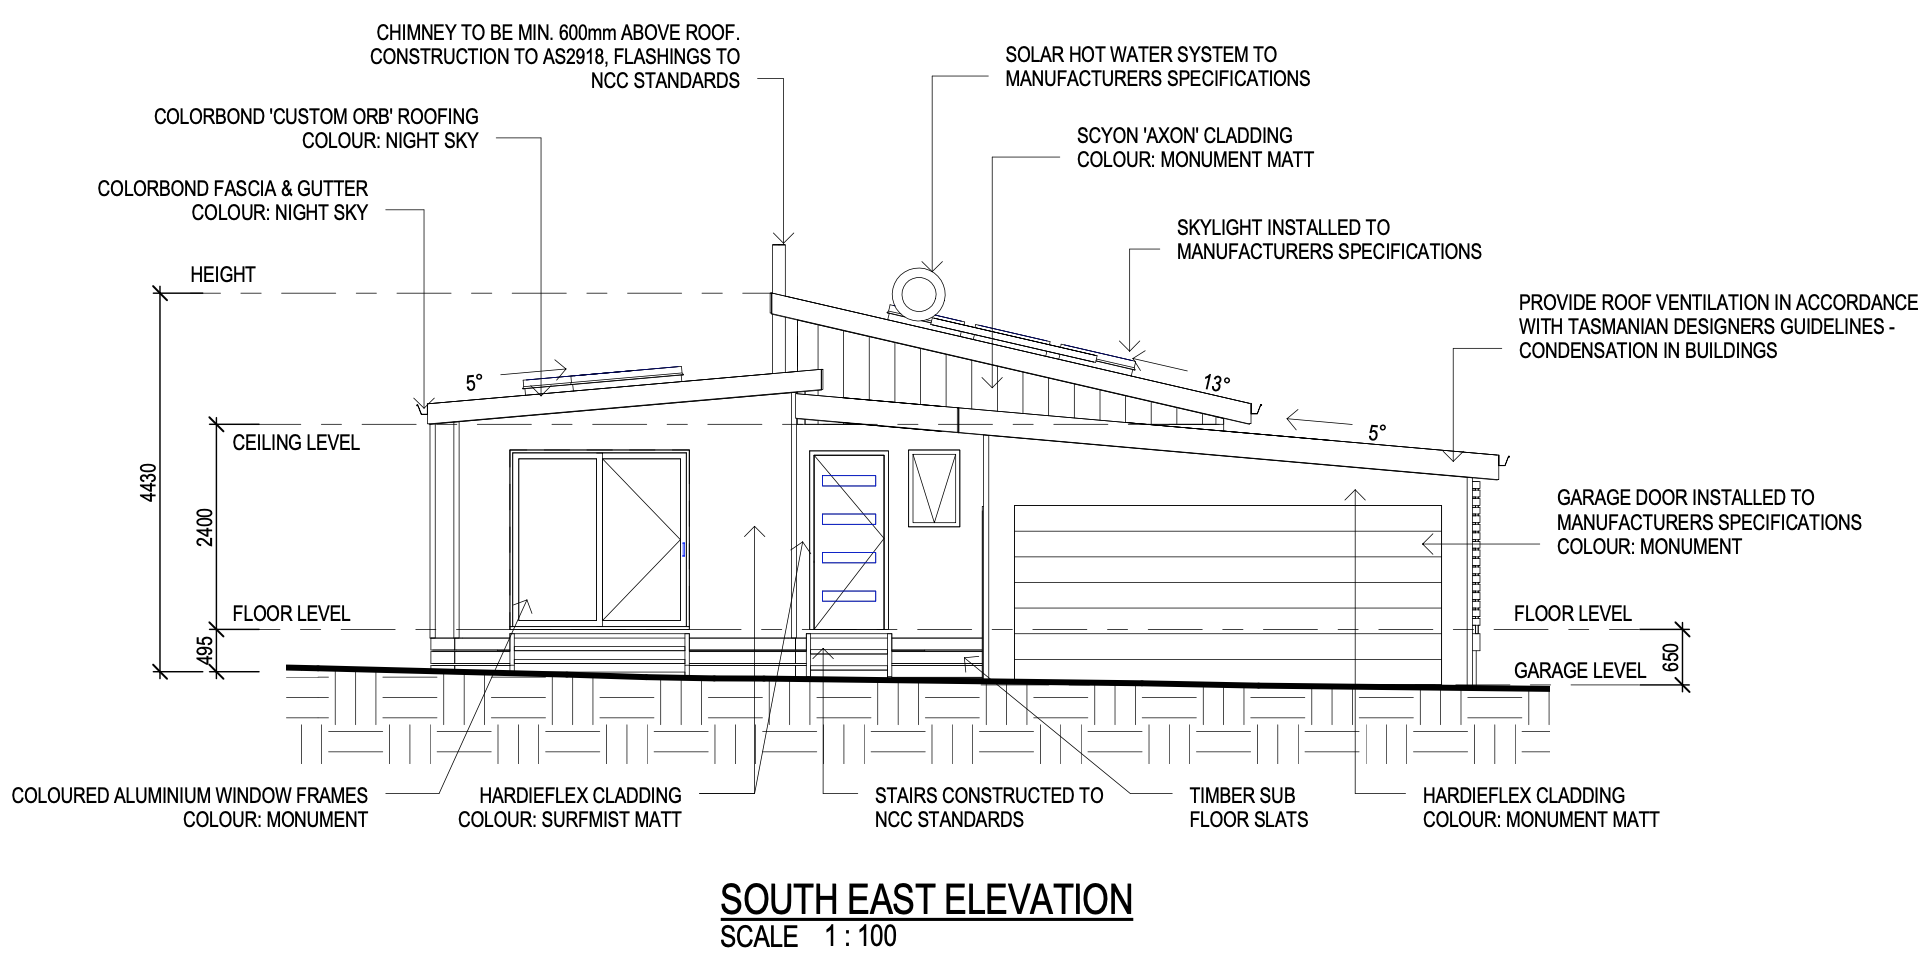
At about the same time, we were having interesting discussions about the slope of the garage roof. There is a local ordinance that the house and garage have to be roofed with the same material, but the style of Colorbond that we preferred for the house roof requires at least a 5 degree slope for drainage. The garage had a 3 degree slope, and if we increased that to 5, and extended the roof over the front door as a porch as we intended, it would interfere with the opposite eave.
Our choices were either to cut the garage into the ground (which would result in a garage floor below ground level with all the associated drainage issues, and would necessitate a more in-depth geotechnical survey), or to lift the entire house by about 30cm. That was pretty much a no-brainer, but when the architect plugged the new figures into their drawings, they found that the rear of the building would be well over a metre off the ground, and – under current Tasmanian legislation – we would need some enormous balustraded stairways to conform to health and safety regulations. Our slim and minimalist design suddenly sprouted all kinds of ugly appurtenances which pretty much wiped out the entire garden.
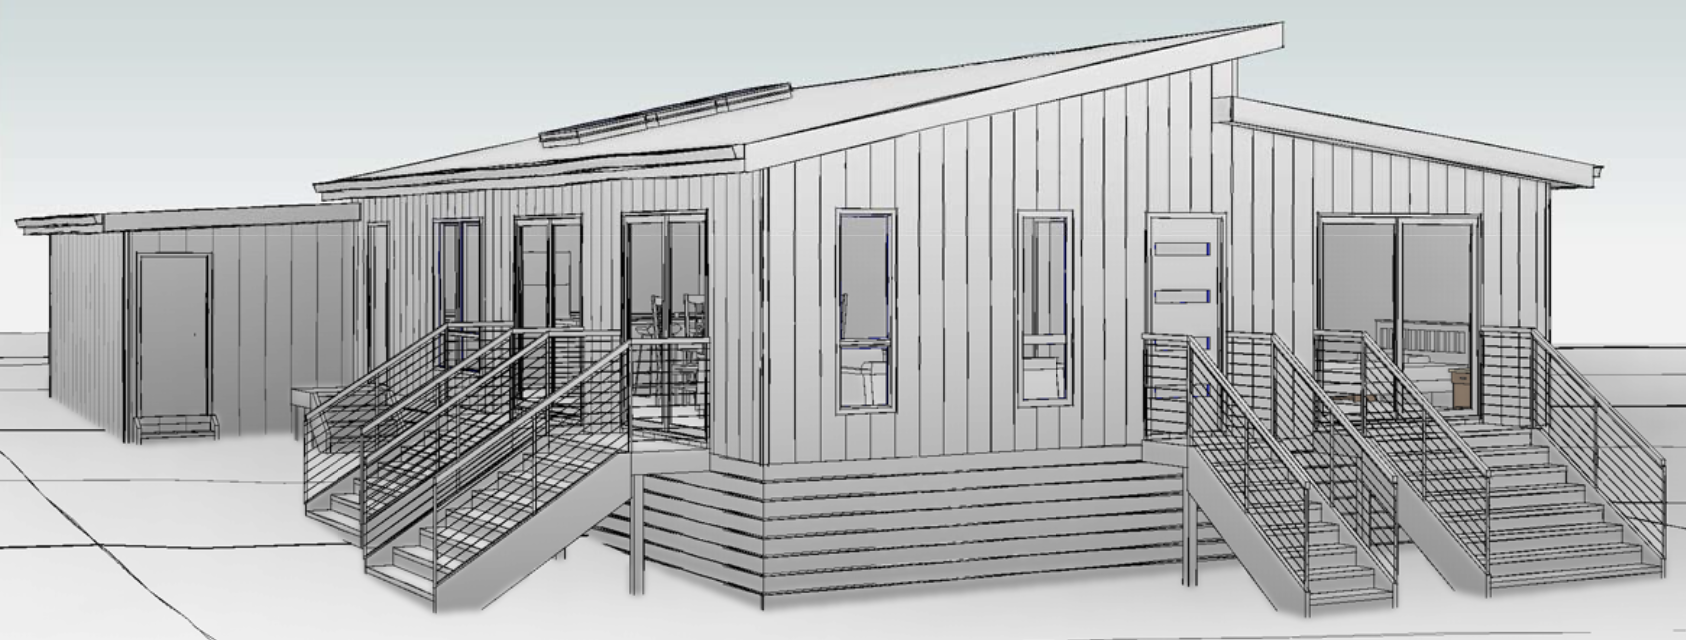
Oh no! Where did all those stairs come from?
In order to get rid of the stairs on our planning application, we needed to bring in the deck design a bit earlier than we had anticipated. After all, it’s just a budget, hey?
Thankfully, Bronwyn had already been talking to a local deck builder, and he was able to quickly come through with some specifications for the planning application. Our main deck, which was originally going to be a low platform along the side of the house (so low that it didn’t need planning permission), was now up on significant stilts, which meant that we’d also need a privacy screen. We also created a small back deck for our bedroom, so that we’ll be able to drink tea as the sun comes up.
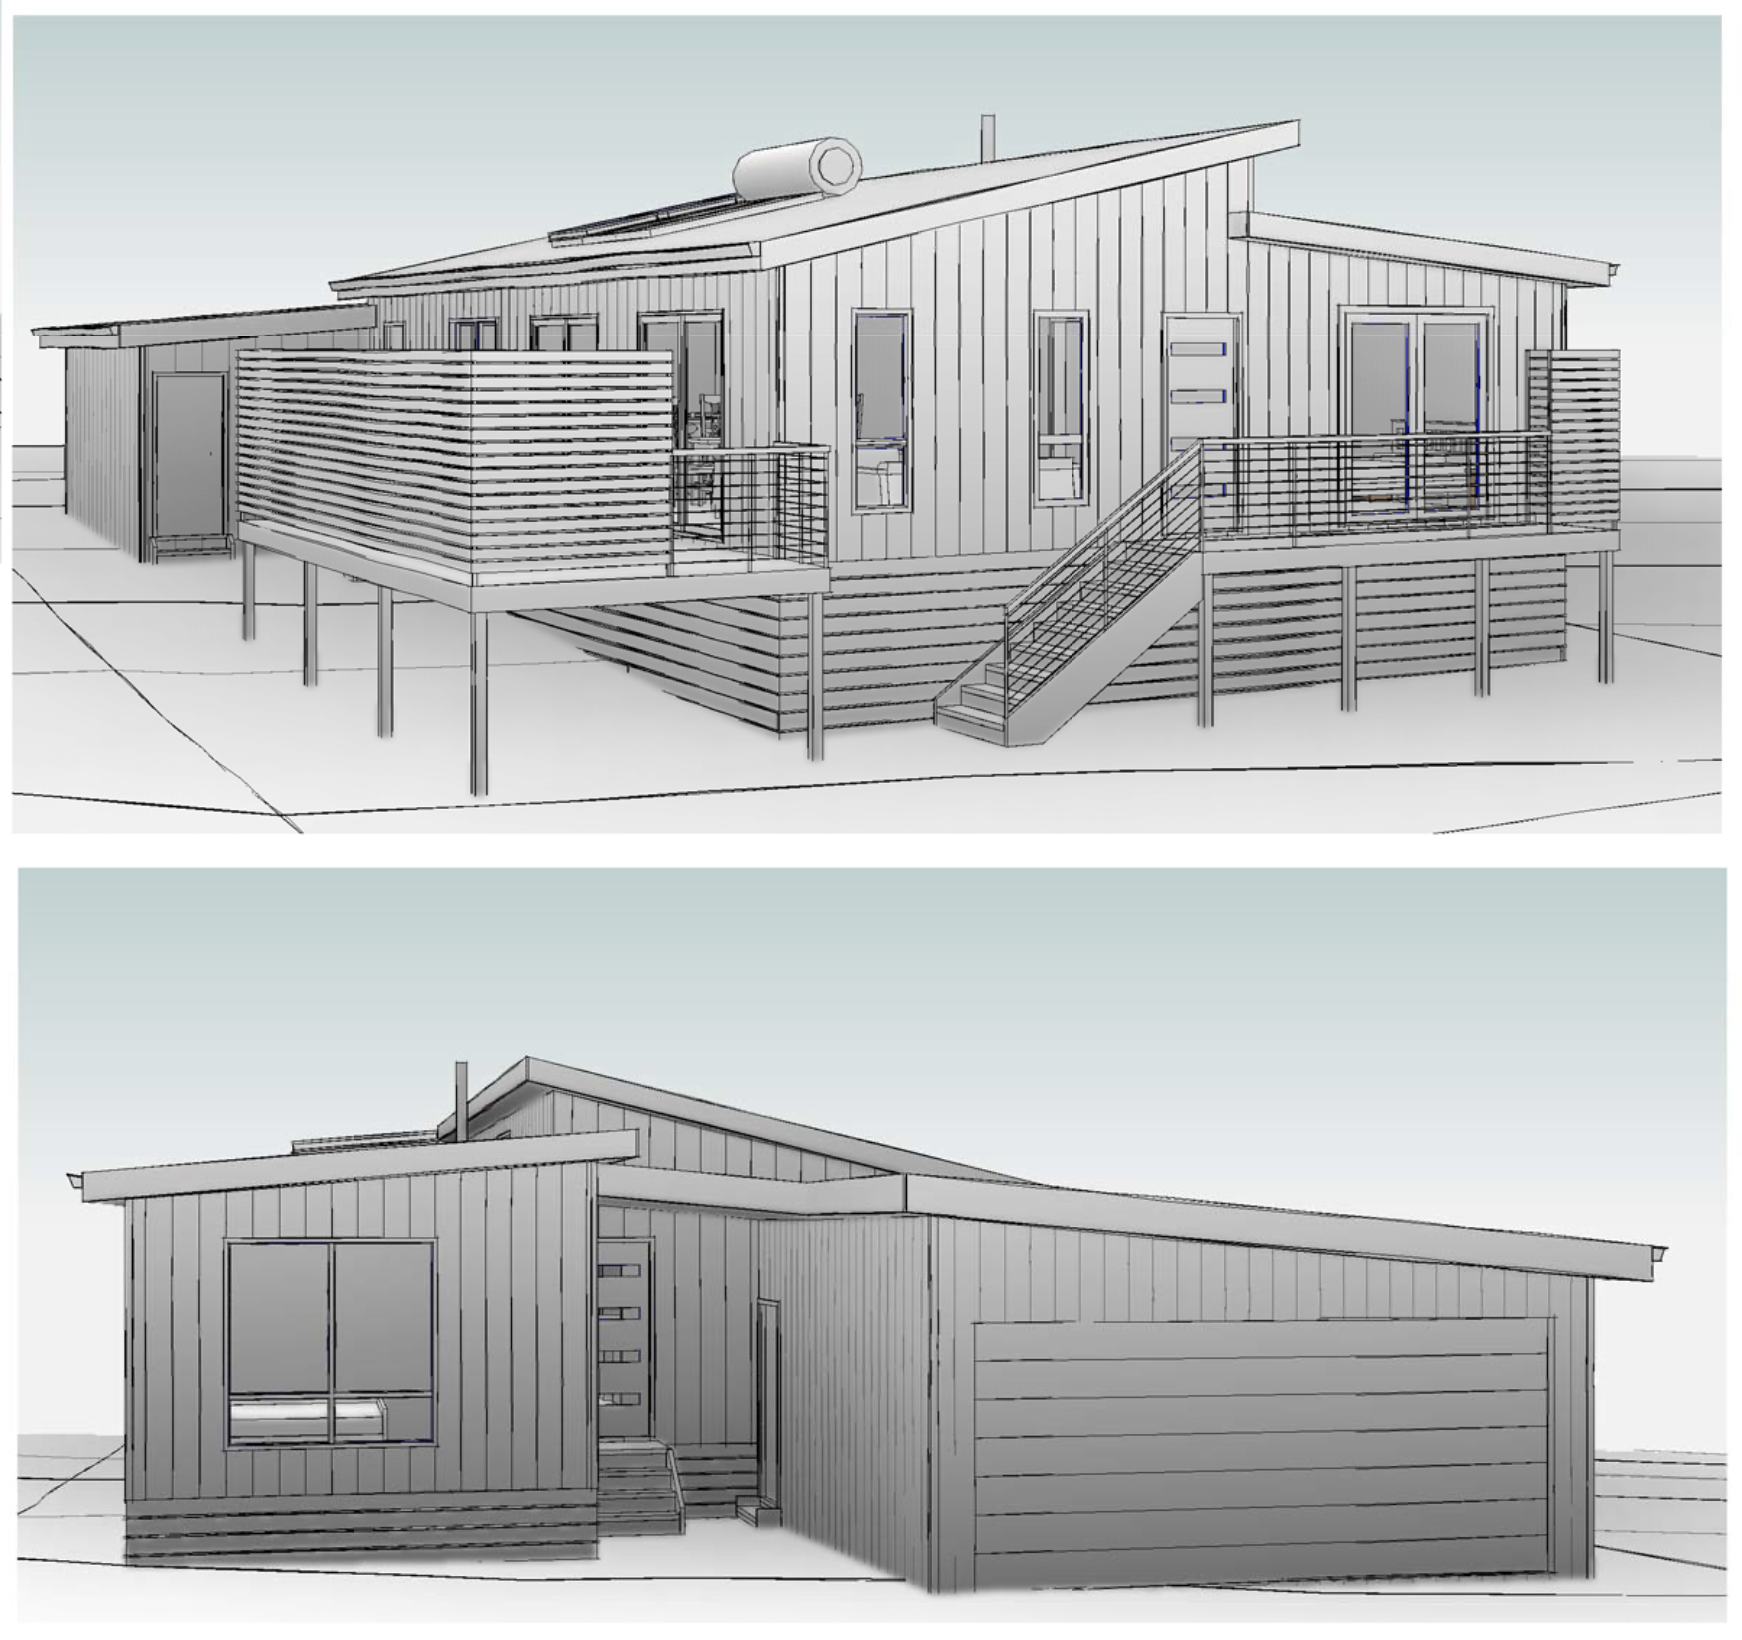
OK, this should work.
It was time to lay down our first serious payment, tens of thousands of dollars, to the builders. They are now submitting the plans to the Council.
Now that our plans had been submitted to the council, all we needed to do was open some champagne, sit back and wait for the build to start, right? Mmmmm no. Not at all. The builder introduced us to the Decor Sheet, a couple of dozen pages in which we needed to itemise in excruciating detail every inch of the exterior and interior of the house.
This was mind-bending stuff. We’d never before realised just how complex a system a house is. Every design decision influences other aspects of the design in ways that are hard to predict until you have gone down the path, and then wound back to try another route. Almost every evening, for months, we fired up the laptop and launched the current version of the Decor Sheet and talked our way through it, again and again, Googling our way through the unfamiliar terms. Did we want square set apertures, droppers, finials? And if so, why?
The first part of the Decor Sheet deals with the outside of the house; building materials, colours and so on. As time went on and we made firm decisions, we signed off first new version A, then version B of the original plans. We then realised that some of the decisions that we’d made about the exterior affected the interior, leading to version C, which raised questions about the roof, which led to version D, and so on.
The “exterior” part of the Decor Sheet needed to be signed off far ahead of the “interior” part, and although it was a bit stressful, we did manage to get it done. The next step was to deal with the “interior” pages, and at about this time, the wheels seemed to come off the builder’s bus. They were supposed to be helping us through the design process, but suddenly they weren’t responding to emails or answering calls. The only response we could get was that they were “very busy”, but that we still needed to complete the Decor Sheet by a specific date, otherwise we would “lose our place in the queue”.
The Colourist
We have no idea how to choose a colour scheme for a house, or how to design a kitchen or bathroom. I mean, why should we? Like anybody else, we know what we like, but how on earth were we suddenly supposed to become interior (or indeed exterior) designers? The builder had originally promised expert guidance, but that guidance was clearly not forthcoming.
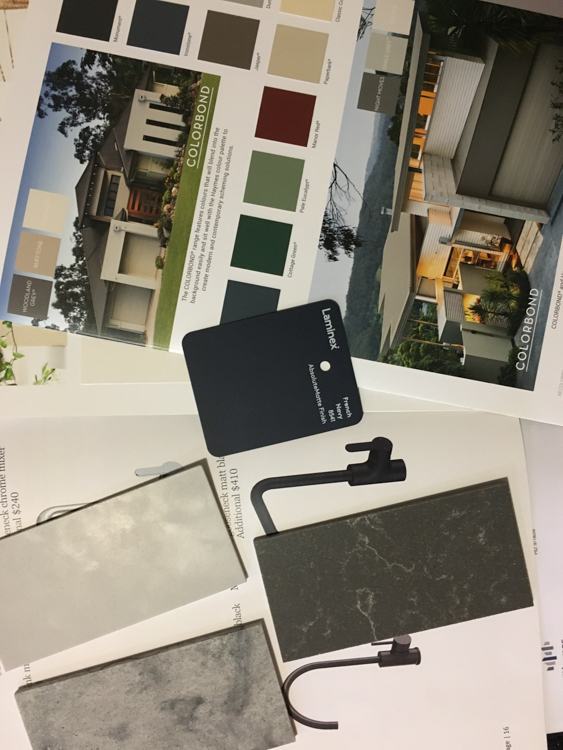
For around a hundred dollars, we engaged a “Colourist” through the local paint shop. She was amazing! We had originally intended to talk to her about interior walls, but she got the bit between her teeth and revamped the exterior as well, with full and frank advice about the whys and wherefores of her decisions. We left the shop with an armful of colour chips and, for the first time, a warm fuzzy feeling that we were getting on top of things.
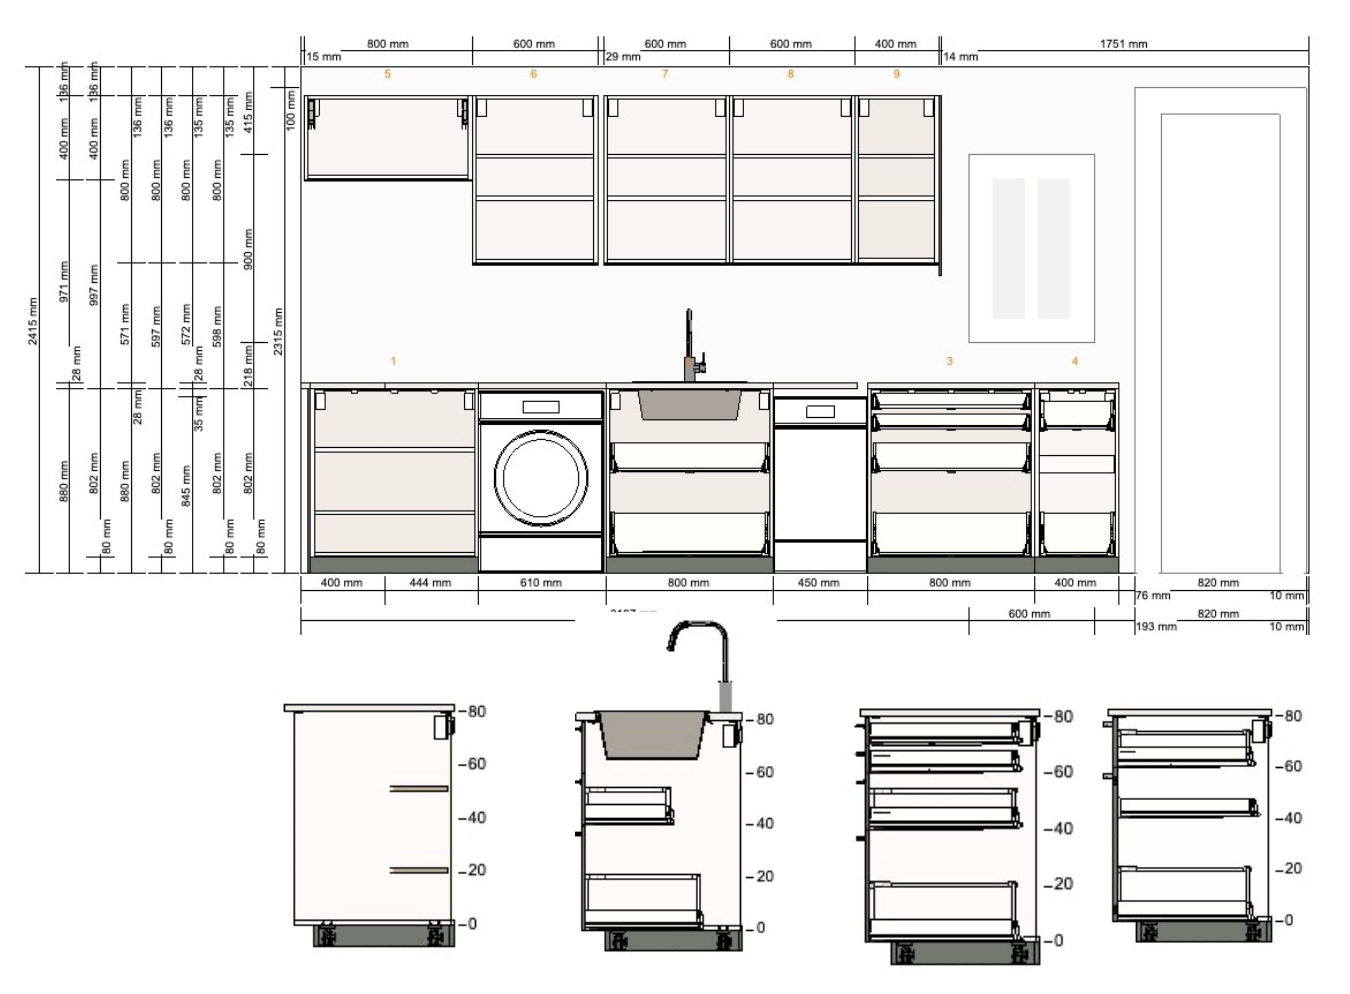
The Kitchen Designer
That warm fuzzy feeling persisted until we started on the kitchen. We already had a somewhat ambiguous relationship with the builder’s joiner, whose response to any request for advice about cabinet making was “We can build anything!”, which was hardly helpful. She had a particular penchant for making drawers and cupboards in unusual widths “to make them fit”, without any thought of how we might use them in real life.
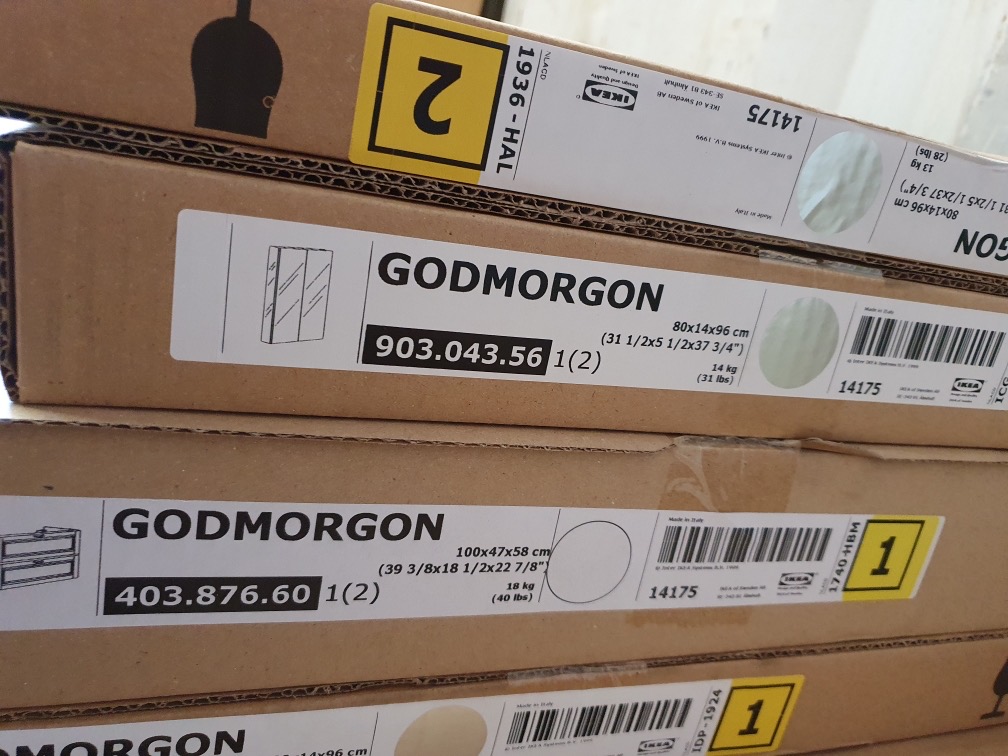
With no practical advise forthcoming from that direction, we downloaded the kitchen design tool from Ikea and messed around with it. It’s a great tool, but we still didn’t feel that we were qualified to make our own decisions, so we made an appointment with an Ikea consultant. He came round to the house and at first was unwilling to provide actual advice beyond recommending products that fitted our specifications, but Bronwyn convinced him to think a bit more laterally and a few hours later, the two of them had thrashed out a rather nice design for both the kitchen and the pantry.
All of the cupboards and drawers were carefully designed to match standard-sized Ikea kitchen products, so that we would have no trouble finding inserts and trays for them. We did want the kitchen to be installed by the builder in their factory, rather than after-market by Ikea or anybody else, so we sent the finished design to the builder, who gave it to the joiner, who copied the basic design into his plan, but stretched all the cupboards out “to make them fit”…
We soon sorted out the joiner’s little game, and got the kitchen cabinet plans changed back to the way we’d designed them. However, the whole experience got us thinking about the limitations of having built-in wardrobes and cabinets. After all, if we wanted a wardrobe, we could get a free-standing one, and if we wanted to change the function of the room in the future, we could just move that wardrobe somewhere else. If everything was built-in, which was the builder’s default option, then we would lose that future flexibility.
OK then, we removed all the built-in wardrobes from the Decor Sheet.
Bathroom Design
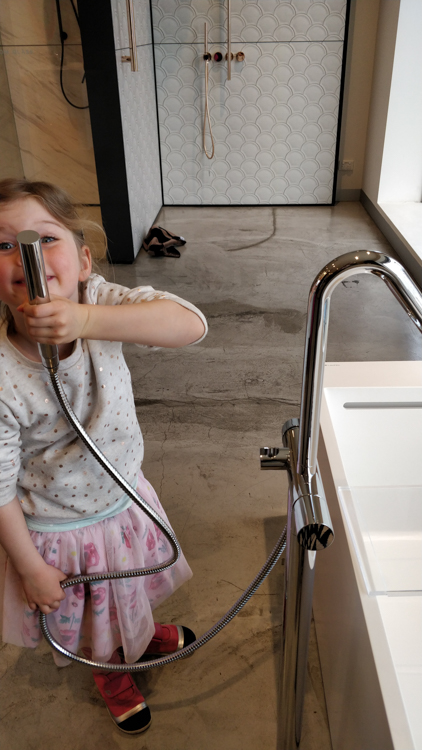
For similar reasons, we decided to “Ikea-ise” the bathroom. We’d already decided on the floor and wall tiles, so now this meant also choosing our own bath, vanity units, sinks, taps, and other paraphernalia for each of the two bathrooms.
Some of the items were available from the builder’s own suppliers, so we let them deal with that. Others, such as some fancy tap ware, we purchased ourselves, and will freight directly to the factory. When it came to the bathroom furniture, Ikea Melbourne will deliver to Tasmania via the ferry, but we didn’t want the goods to arrive either too early (and lie around in the factory, potentially getting wet or damaged) or too late (thus delaying the build), so we rented a storage facility close to the factory and had them delivered there.
When the builder is ready to receive them, we’ll hire a local driver to pick the boxes up from storage and take them to the factory.
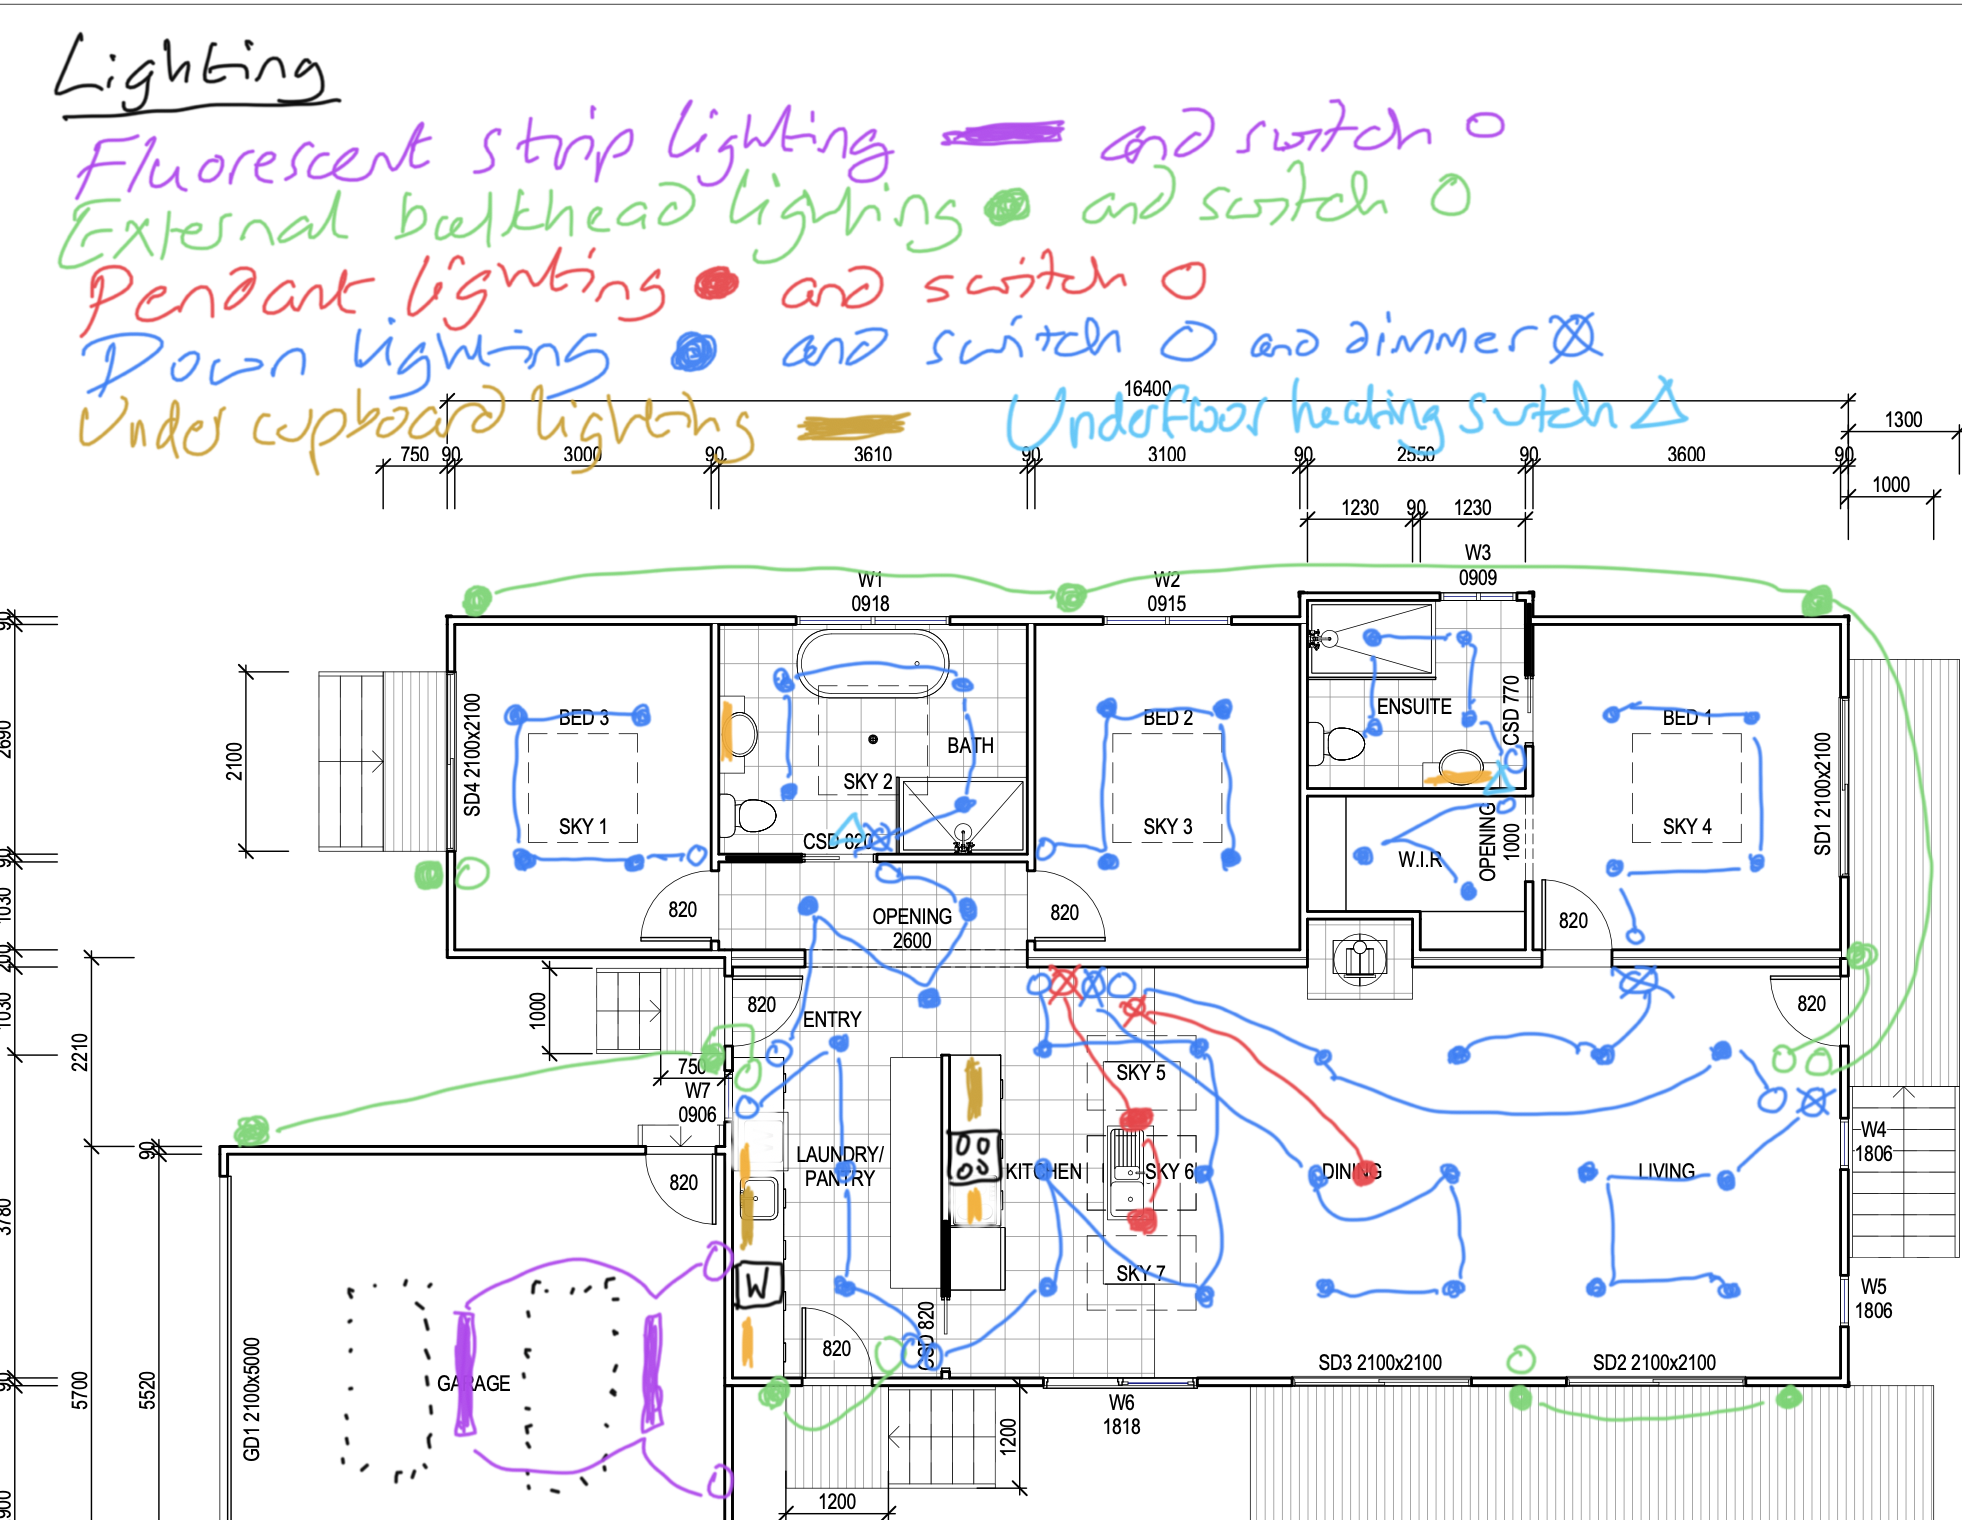
The Electrical Plan
There’s a part of the Decor Sheet that says “create an electrical plan”. Eh what? So not only are we required to be colourists and furniture designers, now we need to be electricians, too? Apparently.
We knew this was coming, and for months I had been trying to get a template from the builder, so that we had at least a vague idea of what kind of documentation we were supposed to provide. Eventually, after even more bugging and prodding, we received a snippet of somebody else’s Electrical Plan, and found that it was simply a plan view of the house, with all the lights, sockets, switches, data, and specialist power supplies marked.
Sure, we can do that! The power and data plans were reasonably easy; maximum power and data everywhere, to cater for every possible change of use for a room. No worries.
But when we turned to the lighting plan, we ended up once more going down the Google rabbit hole. How many downlights should we have per square metre? What’s the best way to arrange lights in a bathroom? And then, once I’d started drawing in the switches, I realised that you could easily get into a situation where you couldn’t comfortably turn the lights out on your way to bed, or turn them on if you entered through the back door at night, or what if you came out of the office at night and wanted something from the kitchen…?
It was mind-boggling, but I believe that I thought of everything.
Variations
As each change is made to the Decor Sheet, it affects the original quoted build price, which was based around a set of standard inclusions. These changes are supposed to be recorded in a document called a Variation; when we remove items from the plan, the price goes down, and when we add new ones, it goes up. At least, that is the theory, but the builder had stopped talking to us and we had no firm idea of where we stood financially. We knew that some of the early changes that we’d made, such as the Velux skylights, and moving the driveway from one side of the plot to the other, were large-ticket items, but we had still received no quote for them. Without knowing how much the build was going to cost, we were running into problems with financial planning.
It wasn’t just the money; we were trying to make important decisions, many of which required interaction with the builder, and it was as if they had just written us off. One night, after poring over the plans and figures and Decor Sheet once again, I got fed up with the whole thing, and emailed the builder to inform them that we were not moving forward with the build or paying them any more money until all of our outstanding questions were answered.
Early the next morning, the somewhat nervous and apologetic builder arranged a Zoom meeting, and shortly after that all the remaining issues had been addressed, including a properly itemised Variation. We spent a couple more evenings going through the dreaded Decor Sheet, checking it line by line, and then we signed it.
It’s been a month since we received our Planning Permit from Kingborough Council, but sadly this didn’t give us the right to actually do anything. Possession of a Planning Permit merely confers upon us the right to apply for a Permit To Build. Until we receive that second document, we can’t even break ground on our land.
Time is ticking on, and Council is still sitting on our Permit to Build. Without that document, we not only can’t build, but we can’t get a loan. The bank are patiently sitting on our loan application, but we’ve already had to ‘refresh’ our loan paperwork once already, when the bank statements and so on that we’d provided went out of date. It is frustrating because we’re still making substantial payments to Get Things Done, and our cash reserves are dwindling. In addition, part of our contracted agreement is that the foundations must be “substantially completed” by early November, and it’s now late October and we can’t get them started.
If we’d been building in the traditional manner, on concrete foundations at our property, we’d now be up the proverbial creek, with no way of getting the build done in time. We are, after all, moving to Tasmania in December.
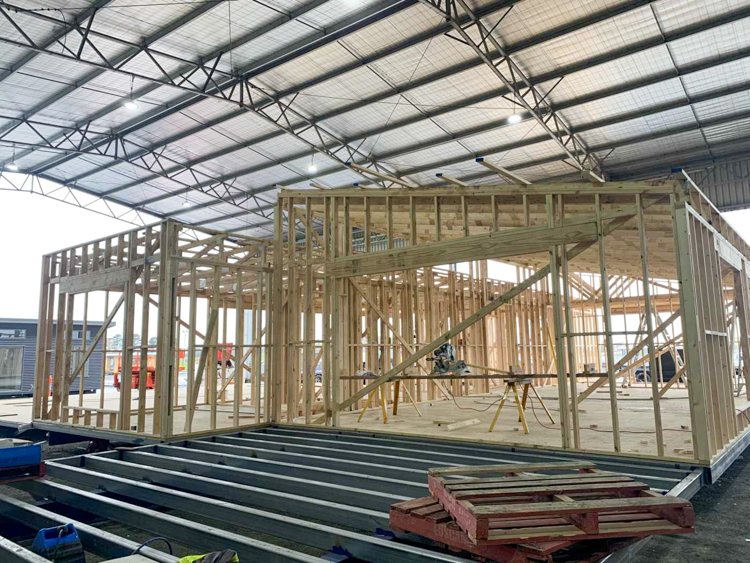
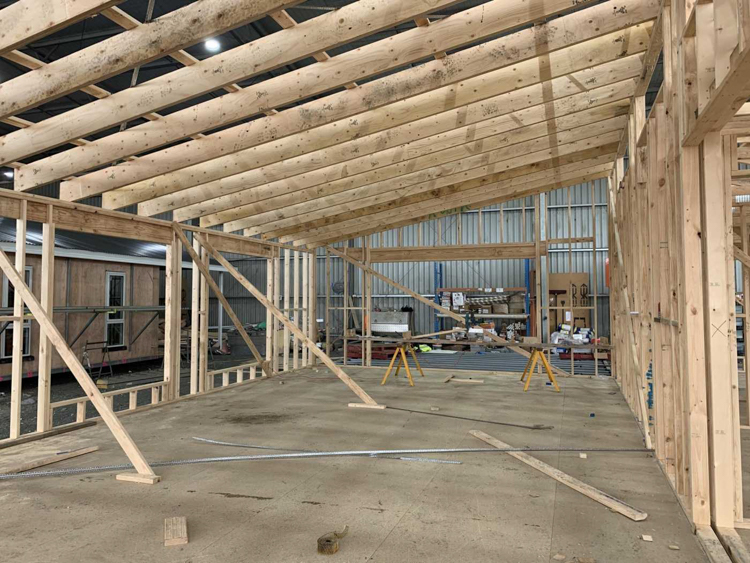
Luckily, the house is being built off-site as two separate wings in TasBuilt‘s factory, and we had enough cash to get them started with the framing and windows, so they forged right ahead and started building. The framing was done in a couple of days.
Framing for the front of the house, showing both wings (Sep 28)
Framing for the cathedral ceiling of the living wing (Sep 28)
A view through all the bedrooms and bathrooms of the service wing (Sep 28)
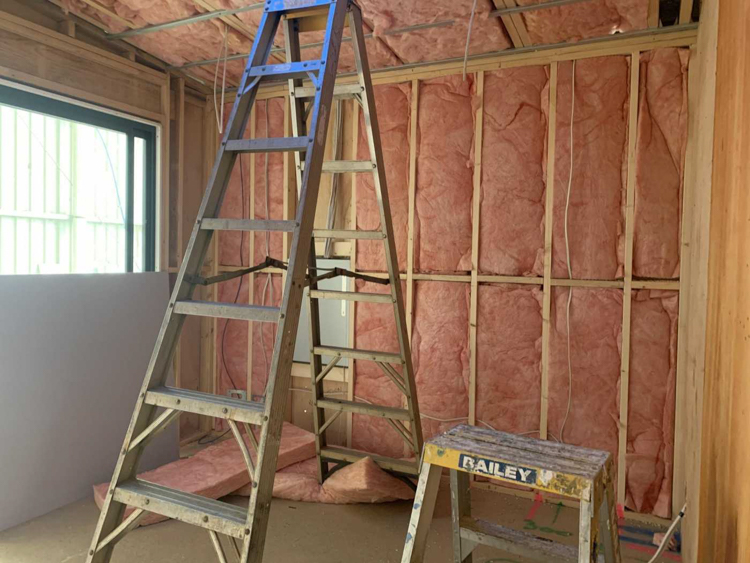
Despite the fact that we can’t pay the builders any more money until our loan goes through, their factory has its own timetable and they were keen to continue; a week later they’d installed the windows, electrics, and made a start on the insulation.
Electrics in the living wing (Oct 10)
External wall insulation to the front of the house (Oct 10)
Internal wall insulation in one of the bedrooms (Oct 10)
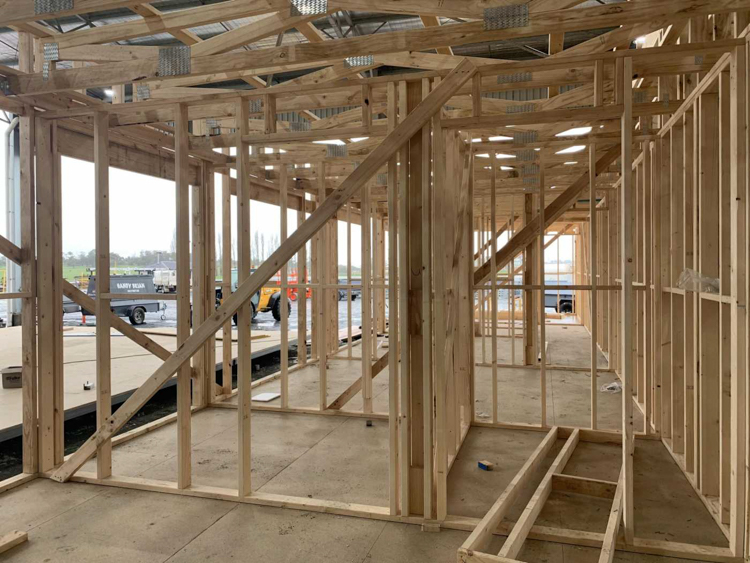
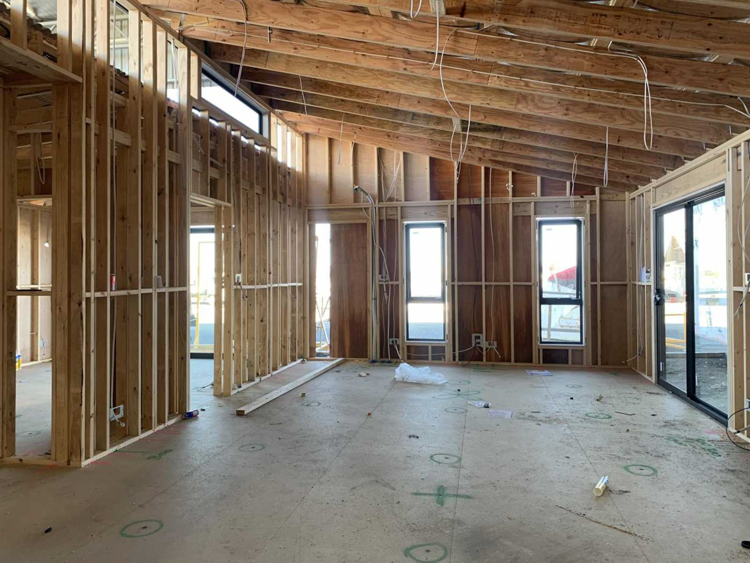
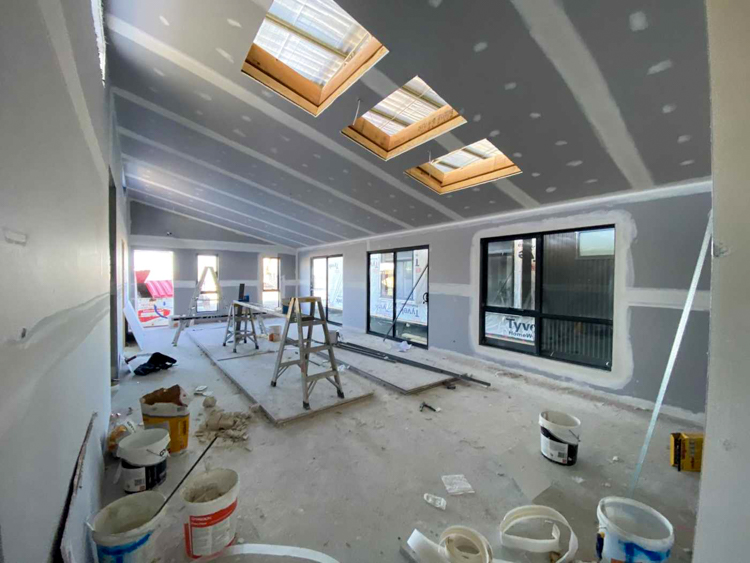
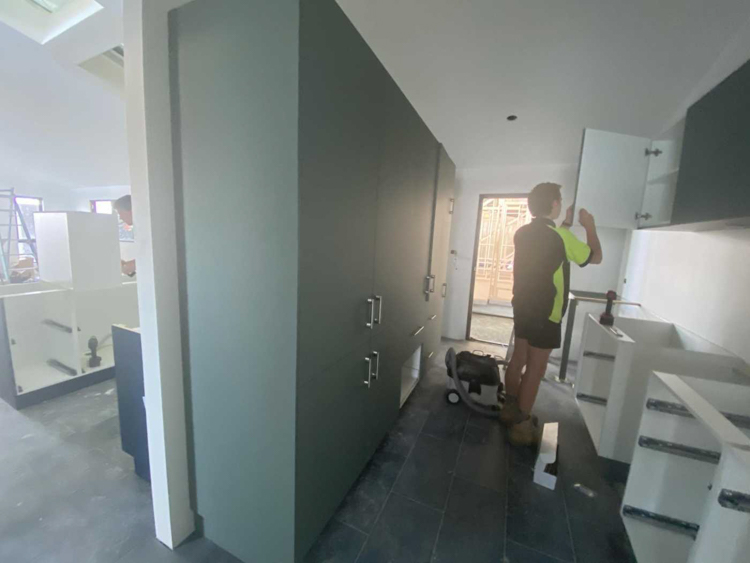
A week later, they’d made a start on the roof and cladding, and made good progress on the dry-walling.
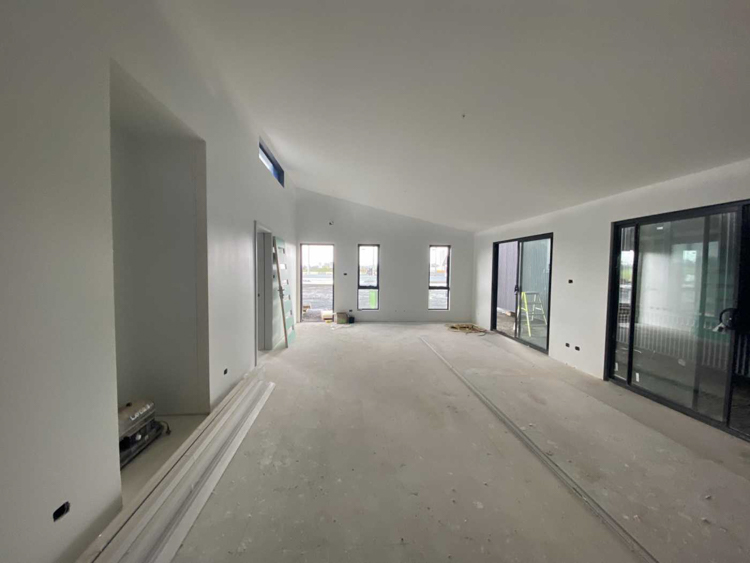
Dry-walling in the living wing. It looks nice and bright! (Oct 17)
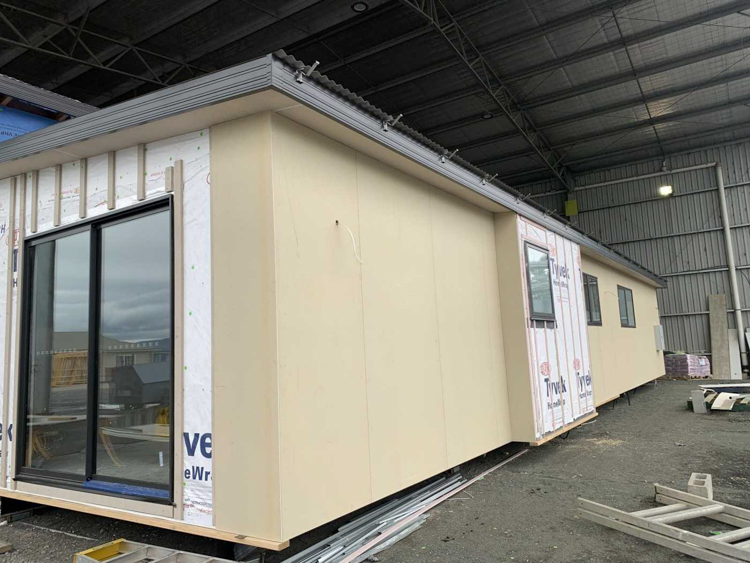
Cladding and roof detail on the back of the service wing (Oct 17)
Ensuite and walk-in wardrobe from the master bedroom
Now that the builders have started, it seems that nothing can stop them. The house is due to be completed and moved to our property (on two low-loaders in the middle of the night) in a fortnight’s time. Before it arrives, the foundation posts need to be in place. These are scheduled to go in next Wednesday… and we’re still waiting for the Permit to Build.
In the Australian building industry, there is a key milestone where a project is deemed to be “Substantially Commenced”. This phrase occurs throughout the legal, contractual, and financial documentation, as well as in both Federal and local government policies. The term is, however, not explicitly defined, neither as a legal term nor in any building code.
In most jurisdictions, in the context of private housing, it is deemed to be the date at which the foundations have been laid. For most projects, which are built in situ from the ground up, it is the first time that the builder breaks ground and does something physical. In our case, because the house is being built off-site, the building was in fact almost complete before it had been “Substantially Commenced”.
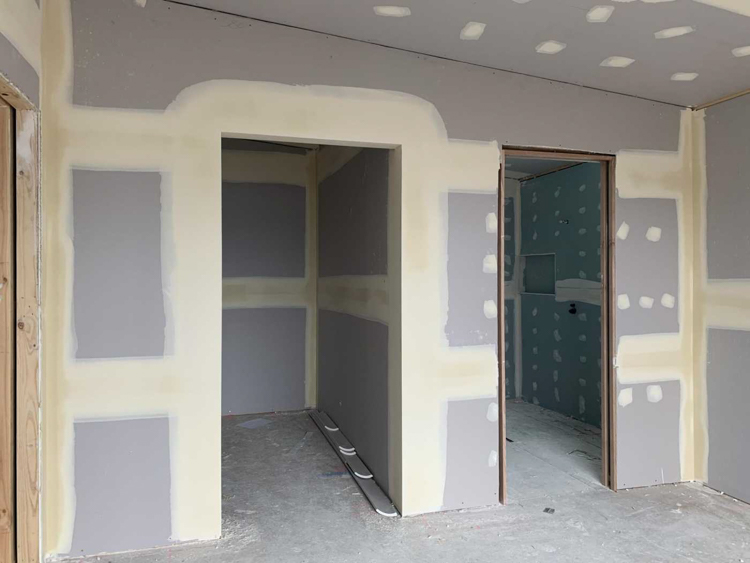
The living wing, with all of the edges now square-set (Oct 24)
The under-floor heating is in, now for the tiles in the bathroom (Oct 28)
Our “Substantially Commenced” date was Wednesday 28th October. On that day, our concrete piers had to have been installed on the land, otherwise we’d miss a load of contractual and financial milestones and generate a whole heap of extra paperwork and expense.
By Wednesday of the week before, we still didn’t have our Permit to Build. On Thursday, the entire planning department took a day off. On Friday, the planning department were back at work, but the only person authorised to sign our Permit to Build, had gone on holiday. On Monday, despite continual prodding by our builders, we heard no more from the department. On Tuesday, our builders sent a work crew for a site check, and discovered that the builders of the properties on either side of us have been using our property as a work site and dumping ground.
Get off my land! This hard-core and mixer belong to other builders.
One of the clauses in our contract with the builder was that the site must be completely empty before they start work. We contacted the builders on either side, who both admitted liability, and promised to move their stuff immediately.
Late on Tuesday afternoon, only hours before the deadline, we received our Permit to Build.
On Wednesday, the work crew arrived on the property to put in the foundations, and found that (of course), neither of the neighbouring builders had done anything about their junk on our land. Thankfully, one of the crew took it upon themselves to push everything over the boundaries.
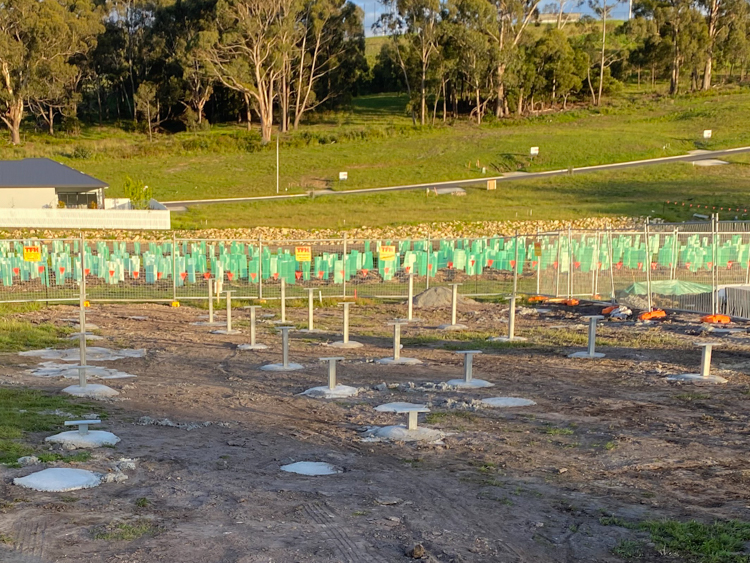
Because our project is a post-and-pier construction, which does not involve any excavation or poured concrete, the actual work of building the foundations went very quickly indeed.
A lot more than just the house is resting on these little posts!
Our foundations are now officially down, and we are Substantially Commenced!
With the foundation posts installed last week, the builders have been working swiftly at the factory to finish the interior of the house. They only had a week to finish up before moving the house 200 km overnight across Tasmania from Westbury, near Launceston, to its final resting place in Kingston, near Hobart.
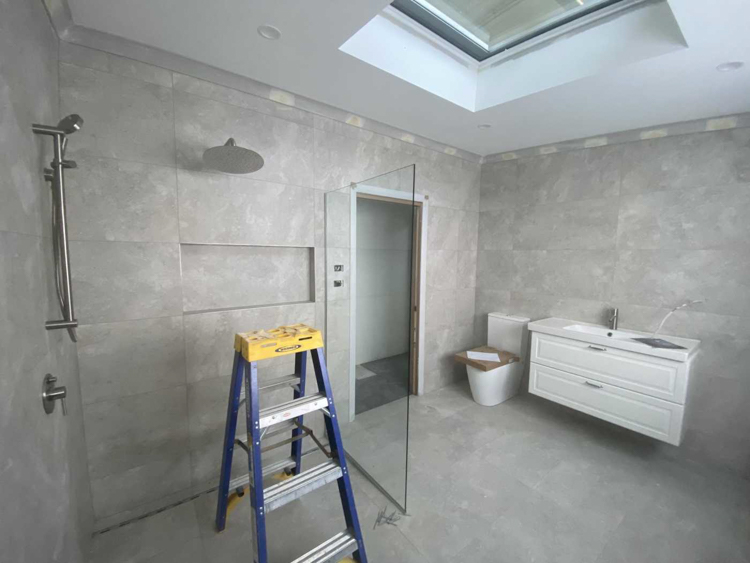
Yesterday, the tilers finished up the bathrooms, installed the vanities and hooked up the plumbing.
The main bathroom is looking pretty good!
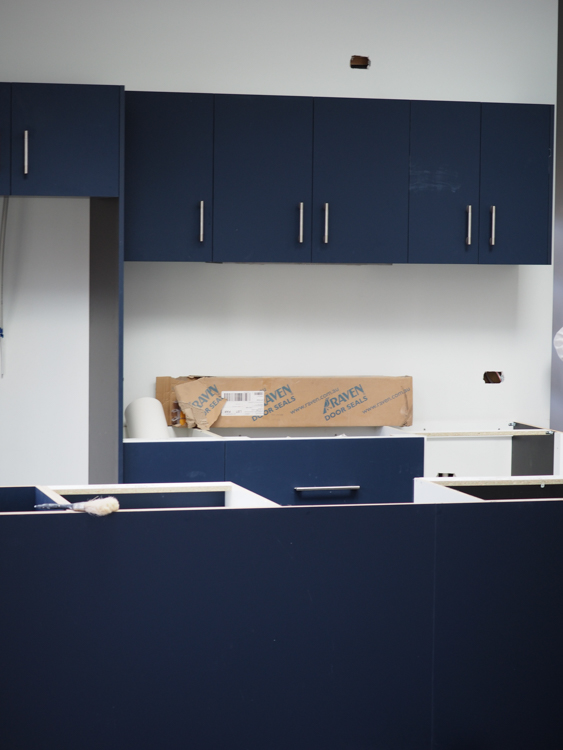
Meanwhile, the cabinet makers assembled the joinery and plumbing in the kitchen and pantry.
The green cabinets are in the pantry, you can see the blue kitchen cabinets around the corner.
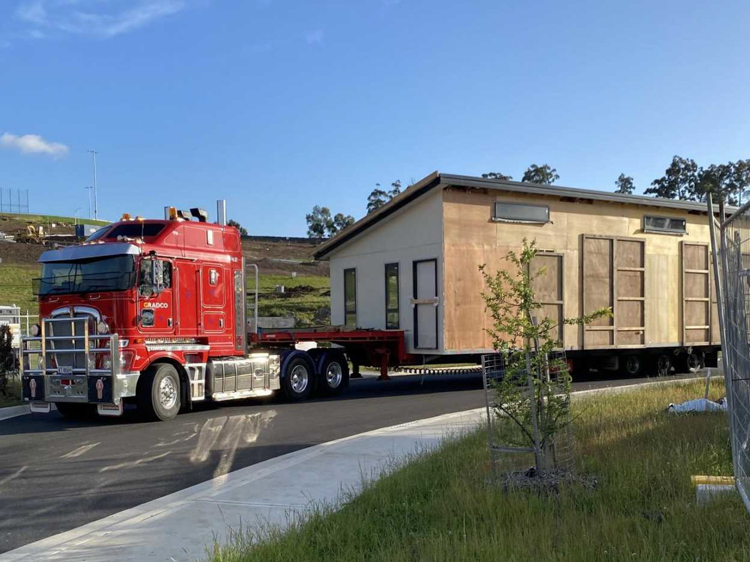
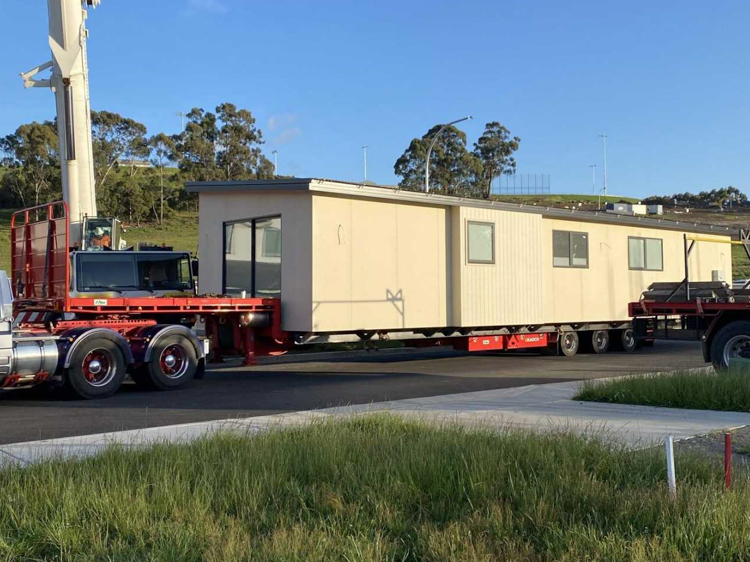
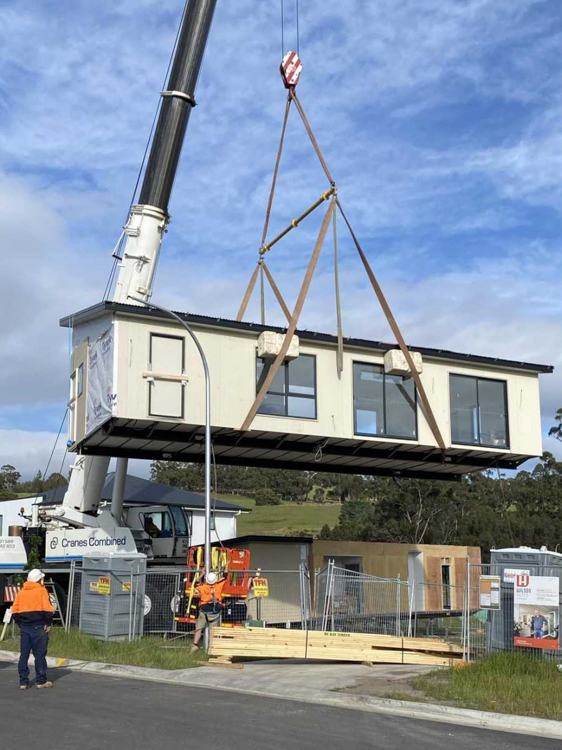
The two wings of the house were then separated and lifted onto two low-loaders, which trundled through the night, through the centre of Hobart in the small wee hours, until they reached our plot in Kingston in the early morning.
The living wing arrives, protected from the elements by wooden blanksThe service wing arrives, not quite as wide but very long!
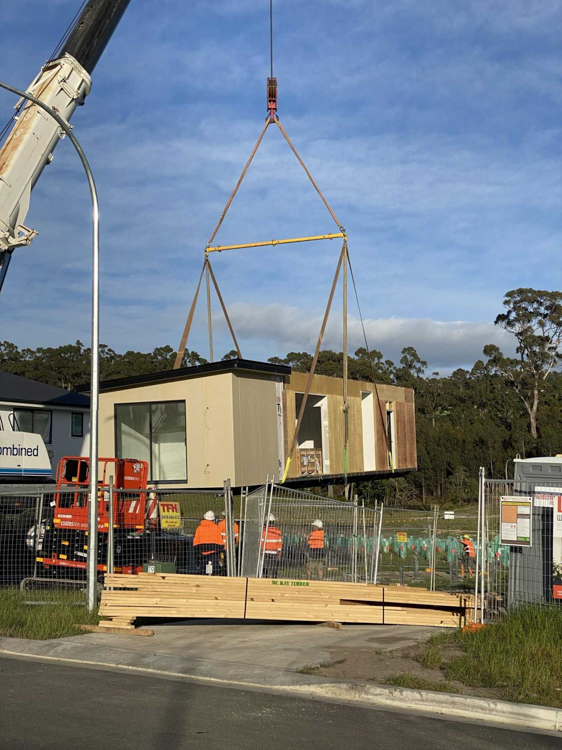
Now it was just a matter of lifting the two wings onto the pre-prepared pilings…
24 Rodway Court has landed!
You can see from the photo that the front of the house isn’t fully clad. This is because there will be a connecting garage in front, but since that will be on a slab, and needs a driveway and crosswalk, it couldn’t be manufactured off site. We believe that this will be built next.
The water and sewage are already in place, and today we spoke to the electrical company about our new account. After that we just need to install the solar heating, the wood stove, the wooden flooring, the raised decks and stairs…
Our new house in Kingston is almost finished, but – because of pandemic restrictions to cross-border travel – we had still seen neither the house nor the land that it sits on. The whole project had thus far been conducted entirely over the internet.
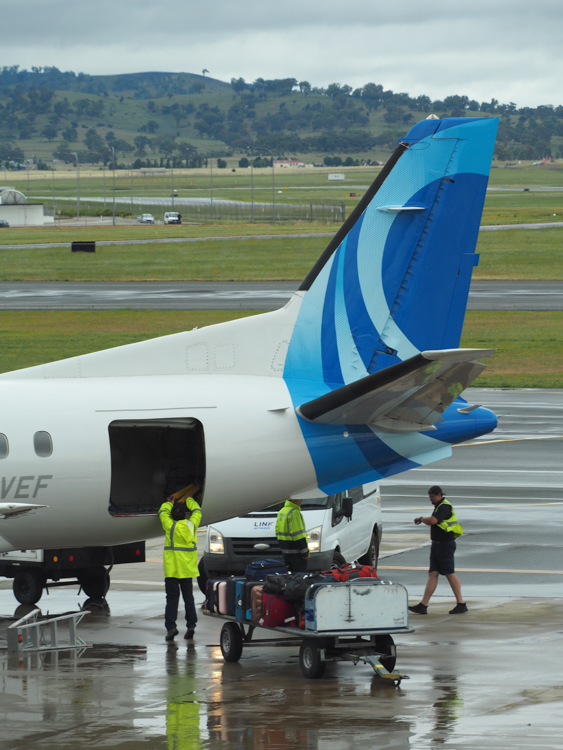
The border between ACT and TAS opened in mid-November, and Link Airways laid on an unusual direct service from Canberra to Hobart, so we took the opportunity to fly down and – for the first time – see our project in the flesh.
There was a short delay at Canberra Airport when the ground crew realised that the HF aerial had snapped from the top of the fuselage and was wrapped around the tail fin (you can just about see it at the top of the photo below), but in the end we boarded anyway. I chatted briefly to the captain on the way up the stairs, and he quipped “We don’t use HF anyway”.
Spot the missing antennaMasks to be worn aboard
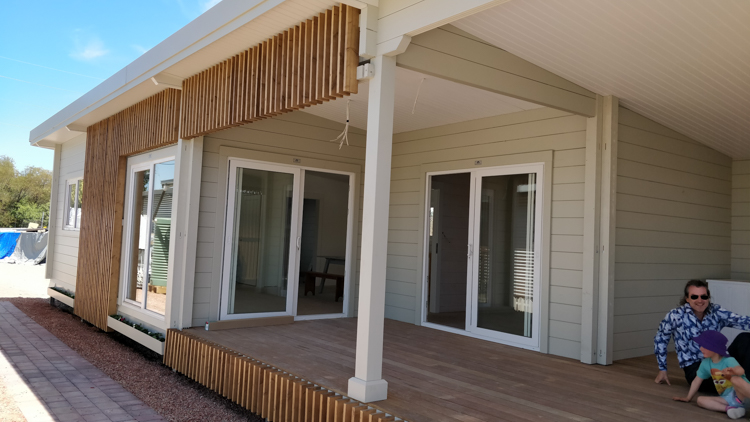
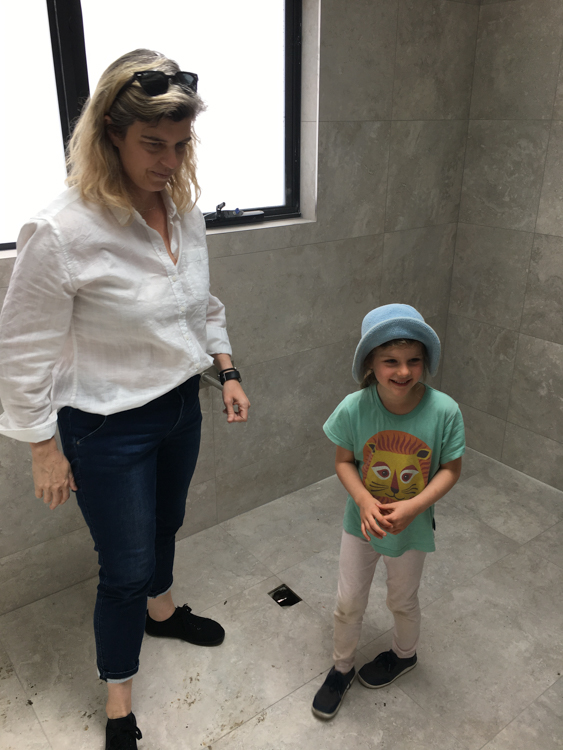
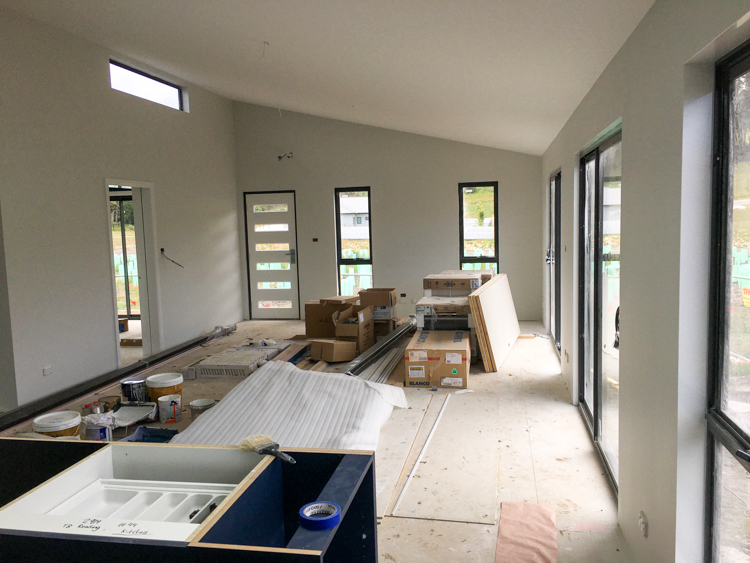
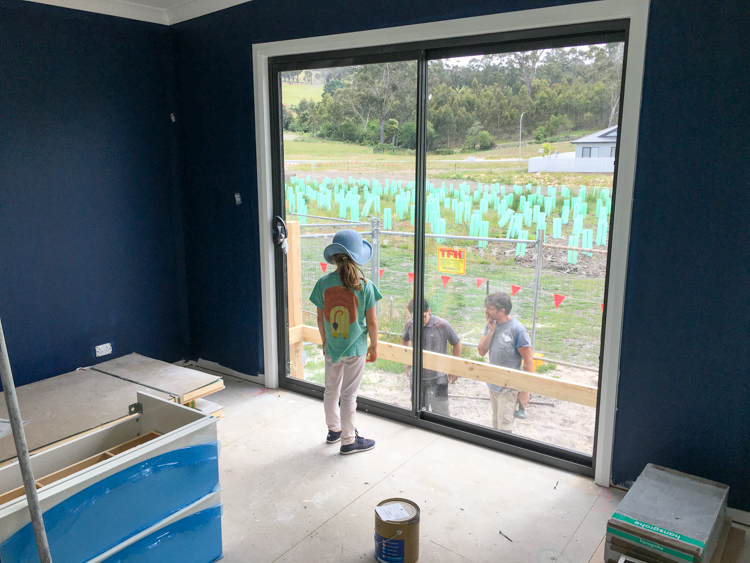
Although the builders had been good at posting progress photos on the internet, we’d never seen any of it for real, so it was with some trepidation that we approached the building site for the first time.
We were relieved to find that it all looked exactly as we expected.
The bathroom tiling is looking goodThe butler’s pantry is coming alongThe main living area, viewed from the kitchenThe kitchen cabinets almost installedInside the fireplaceBerrima in the master bedroom, watching the carpenters start work on the back deck
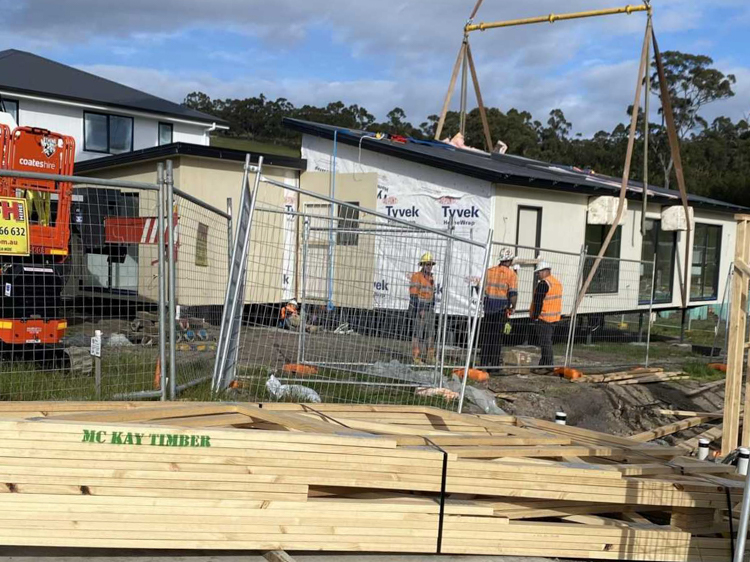
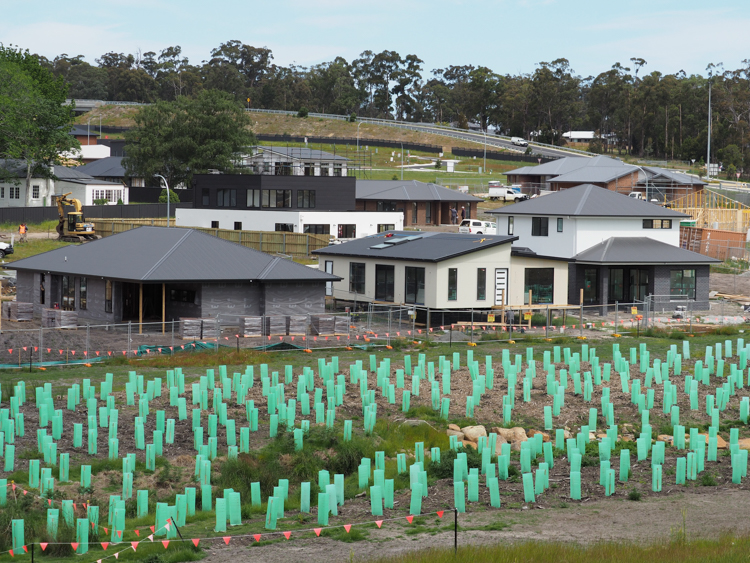
This visit also gave us a welcome opportunity to look at the surrounding area. The last time we’d seen pictures of the plot was from our bush-fire assessment, when there was nothing there but empty grass. Today, what a different picture!
The fledgling streets are crammed with tradesmen’s vehicles, skips, back-hoes, pile of earth, stacks of temporary fencing. The houses are springing up like mushrooms along the edge of the creek, which has been planted with native shrubs in plastic tubes.
Our house (unpainted, centre), nestled between our new next-door neighbours
The neighbouring buildings are quite close, so we are glad that we are in a quiet cul-de-sac to the front, with creek and shrubbery to the rear. It will be interesting to meet our new neighbours; from the state of their buildings, it looks like we’ll all be taking up residence together, early in the New Year.
If, Gentle Surfer, you have been following our blog from the beginning, then you will be wondering what happened to our off-grid house in the forest.
Once the COVID-19 pandemic shut down all the State borders, it played merry hell with our logistics and we had to temporarily abandon our plans. I had paid off the landscaping and road-building contractors without ever seeing how far they had got with their work. This was my first opportunity in almost a year to see what the site looks like today.
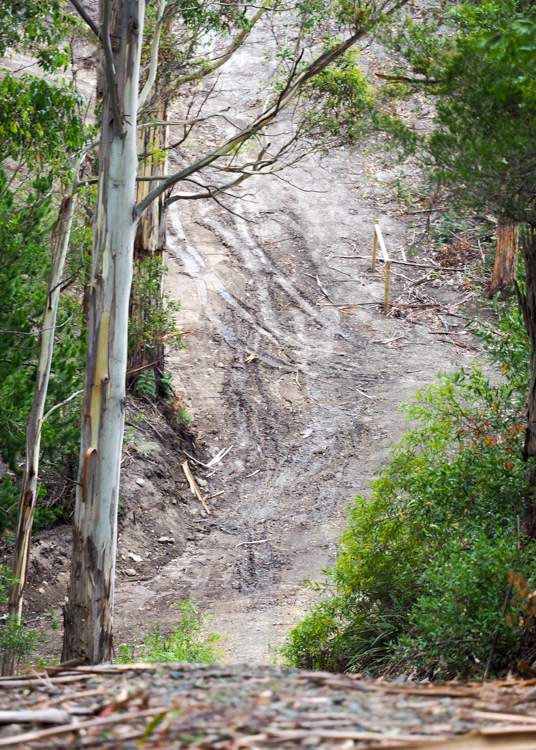
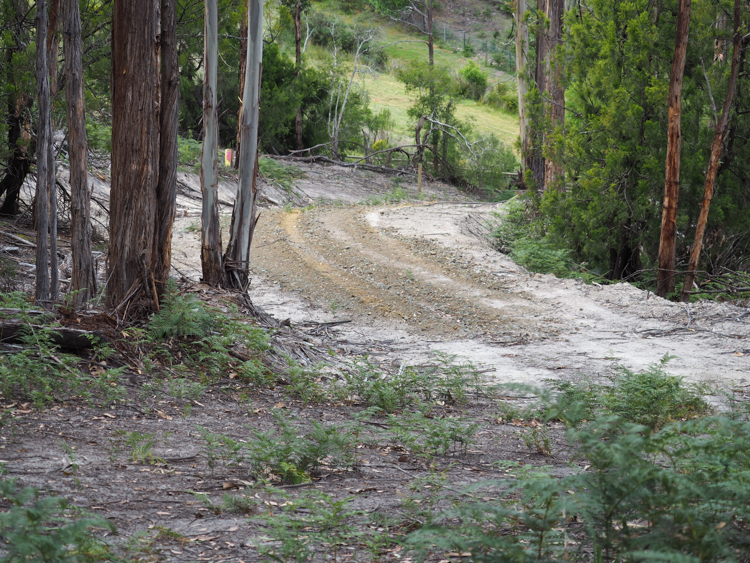
My first priority was the state of the new road into our property. I had arranged, over the phone, for dozens of tonnes of rock to be spread up the lower reaches of the road after it had been levelled, but had no real idea how far the contractors had got or what it was going to look like.
In the event, too much loose rock had been laid over the load that had previously been compacted, making it hard going even for our rented 4WD, and the top part of the road had no aggregate at all, and was starting to grow ferns.
Evidently I’ve got a bit of work to do on the road, over the Summer!
Lower slopes good……upper slopes bad
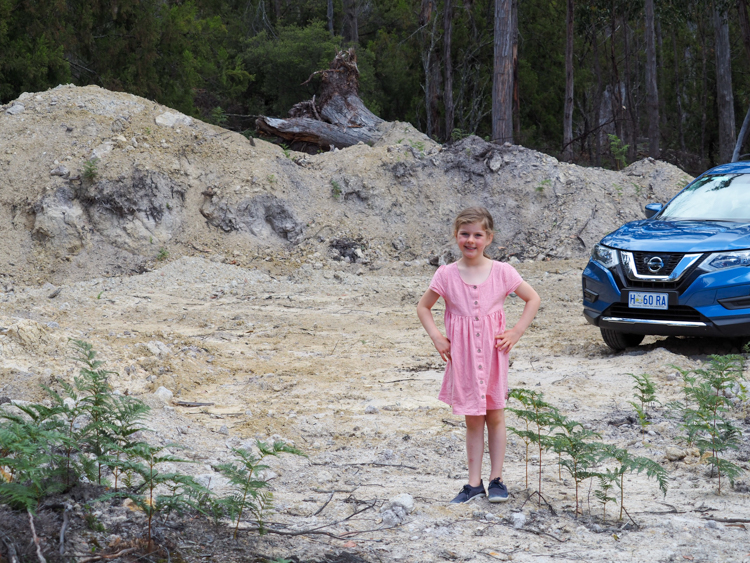
My second priority was to see just how much levelling had been achieved on the actual building site. The contractor had been working on a cut in which we were to build our 6×12 metre shed-cum-solar-farm, and all I knew was that he had made some progress and then had had to stop when the track motor burned out on his digger, for which he was unable to source spare parts due to lockdown in China.
Now that we’ve shifted our primary residence to our other project, we don’t need so many solar panels in the forest and thus such a big shed, but I wanted to know how much levelling had already been done and whether we could build a smaller structure there. At the very least, perhaps we’d have somewhere flat to camp when we visit…
In the event, Dan had done most of the digging-out and about a third of the levelling. It’s not ideal, but is a good start to work with once we finally get down there.
Probably big enough to put a tent on
As for the building site itself, well, it’s still liberally scattered with the timber that I felled on my last visit, now nicely overgrown with ferns. My immediate plan is to clear the timber, split it into firewood, build a solar irrigation system, and plant vegetables.
One day, we’ll still build a house here
Once the current house build project has finished and we’ve settled in to our new home, the forest will be waiting just down the road. We certainly haven’t given up on that project and have already started thinking ahead and making plans.
As they used to say in the newspaper trade, watch this space!
It all started out so simply. Since we had been forced to put our plans for an off-grid house in the forest on the back burner, and had quickly built a different house on an urban block nearby, we were left with 14 acres of woodland which would provide us with an endless supply of firewood and the odd camping weekend, and… what else?
I could grow vegetables. And perhaps honey. Maybe ducks.
But let’s start with vegetables.
I decided that my preference would be to work in 10m x 5m plots. I find that area easy to handle with manual tools and, let’s face it, the dimensions make the math easy. Having several identically-sized autonomous blocks, rather than a rambling smallholding, also means that if disaster (irrigation failure, possum attack) visits one block then I haven’t lost everything.
The land slopes at around 8-10 degrees, so I needed to choose my sites carefully if I was to avoid repeatedly staggering up and down from the tool shed. Given that our access road leads only to our putative building site, and that the site itself is still largely covered in freshly felled trees, my options were somewhat limited. In the end I chose a slightly undersized area close to the tool shed, near to a line of native cherry and sedge which appear to define an underground seep.
The soil
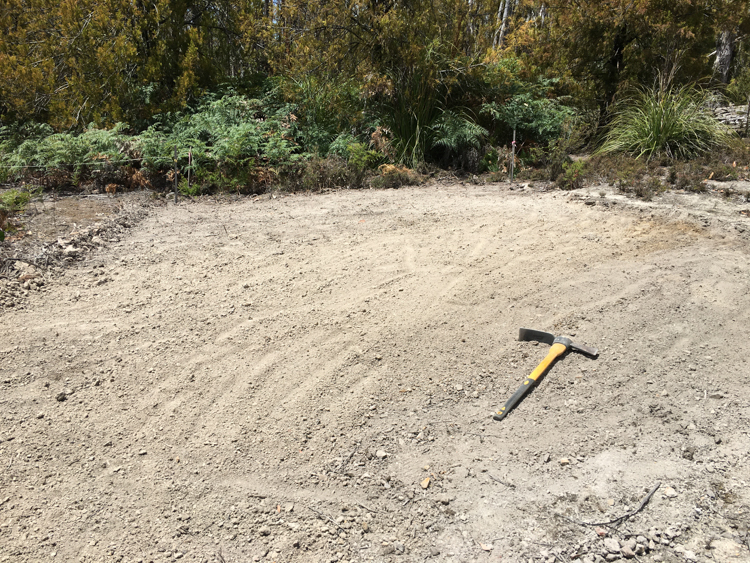
I unlimbered the trusty mattock, and set to work.
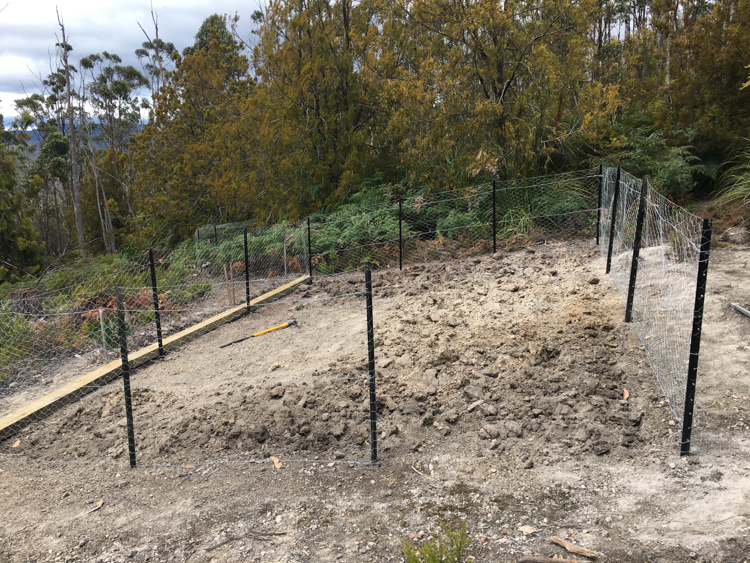
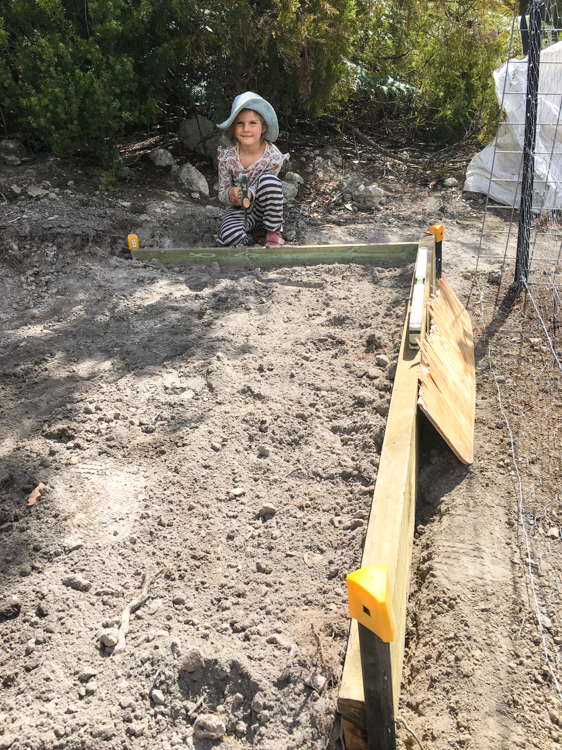
With the area cleared of Common Heath, ferns and debris, I set up a 1.8m fence to keep out the wallabies and possums, and dug over to about 10cm. The soil is sandy clay, and pretty easy to manage.
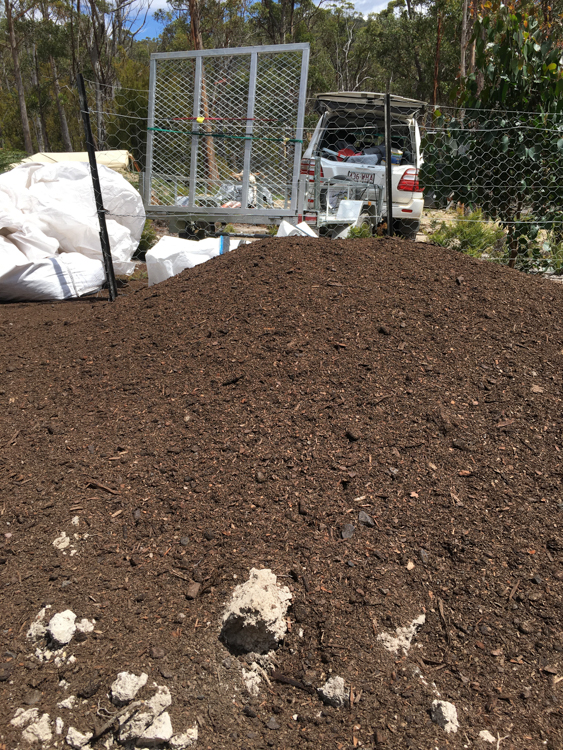
The soil may be easy to work, but it is very poor quality. After some manoeuvring, a helpful fork-lift driver at Horticultural and Landscape Supplies north of Hobart managed to drop a cube-and-a-half bale of SeaGreens kelp compost onto my trailer. I somewhat gingerly towed it to Lymington, and got it up the track.
It took a little while to shovel it out and dig it in, but the plot started to look pretty good.
It was the height of Summer, and the ground was bone-dry. No matter how good my compost, no seeds were going to sprout in these conditions. It was time to install some irrigation.
The irrigation tank
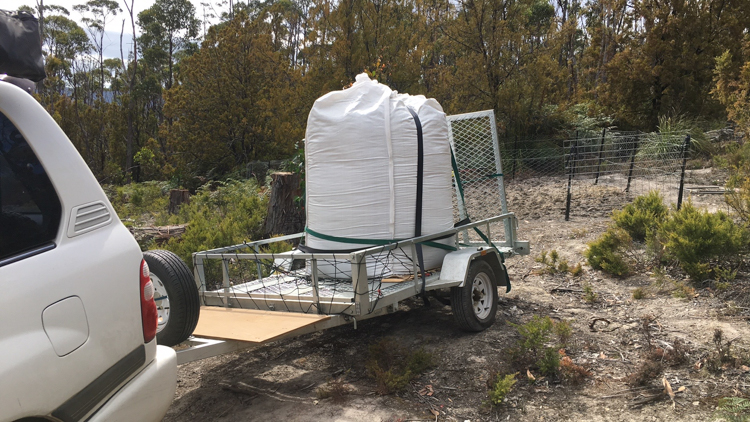
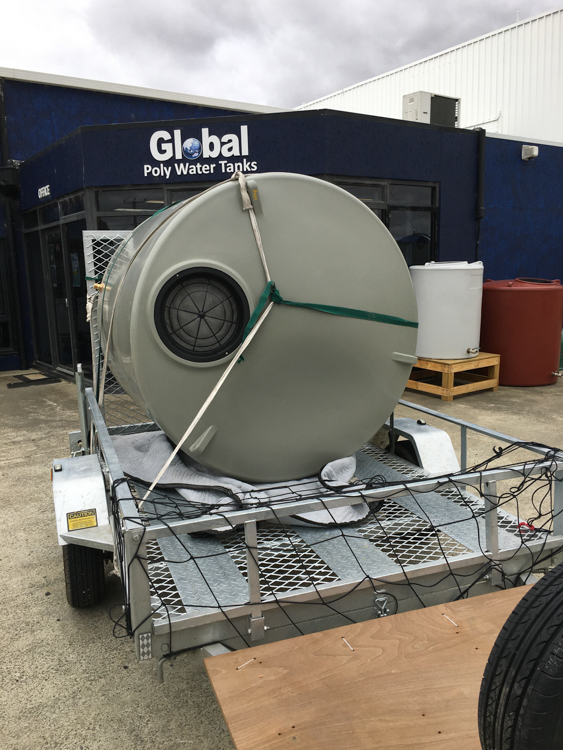
I reckoned that a 2000 litre rainwater tank was probably the biggest I could handle by myself, and should be equal to the needs of my vegetable patch (but read on!).
There are many suppliers of rainwater tanks in Australia, most of whom operate on a just-in-time build-and-deliver business model, which didn’t suit me because access to the property is still problematic, particularly for delivery trucks. However, I happened to be out at Global Poly investigating pumps and cartage when they mentioned that they almost always keep some spare 2000s on the forecourt. I put one on the trailer and took it home.
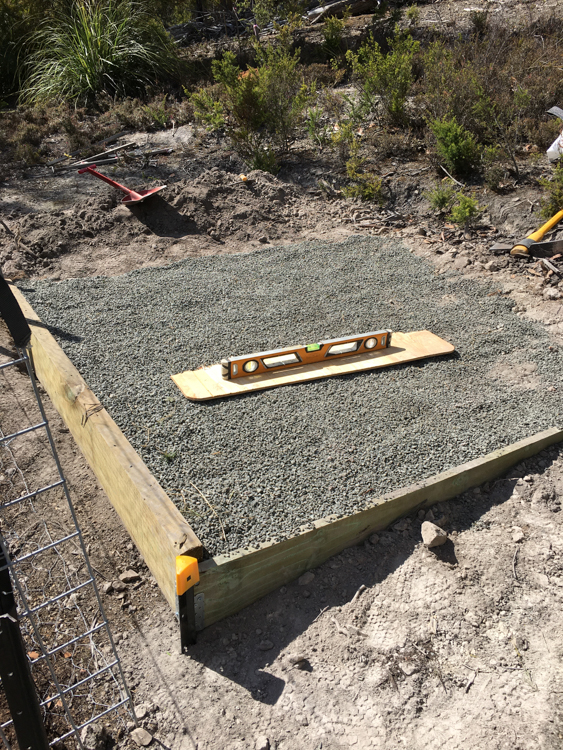
The builders at our new house in Kingston had finished work, and had left behind a pile of surplus blue-stone from their installation of our household rainwater tanks. Berrima and I shovelled about a tonne into a bulk bag on the trailer, towed it to the forest, and spent a happy afternoon crafting a tank stand.
Now I needed a way to fill up the tank. In the future, I have grand plans to fill all my irrigation tanks from the roof run-off of an oversized shed, but that project is still just a twinkle in my eye. In the meantime, I needed to sort out cartage. There are a number of local water cartage firms who will bring a tanker to your property, but again I was concerned about access for heavy commercial vehicles, so I decided to create my own cartage system.
Water cartage
Originally I looked around for a second-hand Intermediate Bulk Container (IBC). These metal-bound plastic tanks are designed to be handled by a fork-lift and are used all over the world to deliver all kinds of liquid products. They fit neatly onto a trailer or in the back of a ute. It’s usually possible to pick up a food-grade IBC at a reasonable cost, but with COVID playing havoc with the logistics, this was not a good time to try to find one in Tasmania.
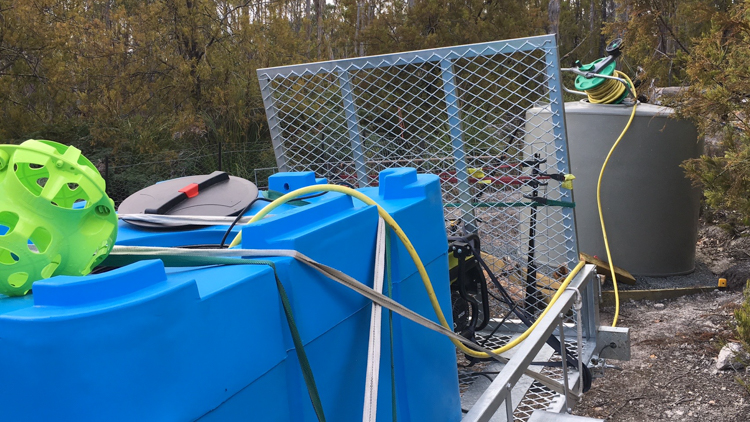
Once again, Global Poly came to my rescue. They sell compact ‘Fire Cubes’, designed to be used in conjunction with a generator and a pump in fire-fighting from the back of a ute. At 900 litres, a full tank would exceed the carrying capacity of my trailer, so it would take three partial loads to completely fill up my irrigation tank, which seemed acceptable.
Have tank, will travel
I already had a spare generator that I’d bought for the convenience of the tradesmen working on our Kingston house, and a simple Chinese pump only set me back a hundred dollars or so from my friends at Global Poly, so I was good to go. I pumped water into the cube from my house rainwater tanks, drove to the property, and pumped it back out. And repeat.
Pumping rainwater from the trailer into the irrigation tank
Drip Irrigation
I had previously set up small household drip and spray systems running through timers under mains pressure, but I had no real idea how to set up a gravity-fed system on this scale. My gut feel was that, unless I wanted to mess around with tall tank stands, I would need an electric pump to run the system, but I was open to the suggestion of letting it flow out under gravity. There’s a great deal of conflicting and often quite complex advice on the internet, and I wasn’t able to make a firm decision. I did notice that Hobart company Hollander Imports received a lot of local praise. They don’t have a proper web presence, only a Facebook page, so I drove into Hobart and ambled into their office, hoping for some advice.
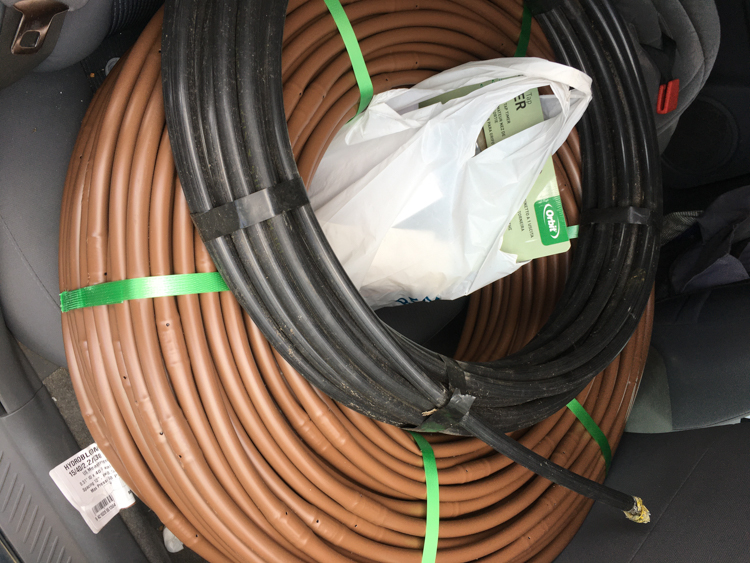
The gentleman behind the desk listened carefully as I described the size of the tank, the size of the plot, and the slope of the land, and then pronounced the site ideal for a gravity feed system. He loaded me up with coils of piping, constant-pressure drip line, and handfuls of taps, joins and clips. He reckoned that the constant-pressure line would compensate for the change in pressure as the tank emptied, and would provide an even supply of water. He also recommended that I didn’t bother with all the fancy delivery-and-collector patterns published on the internet, but just to run both my plants and my drip lines downhill from a horizontal feed pipe.
Constant feed drip line (brown), irrigation piping (black) and a bag full of parts
The plot is 40 minutes from my house, so I needed a way of automatically turning it on and off as I didn’t want it dripping 24 hours a day (I had nowhere enough water for that!). Hollander Imports sold me a battery-powered mechanical timer, which controlled a simple flow gate.
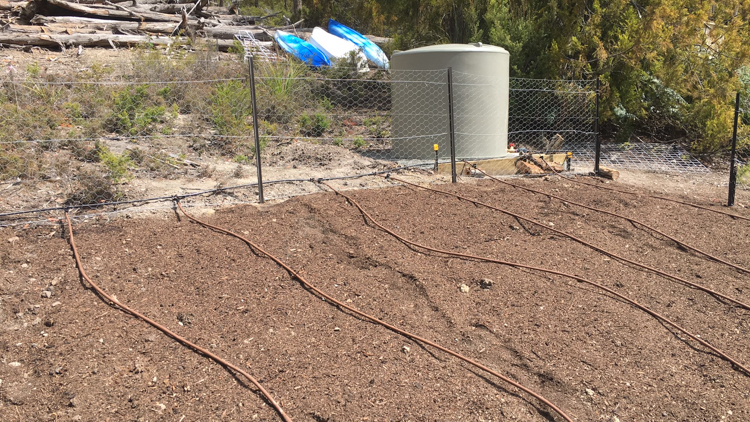
I took all of it up to the land and, leaving the timer aside for the moment, connected the plumbing components together in their approximate final configuration. I manually opened the tap on the irrigation tank, and it all worked perfectly.
Approximate set-up for testing
I unplugged the piping from the tank valve, and inserted the timer into the line. It toggled on and off correctly according to its program, but even when “on”, it drastically reduced the flow to a rather pathetic dribble. This needed some more investigation.
The secret is in the timing
There was clearly something not quite right with my choice of timer. Eventually, deep in some technical specifications that I found online, I discovered that the physical valve in the unit requires a minimum head pressure in order to fully open. I scribbled some numbers on the back of an envelope, and clearly the gravity system wasn’t ever going to deliver enough of a head; unless I wanted to raise my 2000 litre tank several metres above the plot, this particular unit required mains pressure to ensure that the valve opened fully.
I did some scouting around, and found a timer that – according not only to the wording on the box, but also to the detailed technical specifications – was designed specifically for gravity-feed drip-lines, which as a bonus allowed the electronic operation of up to four separate gates. I bought one, with a single gate, and set it up.
Timer with integrated valveTimer with separate gate valve
Unfortunately, this new valve didn’t perform much better than the first one. Despite its advertised capabilities, it too needed a minimum head pressure if the valve was to fully open.
I went back to my original gut feel; I would need a pumped system.
Oh boy, the internet is full of advice about irrigation pumps.
Eventually, though, I found some bloggers who had set up similar small systems, and the general consensus was that you could get good results by using an inexpensive pump from an ornamental garden fountain. These pumps have the double advantage that they operate on a pressure that is low enough not to overload the drip fittings, and they are cheap to replace if they go wrong.
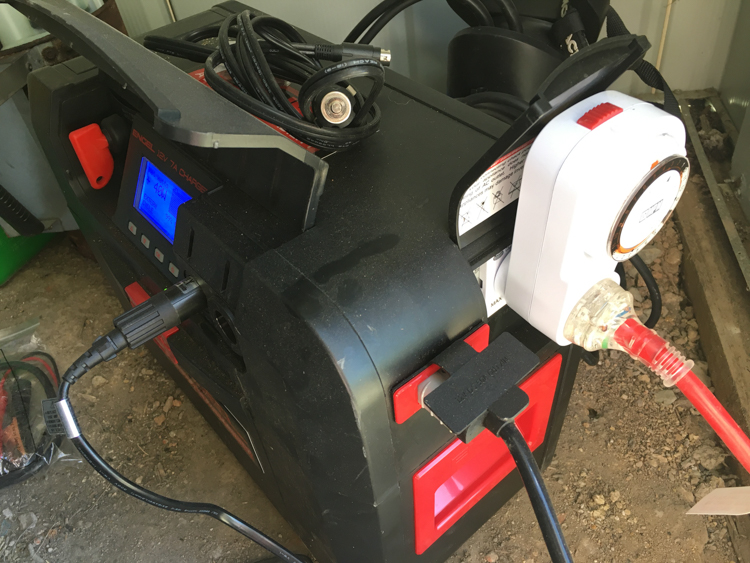
Of course, these pumps need electricity. I got out a couple of solar panels and a battery box which I use to run my Engel fridge while four-wheel-driving and camping. I set this up in my shed, and bought a simple mechanical timer to control the pump.
I turned it on, and the water flowed gently out of the drip feeder. I set it up to run for half an hour, morning and night, calculating that this would use 1000 litres a week, or a fortnight for the full tank. Contented, I drove home.
Where has all my water gone?
A couple of days later, I returned. The soil had clearly been watered, but the tank was empty. That was nearly a thousand litres in two days. Puzzled, I refilled the tank, re-did the math (same answer), and turned down the flow on the pump.
Despite this glitch, the system appeared to be working in the sense that it was wetting the ground, and time was ticking on and I didn’t want to miss the Autumn planting season. It wasn’t perfect, but I needed to plant some seeds.
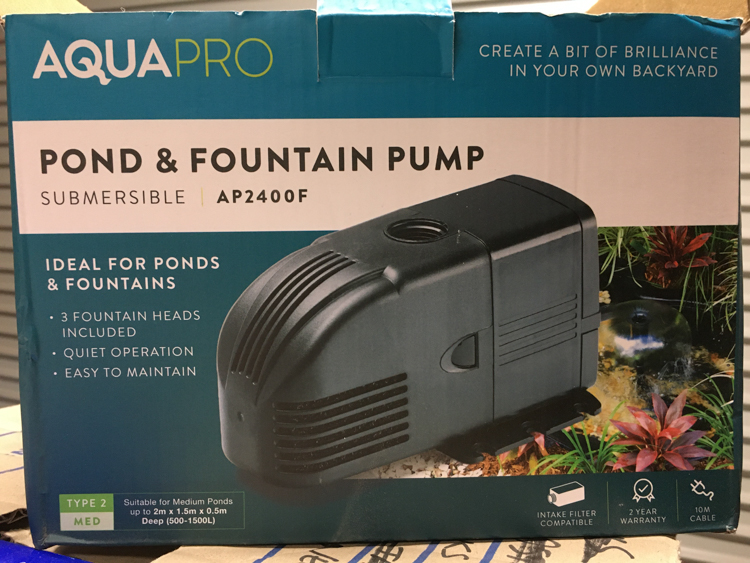
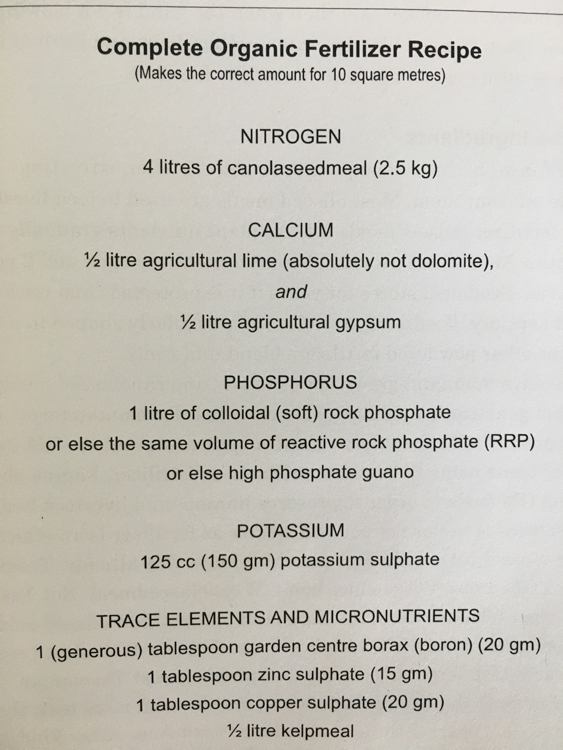
Tasmanian soil is fairly consistent across the State, and has a mineral profile that lacks certain essential ingredients for vegetable gardening. I had found an organic fertiliser recipe in the excellent book ‘Tasmanian Food Gardening’ by Steve Solomon, and had for some time been tracking down the ingredients from local suppliers.
I mixed up enough for ten square metres, sprinkled it around, and planted the seeds of some winter vegetables. Apart from the niggle of the water usage, everything seemed to be going smoothly.
A few days later I returned, and the tank was once again empty. I had other things to take care of, but the seeds were sprouting and we were in the middle of a drought, so for the next few weeks I was taking every spare moment to drive back and forth, towing thousands of litres of water and pumping them into the ravening maw of my irrigation system.
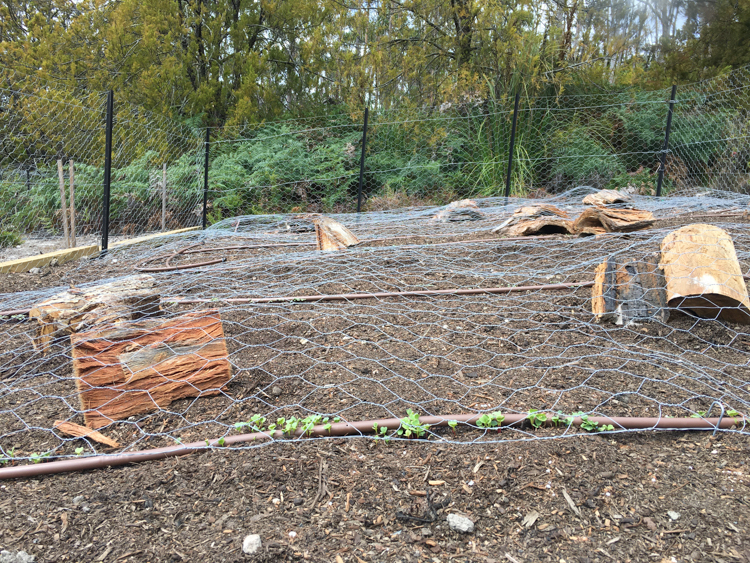
The seeds are sprouting, under the bird wire
At last, after several weeks of this craziness, I was able to put aside a whole day to sit quietly without the distractions of work, of house-building, of firewood, or of small children, and to turn the system on and off and to observe it carefully.
Firstly, the mechanical timer was not keeping time at all. During the past fortnight I had noticed that it would be running anything from one to twelve hours behind (or possibly ahead, who knew?). I had it set to switch the pump on for 30 minutes, twice a day, but if the timer wasn’t reliable, how long was it really pumping for?
I took the timer out of the system, and, sitting quietly in the sunshine, began switching the pump on and off manually. Because it’s a low-pressure drip system, it isn’t immediately obvious from the business end whether it’s on or off. Once the pump stops, the pipes spend an appreciable time slowly draining, and you have to watch the drip nodes very closely to see if any water is coming out, especially as – without pump pressure – only the nodes on the underside, hidden against the soil, are working.
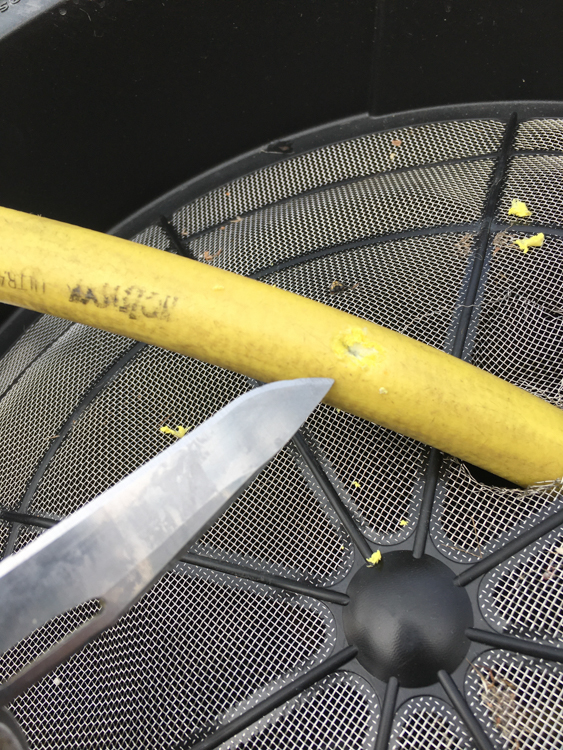
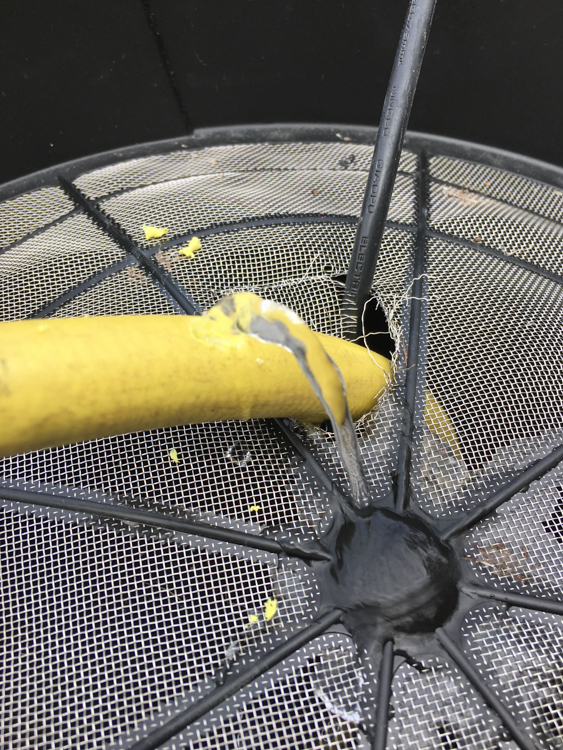
Time and patience eventually won out, and I proved to my satisfaction that, once the pump switched off, the pipe continued to siphon slowly throughout the day, quietly draining the tank until it was empty. There was a satisfying magical moment when I turned the pump off and stabbed an air-hole at the highest point of the hose. The system aspirated loudly, and the flow stopped.
When the pump is on, it now spurts a little fountain out of the cut hose, but the water returns to the tank, the pump and drip line compensate for the pressure loss, and the fountain makes a pleasant tinkling sound that tells me when the irrigation is on.
Remember the problem with the mechanical timer? I replaced it with a digital timer, which keeps perfect time. Later, I tried the mechanical timer at home, on mains power, and it ran perfectly; there must be something about running it on the inverter of the battery box that confuses it.
Catching the rain for irrigation
One day, we’ll build a shed with a large roof which will capture tens of thousands of litres, which will solve all our water supply problems. Right now, though, we have other priorities, but I was not unaware of the craziness of towing thousands of litres across country with a big V8 several times a week.
Our builders in Kingston had ordered a batch of incorrectly coloured roofing panels, which were sitting in the garden of our house, awaiting disposal. I put them in the trailer, added a stack of cheap construction timber and some guttering, and built myself a rain-catcher. It won’t really collect a lot of rain in the dry season, but – bearing in mind that the irrigation system is agnostic to the weather, and pumps rain or shine – it keeps the tank topped up in the wet.
Yes, it would be possible to add a rain sensor. It’s on my ‘nice to have’ list.